


Print Profile(1)

Description
I needed a simple way to join two 3D-printed parts together, so I designed this DIY snap-fit connection system that anyone could implement into their models to create a secure connection between them.
Included in this project are:
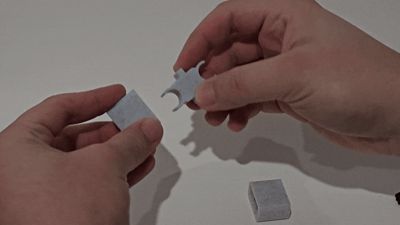
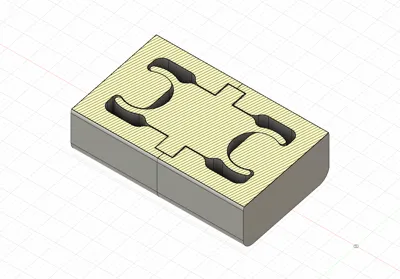
- Body Remover STL – This part is used to subtract from another model, creating the receiving end of the snap fit.
- The tight version has significantly reduced tolerances to the top and bottom, it will be hard to get out once it's in.
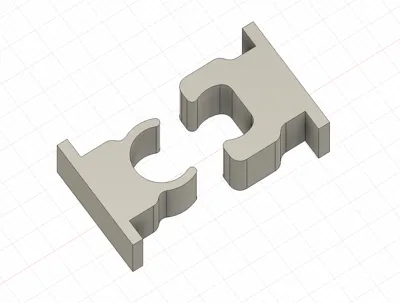
- Clip STL – Attach this to any model to create the snapping piece that fits securely into the socket.
- Test Body STL - a rectangle that was hollowed out using the body remover tool to test tolerances and fitment.
Simple steps to implement into your project:
- Import the “Body Remover” STL into your project.
- Position it where you want the snap-fit socket on your model.
- Subtract it from your model to create the connection slot.
- Attach the “Clip” STL to the second part you want to connect.
- Print both parts and test the fit.
- Adjust tolerances if needed for your material or printer settings.
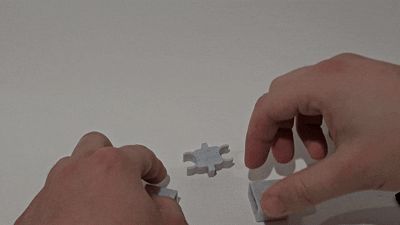
The system was tested with PLA and designed to be tight and secure. Pulling the pieces apart requires some force, which was intentional. In fact, the test clip and socket turned into a fun little fidget toy thanks to the satisfying “click” they make.
I've included the test body and clip STL files so you can experiment with tolerances before integrating the parts into your own designs. The tolerances are balanced to ensure a snug fit without binding, but you can easily tweak them to suit your specific needs.
If you do use this tool, please put some photos below as I would love to see how it was implemented!
Boost Me (for free)
Encourage me to keep uploading the models I make :)
License
You shall not share, sub-license, sell, rent, host, transfer, or distribute in any way the digital or 3D printed versions of this object, nor any other derivative work of this object in its digital or physical format (including - but not limited to - remixes of this object, and hosting on other digital platforms). The objects may not be used without permission in any way whatsoever in which you charge money, or collect fees.
Comment & Rating (11)