Xtool Ra2 Pro Modular Clamping System/Jaws/Rotary


Print Profile(5)


Description
Boost Me (for free)
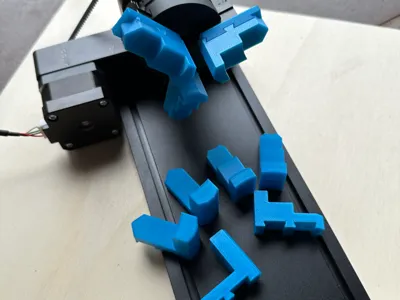
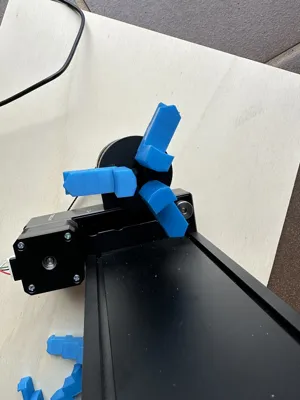
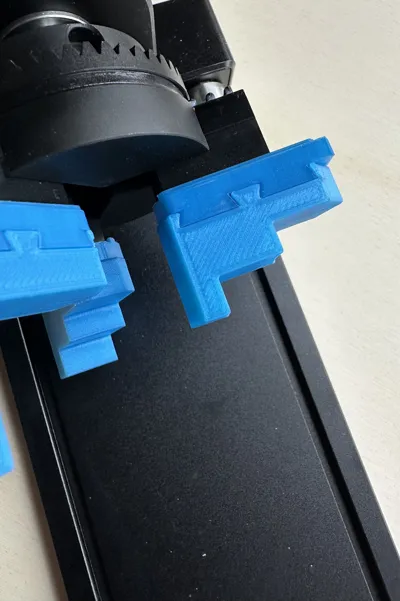
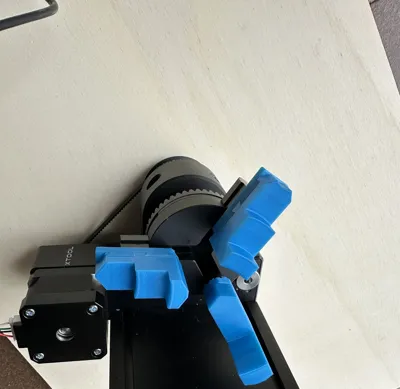
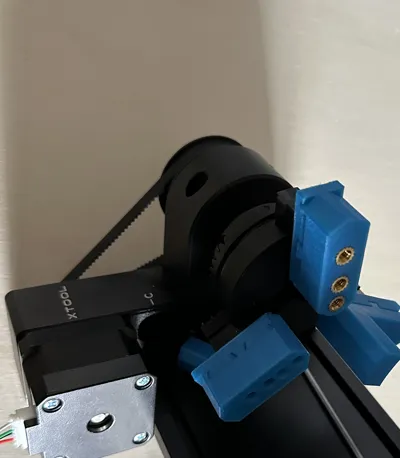
🛠️ Modular Jaws for xTool RA2 Pro – Dovetail Jaws 🛠️
This 3D-printed jaw set was specifically designed for the xTool RA2 Pro Rotary and offers a versatile and customizable solution for fixing workpieces during engraving and laser processing
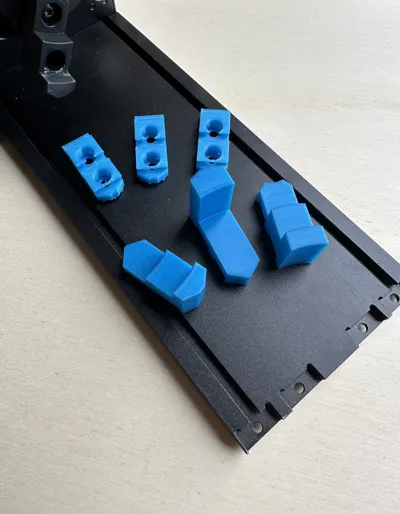
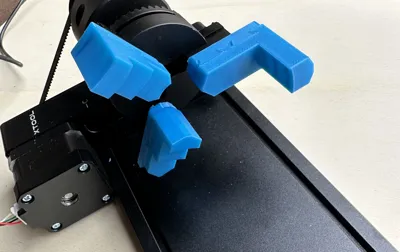
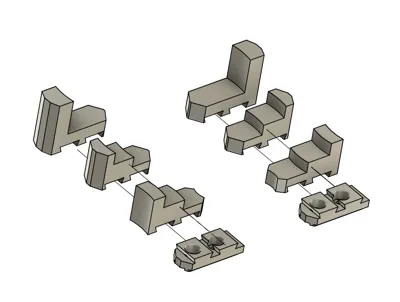
The set consists of an adapter that is firmly screwed to the RA2, as well as three different pairs of jaws that can be used modularly. Each jaw has two different clamping “sides”/surfaces and can be easily flipped to use the other side
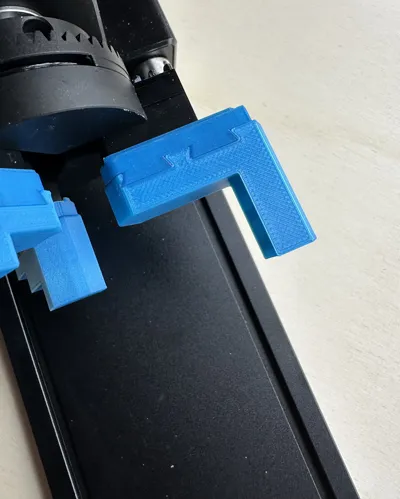
Attention: Please slide the jaws 3-4 times through the adapter (dovetail guide) to remove any excess material and ensure smooth movement
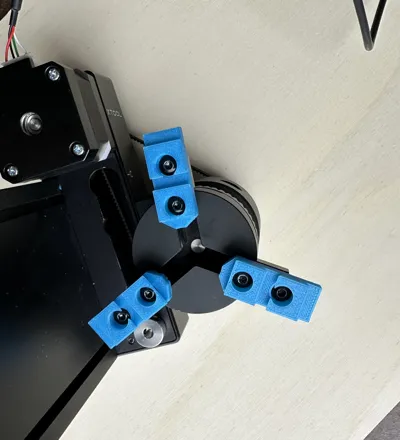
🔧 Structure & Functionality:
- ✅ Adapter with Screw Fastening: The adapter is screwed to the RA2 unit with the original screws and serves as the base for the jaws
- ✅ Dovetail Jaws: The jaws are slid onto the adapter via a dovetail guide and held in place – without any additional tools
- ✅ The jaws are almost the same dimensions as the original ones + 1 additional pair of jaws
✅ Double-sided Use: Each jaw has two clamping surfaces – simply flip and continue working
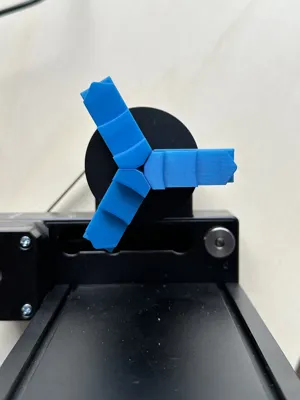
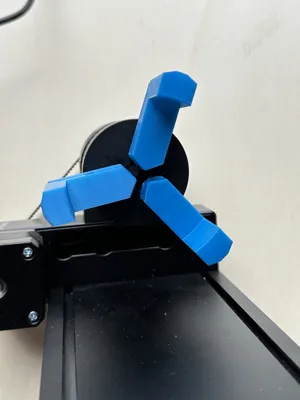
⚙️ Technical Details:
- Compatible with xTool RA2 Pro Rotary
- Secured by dovetail guide
- Interchangeable jaws for various applications
- Ideal for engraving on bottles, glasses, cylindrical objects, and much more
🖨️ Recommended Print Settings:
- Material: PLA, PETG, or ABS (for additional temperature and load resistance)
- Layer height: 0.16mm / Or as desired
- Infill: As desired: I printed mine with 25% infill
- Quick to print
- Choose appropriate material depending on desired strength and wear resistance
- I carefully removed the support structure from the adapters from the back with a screwdriver
🔄 Update – New Jaw Variants for Mugs & Glasses (xTool RA2)
The modular clamping system for the xTool RA2 has been expanded with two new jaw variants, specifically designed for clamping mugs, cups, and glasses
🆕 Jaw 6 – For Mugs & Cups
Suitable for mugs and cups with straight or slightly conical walls. The jaw ensures secure centering and stable grip, so that the workpiece does not slip or twist during engraving
🆕 Jaw 7 – Variable Diameters with “Stop”
This jaw has two clamping levels, allowing different diameters to be clamped flexibly. Additionally, an integrated stop is present, which enables reproducible positioning and significantly simplifies the alignment of glasses and mugs
With the new jaws 6 and 7, the modular clamping system offers even more flexibility, precision, and repeatability for engravings on mugs and glasses with the xTool RA2
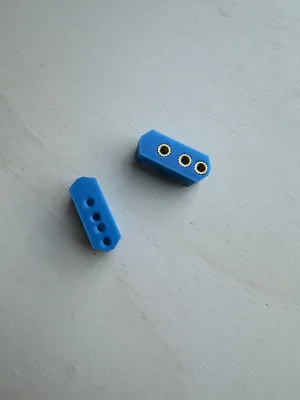
Update: New jaws available Ra_Jaw_4 and Ra_Jaw_4.5 for xTool RA2 Rotary – with and without heat-set inserts for Xtool threaded rods
I have designed two new jaws for the xTool RA2 Rotary unit
🔩 Version Ra_4 – Directly with Internal Thread
This jaw is equipped with an internal thread, suitable for the original xTool threaded rods. It is ready for use immediately after printing – without any additional components
✅ Advantages:
- No heat-set inserts needed
- Quick and easy to print
- Immediately usable
🛠️ Note on Preparation:
For the printed thread to run smoothly, it should be carefully screwed in and out 1–2 times with a suitable screw or the xTool threaded rod before first use. This smooths out any potential print residues and ensures smoother operation during later use
⚠️ Note:
Printed threads are functional, but less durable compared to metal inserts/heat-set inserts – especially with frequent tightening or strong force
🔩 Version 4.5 – For Heat-Set Inserts (recommended)
This version is designed for use with M4 brass heat-set inserts. After inserting the inserts, the original xTool threaded rods can be screwed in
✅ Advantages:
- Significantly higher durability
- Ideal for frequent clamping
- Suitable for the original xTool threaded rods
🛠️ Assembly Note:
After printing, insert the heat-set inserts into the prepared holes with a soldering iron (applies to Jaw 4.5)
➡️ Important: Make sure the inserts are melted in straight and flush – crookedly inserted inserts can impair the thread's function or damage the jaws
Both jaws are compatible with the xTool RA2 Rotary unit and the modular clamping system
📩 I look forward to your feedback, makes, or suggestions for improvement!
Documentation (2)
License
You shall not share, sub-license, sell, rent, host, transfer, or distribute in any way the digital or 3D printed versions of this object, nor any other derivative work of this object in its digital or physical format (including - but not limited to - remixes of this object, and hosting on other digital platforms). The objects may not be used without permission in any way whatsoever in which you charge money, or collect fees.
Comment & Rating (32)