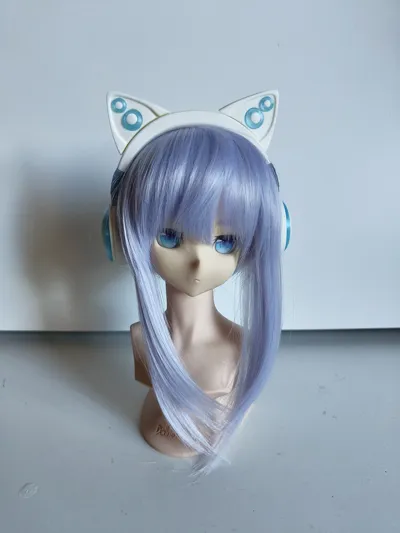
Doll headphones plain and Cat Ears (pieces)


Print Profile(1)

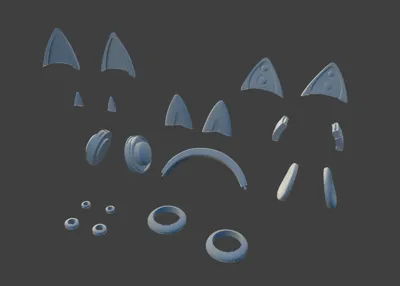
Bill of Materials


Description
(Who else remembers the Axent Wear headphones..?)
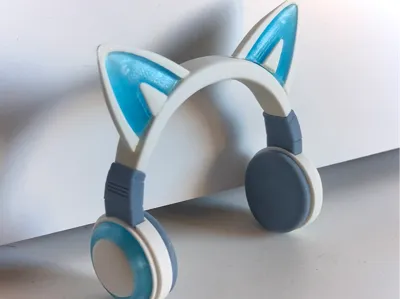
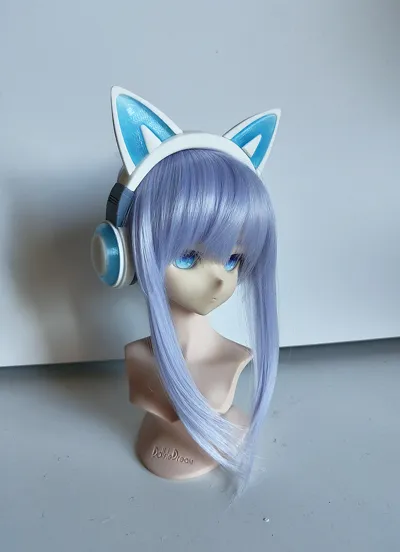
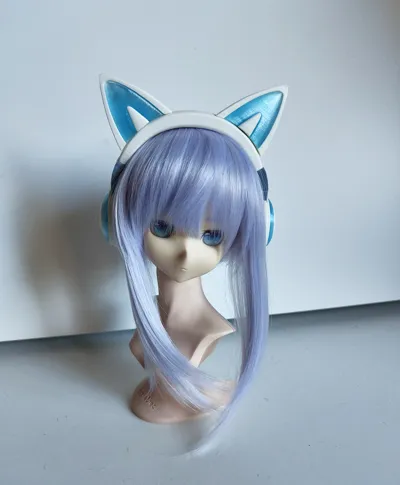
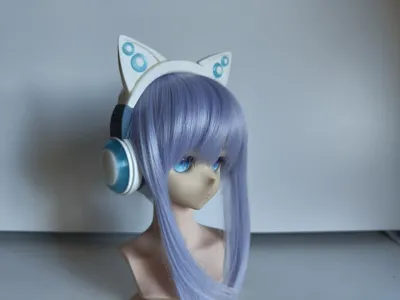
Headphones with cat ears for SD sized dolls/BJDs, or miniatures.
In parts, if you want to print ears in different colors and switch them out, avoid painting, or don't have an AMS.
I've also got a one-piece version which can be found HERE
Please measure your dolls head and compare to the measurements on the one-piece model before you print this, to ensure that it'll fit.
The holes for the magnets are designed for 6x3mm ones, although with generous allowance.
Use a hot glue gun to cushion the magnets to the desired height.
- The parts are intended to be glued on.
Some don't need it though, like the ornaments/parts on the housing, or the ornaments/parts on the smaller ears. Instead you might have to rotate or slightly screw them on to make them click into place. The ornaments for the small ears might take a bit of force, or sanding/shaving, to insert. A suggestion is to print a few of the ornaments/parts for the smaller ears in case they get stuck in an awkward position when you put them in, as they are easy to damage when prying them back up.
- You can skip the ornamental parts (for the small ears and housing) if you'd rather fill with a resin/epoxy mix, for example, instead.
- You might want to glue a foam-strip, or piece of fabric, to the headband, either for looks or to raise the headphones higher, should you want to.
Sanding will likely be required. - Depending on your support settings and filament.
Refer to my one-piece model for some tips on post processing.
And again, depending on the filament, you might want to change/increase the infill or add more wall-loops to make them sturdier.
They are intended to just slide onto the dolls head. They will snap if bent/pulled at.
I can't recommend scaling them down for smaller dolls or miniatures, due to the already small details and parts. But scaling them up slightly should be ok, as long as you take the magnet measurements into consideration. You can of course forgo the magnets and glue the ears on too if you want.
License
You shall not share, sub-license, sell, rent, host, transfer, or distribute in any way the digital or 3D printed versions of this object, nor any other derivative work of this object in its digital or physical format (including - but not limited to - remixes of this object, and hosting on other digital platforms). The objects may not be used without permission in any way whatsoever in which you charge money, or collect fees.
Comment & Rating (5)