Fingerboard Flat Rail - No Supports, Snap Assembly


Print Profile(3)


Description
Simple flat bar rail to trick on with fingerboards. Snap-in-place design means no glue or screws required. Just print and press.
Printing
You can print both parts on the same plate. I recommend printing by object if you do this.
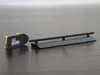
Print the rail flat on either it's left or right side. This ensures the top is smooth and the snap tabs are strong. Print the base the same way, with either the left or right side down on the bed, and the long edge printing vertically. This ensures the top surface of the base and the small ramp are smooth. Other orientations would result in layers creating aa stair-step effect on either of these surfaces.
No supports are necessary, as the 5 mm gaps in the base should be easy for any printer to bridge across.

Assembling
Gently squeeze the base of the rail legs, inserting them into the base one at a time. When all legs are in place, press the rail at the top of each leg to ensure they are fully seated into the base. There should be a slight “click” when each one is seated.
An optional enhancement is to add some adhesive anti-slip furniture pads or something similar to the bottom. This helps it stay put when playing on slick surfaces.
Updates
Feb 07, 2026
- Added A1 and A1 Mini profiles
- The base was shortened by 3 mm for the A1 Mini profile so it did not exceed the max build height. It remains at its original size for the other profiles.
- Note: I do not own these printers to test these profiles. My concern with printing the base upright on a bed slinger is that there will be too much movement and the part will release from the plate. Make sure your build plate adhesion is good and print at your own discretion.
License
You may create derivative works based on this object, provided that all such derivative works are published exclusively on the MakerWorld platform and include proper attribution to the original creator. You may not share, upload, host, distribute, or publish this object—or any derivative work of this object—on any other digital platform, marketplace, or distribution channel. Commercial use of this object and any derivative works is strictly prohibited. This includes, but is not limited to, selling, renting, sublicensing, or using the object in any context in which you receive monetary compensation or other financial benefits.
Comment & Rating (73)