SWITCH2 Cooling Base Stand A Durian


Print Profile(1)

Description
This actively cooled stand for the SWITCH2 dock is custom designed. The vent design of the cooling bracket corresponds to the internal structure of the dock after disassembly, creating efficient cooling for both the dock chip and the device itself.
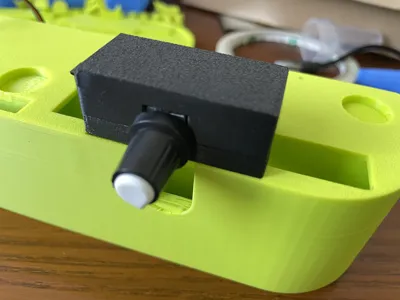
The base uses a 4028 fan with a 4-pin interface, four 15mm*3mm thick magnets, and a fan PWM speed controller. The PWM controller measures 45mm long, 22mm wide, and 18mm high. The style is as follows:

The circular knob in the model is a replacement for the PWM knob shown in the image. A Type-C cable of 40 centimeters or more is required. Internal storage space for the cables is designed.
The airflow is well-designed, and the cooling effect is significantly noticeable in actual use
Installation Instructions:
1, 502 or 401 adhesive is required
2, Glue the printed T-shaped component into the main body of the cooling base as shown in the image. (See image below)
3, Due to the compact space, PWM installation requires patience. Install the fan first, and you can choose to secure the fan with adhesive or screws.
4, For the Type-C and USB-A cables, first thread the C-end through the small hole next to the fan intake, then thread it into the PWM controller slot. The fan cable also enters here; the dimensions are precisely designed. You need to insert the fan cable first, tucking it into the adjacent recess, then thread through the Type-C cable.
5, Then connect the cables to the PWM controller on the outside and carefully insert the controller into the slot. If the Type-C connector is longer, you may need to plug the fan cable into the PWM before inserting it into the slot, then carefully insert the Type-C connector from the top cover of the cooling base. This operation may be somewhat challenging.
6, Attach the magnets; pay attention to the north and south poles.
7, Done!!! You are amazing!!!


License
You shall not share, sub-license, sell, rent, host, transfer, or distribute in any way the digital or 3D printed versions of this object, nor any other derivative work of this object in its digital or physical format (including - but not limited to - remixes of this object, and hosting on other digital platforms). The objects may not be used without permission in any way whatsoever in which you charge money, or collect fees.
Comment & Rating (1)