Search models, users, collections, and posts
Mini Arduino Traffic Light – Snap-Fit 3D
IP Report

Print Profile(1)

0.16mm layer, 2 walls, 15% infill
2.6 h
1 plate
Open in Bambu Studio
Boost
107
275
11
3
552
205
Released
Description
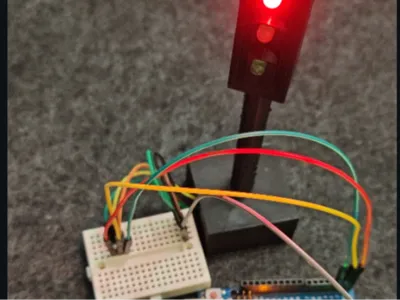
Mini Arduino Traffic Light – Snap-Fit 3D Model for STEM Projects 🚦
Overview
A compact, press-fit traffic-light shell for Arduino demos and STEM lessons. Print, drop in three LEDs, and run the sample sketch.
90 second build • 3D Printed Arduino Traffic Light - YouTube
▶ Full source, code & wiring on GitHub
What’s in the STL pack?
| File | Purpose |
|---|---|
| all-in-one_plate.stl | One-shot build plate (fastest) |
| base_pole.stl | Weighted stand + pole (single piece) |
| body.stl | Main light housing |
| front_panel.stl | LED lens openings |
| rear_cover.stl | Snap-on back cover |
Bill of Materials
- Arduino Uno / Nano
- 3 × 5 mm LEDs (R, Y, G)
- 3 × 220 Ω resistors
- Jumper wires
- 3D-printed parts (choose either the single-plate STL or the 5 loose parts)
(Wiring diagram and firmware are on GitHub.)
Print Settings (tested on Bambu Lab A1)
| Setting | Value |
|---|---|
| Nozzle | 0.4 mm |
| Layer height | 0.20 mm |
| Infill | 15 % gyroid |
| Supports | needed |
| Material | PLA |
Assembly
- Print the parts you prefer (single plate or individual STLs).
- Press-fit LEDs into the front panel from inside.
- Slide the panel into body.stl, then clip on rear_cover.stl.
- Route wires down the pole and plug into the breadboard next to the stand.
- Upload traffic_light.ino and watch the red → yellow → green loop!
License
This user content is licensed under a
Creative Commons Attribution-Noncommercial
Comment & Rating (11)