WERA Tool-Check Plus Upgrade - 838 RA-S Holder


Print Profile(2)

Bill of Materials

Description
Wera Tool-Check Ratcheting Bit Holder Upgrade
Got a Wera Tool-Check but wish it could handle a bigger bit holder with a ratchet? This upgrade is for you. It's a simple, effective way to expand your Tool-Check's capabilities without making it bulky.
Boost Me (for free)
Love the upgrade? Support me with a boost!
What it does:
This print lets you carry a Wera 838 RA-S Ratcheting Bit Holder right alongside your existing Wera Tool-Check bits. It's designed to fit snugly, keeping everything secure.
Why TPU?
You'll have to print this in TPU. It's flexible enough to get it in place, allow for easy access, a secure fit, and it's tough enough to last. Plus, you don't need any other assembly bits and nothing will rattle!
Simple Upgrade, Big Impact:
The Wera Tool-Check is great for portability, but sometimes you need more leverage or a quick ratcheting action. This upgrade gives you that extra utility, making your compact Wera set even more versatile for quick fixes, assembly, or whatever you're working on.
Print Settings:
- Material: TPU 95A - I used Geeetech (essential for flexibility and durability)
- Nozzle: 0.4mm
- Infill: 100% due to multiple walls
- No supports!
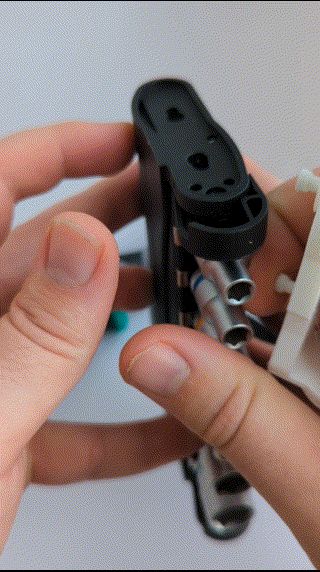
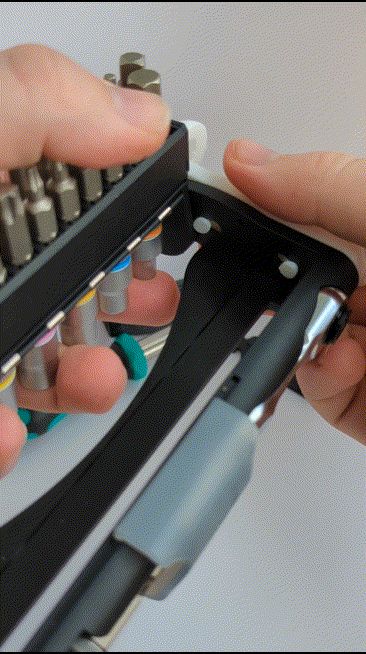
Assembly
- Remove the old Bit Holder. You can just pry it off, it's secured the same way as the new one with 2 “standoffs” that are pushed away from each other into the holes on the main body.
- Fit the smaller part into the larger part of the print, make sure to align the small notch, otherwise it won't fit!
- Push one hole into the main body and outwards to secure it.
- Slightly bend the print and push the second hole into the main body. Wiggle it a bit to secure the fit.
- Done!
Or watch the gifs!
Give your Wera Tool-Check the upgrade it deserves!
License
You shall not share, sub-license, sell, rent, host, transfer, or distribute in any way the digital or 3D printed versions of this object, nor any other derivative work of this object in its digital or physical format (including - but not limited to - remixes of this object, and hosting on other digital platforms). The objects may not be used without permission in any way whatsoever in which you charge money, or collect fees.
Comment & Rating (39)