35mm & 120 Format Analog Film Case - By Jorn


Print Profile(4)


Bill of Materials


Description
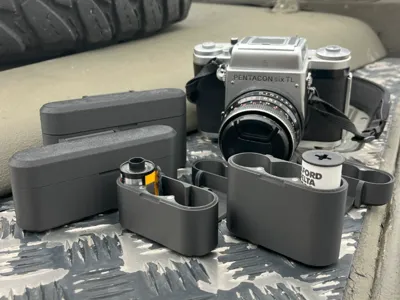
Print in Place Film Case
Things to know:
This is the first 3D printing design I'm sharing, I think it worked out well enough to share with you all. But do let me know how to optimize printing and tolerances.
The Design:
Designed to be less bulky than other options available on maker world, while having a satisfying snap close using magnets. The design is fully print in place! Just give it time to cool on the plate, and the hinges should snap free with light pressure.
The lid and case interlock, causing trouble free, perfect closing every time.
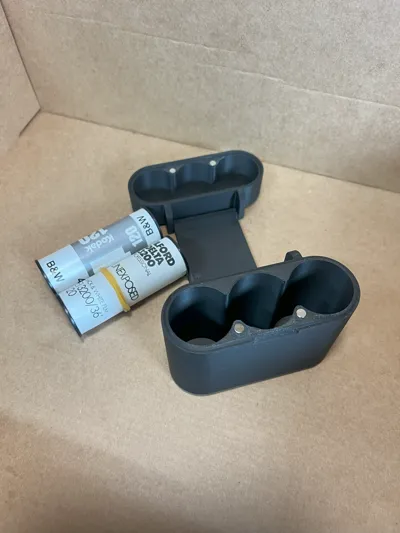
The dividers are a snug fit, making sure your analog film (which is not cheap nowadays!) does not rattle around.
Versions:
Three 35mm film rolls – uses four 4x3mm magnets
Five 35mm film rolls – uses eight 3x3mm magnets
Three 120 film rolls – uses four 4x3mm magnets
Five 120 film rolls – uses eight 3x3mm magnets
*The 120 film versions are designed to be a tight fit, a small rubber band around an exposed roll should remove any rattles completely. Make sure the film is fully inserted and touches the bottom, or the lid might be difficult to close.

IMPORTANT:
The current uploaded design uses four 4x3mm magnets for the versions that hold 3 films.
The versions that hold 5 films use eight 3x3 magnets.
The tolerance for the magnet diameter is tight. This makes sure the fit is snug, so the magnets do not come loose. Apply minimal glue, and use a tool so you can apply downward pressure to insert the magnet.
I've suggested 4x2mm and 3x1mm magnets you can buy from Bambu Lab.
These should work, but make sure you do not insert them too far (the holes are 3.2mm deep!), or the snap close does not work. They should sit absolutely flush with the case, if they protrude the case won't close perfectly.
Let me know if these are capable enough to hold the lid properly, if so I'll update the models so you cannot accidently insert them too deep.
Comment & Rating (9)