2022+ Toyota Tundra TRD Pro Grille Camera Bracket


Print Profile(1)

Description
Good morning.
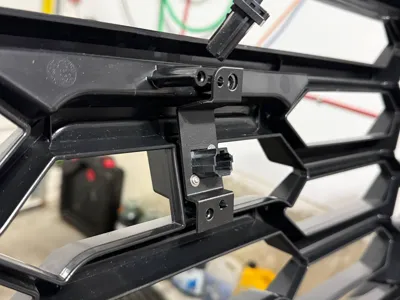
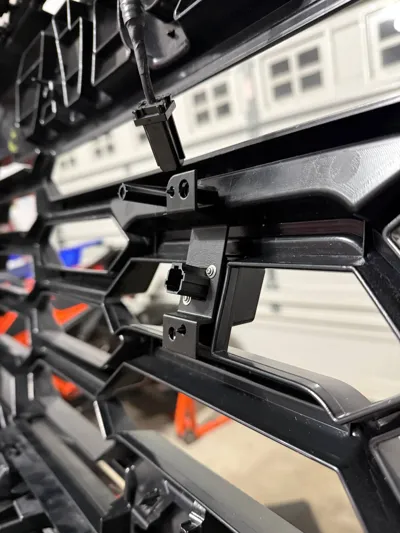
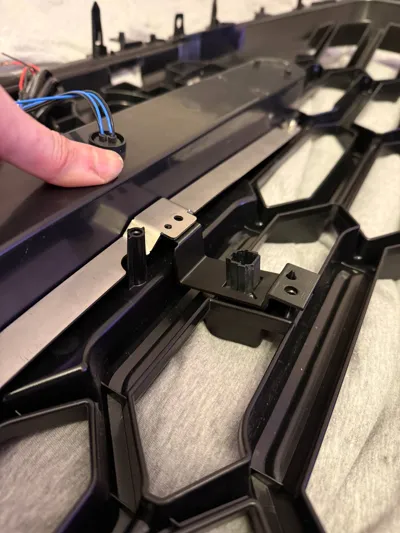
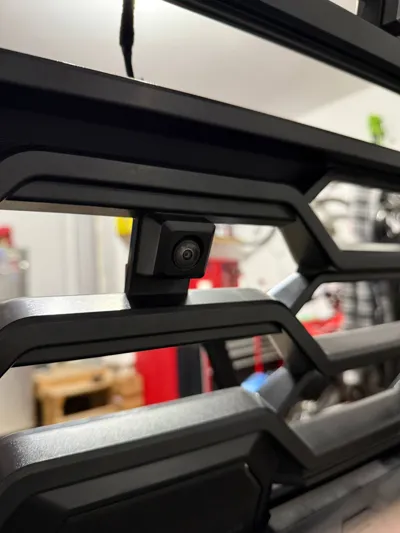
After realizing that nobody has made a camera bracket for the TRD Pro grille that actually fits properly, I decided to make one myself.
This bracket maintains the OEM slope for proper camera alignment and is designed to fit the RAVE Lightbar aka that lightbar they just order from China and slap their logo on, then charge double for.
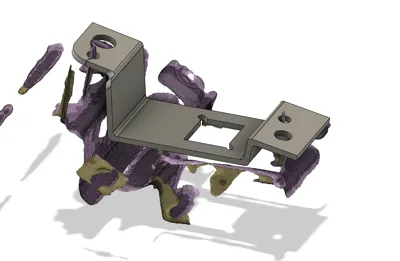
When I installed the camera, I noticed it was crooked, the connector base and the camera unit weren’t aligned properly. It was about 1 degree off. If yours has the same issue, I’ve included both +1° and -1° versions you can download. Or, if you want a custom tweak, feel free to edit the Fusion 360 file I’ve included. Just modify the Move command in the timeline and input the angle you need.
I used PETG, but I'm sure other filaments will work well.
Also, I have no idea how RAVE is charging $30 USD for a bracket that doesn’t even fit. It’s clearly taken straight off Thingiverse, and it’s even labeled for non-commercial use. (Unless they’ve struck a deal with the original creator... which I highly doubt.) Either way, companies really shouldn’t be charging that kind of money for such low-effort junk.

One last note:
After installing the TRD Pro grille, your 360 camera will likely be misaligned. You can fix this with a simple camera calibration in service mode. Here’s how:
📷 How to Calibrate Your 360 Camera in Service Mode
- Enter Accessory Mode
With your foot off the brake, double-press the start/stop button to enter Accessory Mode. - Wait for the Infotainment Screen to Boot
- Turn Off the Display
Go to:
Settings > Display > Screen > Turn Off Display - Access the Hidden Service Menu
Swipe left to right 5 times, then right to left 5 times on the dark screen.
(Make sure to Flick, and Ignore any “Touch to turn screen on” messages.) - Go to Camera Settings
Navigate to:
Function Check > Camera Settings > View Adjustment - Unlock Greyed-Out Options
If anything is greyed out, press and hold it for 5 seconds to unlock. - Adjust the Cameras
You’ll see a top-down view of your truck. Use this to fine-tune each camera’s angle. (My settings in image below) Save and Exit
Once done, press OK to save. On the next truck startup, confirm your changes to complete the calibration.
Not for Commercial Use
License
You shall not share, sub-license, sell, rent, host, transfer, or distribute in any way the digital or 3D printed versions of this object, nor any other derivative work of this object in its digital or physical format (including - but not limited to - remixes of this object, and hosting on other digital platforms). The objects may not be used without permission in any way whatsoever in which you charge money, or collect fees.
Comment & Rating (10)