Magnetic Fidget Clicker with variable resistance


Print Profile(1)

Bill of Materials


Description
I tried various magnetic fidget clicker or slider toys but wasn't quite happy with them.
So I went on to design my own version.
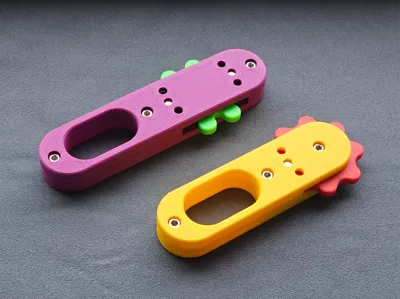
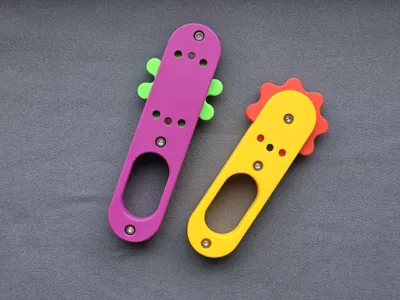
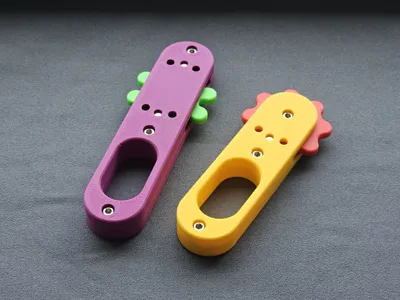
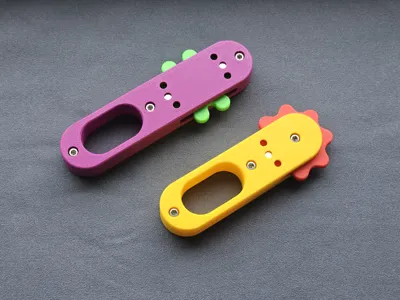
This is my magnetic fidget clicker.
It uses 6x3 magnets, a 608 ball bearing and M3 screws.
Depending on the amount and orientation of the magnets you can create a different click resistance feel.
There is a short and long version. Only difference is the long version has space for more magnets and therefore stronger click resistance.
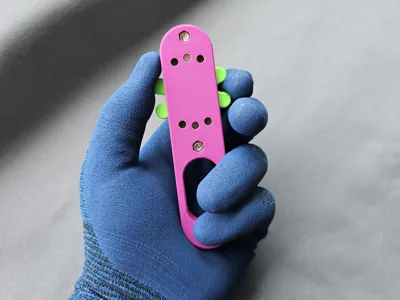
I created it modular with screws, so that way you can easily change the magnets and play around with the different magnet configurations.
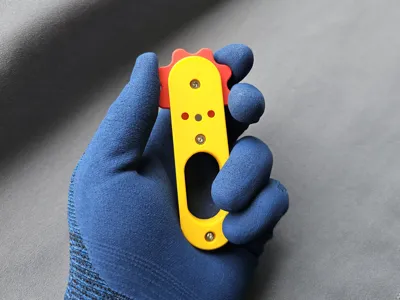
There are two version of the click wheels, one star and one flower shaped.
Both contain 8 magnets and have a pause at layer 19 to insert the magnets during printing.
The holes for the screws and nuts use supports to create a clean surface in the hole.
I had no problems removing them after printing.

Suggested magnet configurations:
The magnets are pressfit, you need a bit of force to push them in.
I used the hex screwdriver as help.
It is important to keep track of the polarity.
Light resistance:
This has 16 very soft clicks.


Medium resistance:
This has 8 distinctive clicks, like some flipswitch.


Strong resistance:
This is a really strong resistance with 8 clicks, especially in the long version with 12 magnets.
Probably too strong for smaller kids.


To remove or change the magnets, just push them out from the other side.
Assembly:
Add the magnets in desired configuration.
Insert ball bearing into clickwheel
The clickwheel as a small lip on one side, the 608 ball bearing needs to sit flush with that:

Then insert the clickwheel with ball bearing onto the top or bottom part.
IMPORTANT:
Try which clickwheel orientation works best for you, if the magnets push or pull at the magnets in the case.
I prefer the push variant, that the magnets in the clickwheel push against the magnets in the case.
Then join both parts, insert the nuts and screws.
The nuts maybe also need a little push to fully insert them.
I used one of the screws and the screwdriver to push them in.


Bill of Materials:
3x M3 Nuts
3x M3x8 Screws
1x 608 Ball Bearing
8x 6x3 Magnets for the click wheel
2-12x 6x3 Magnets for the holder depending on the configuration and desired click strength
Have fun clicking ;-)
License
You shall not share, sub-license, sell, rent, host, transfer, or distribute in any way the digital or 3D printed versions of this object, nor any other derivative work of this object in its digital or physical format (including - but not limited to - remixes of this object, and hosting on other digital platforms). The objects may not be used without permission in any way whatsoever in which you charge money, or collect fees.
Comment & Rating (4)