Exposure calculator (Exposure triangle)


Print Profile(2)


Description
When you take photos with manual settings, you will recognize that three values are influencing each other.
Once you set the correct exposure values, there are thousands of combinations to get the same exposure (= same light amount) of the picture but with different styles.
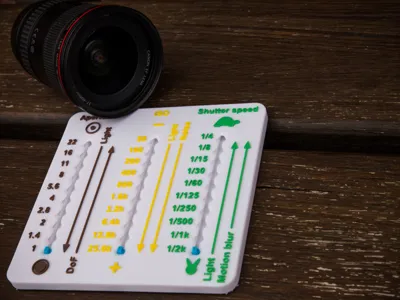
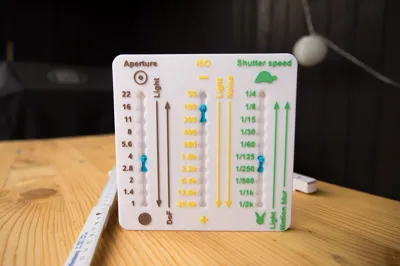
The three values are shutterspeed, iso and aperture.
Beneath the amount of light itself they have impact to the picture style.
Aperture = A higher number means a higher depth of field (DoF), But the smaller the amount of light that hits the sensor during the exposure time
Shutter speed = A fast shutter speed freezes motion in the picture or helps against unsharp pictures. But the faster the shutter speed is, the sensor will have less time to receive the light that fells throgh the “hole” of your aperture.
ISO = Means the light sensitivity of the film (analogue photography). If you set a higher ISO value, you will get more light in your picture but you will loose image quality because of noise.
All of these three values are divided to stops. The modern cameras have ⅓ stops as well but to keep the tool smaller, I only focussed on full stops (but it works similar).
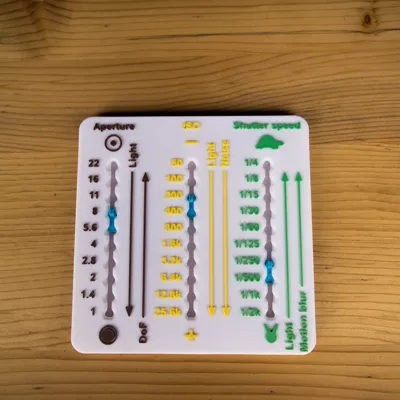
Lets imagine you have a picture in which you need a higher depth of field, then you set the sliders of the tool to the right values.
In my case the picture had the values:
Aperture 4
Shutter Speed 1/125
ISO 100

To get more DoF I want to bring up my aperture to value 22 - this is an increase of 5 stops on my tool which means that the amount of light decreases 5 stops. Now I have to compense this by changing Shutter speed and ISO in the direction where the arrow of light points.
Now the picture has following values:
Aperture 22 (-5)
Shutter Speed 1/125 (+/- 0)
ISO 3.200 (+5)

The same result would be possible if I would set the shutter to 1/60 of a second (+1) and the ISO to 1.600 (+4) but there would be a risk that the image gets shaky.
The second pair of pictures shows how to compensate moving objects. The grass was moving in the wind, so it was not possible to take a clean shot with the values:
Aperture 22
Shutter Speed 1/5
ISO 100

to increase the shutter speed, I decided to lower the aperture to value 8, this means 3 stops of light more that will hit the sensor.
For compensation I picked the values now:
Aperture 8 (+3)
Shutter Speed 1/250 (-4 steps of light)
ISO 200 (+1 step of light)

You only have to pay attention to get all your + and - compensating each other. And you must be clear, what style of image you want.
I hope this helps you.
Printed without supports (I added them to the model).
After printing, you have to remove the circles on the body and the support of the sliders.
Then insert the sliders in the holes on the bottom and firmly press them into the slot until the button pops up on the upper side.
I recommend using PETG for the sliders. PLA may break.
If you like it, you are free to send me a boost!
License
You shall not share, sub-license, sell, rent, host, transfer, or distribute in any way the digital or 3D printed versions of this object, nor any other derivative work of this object in its digital or physical format (including - but not limited to - remixes of this object, and hosting on other digital platforms). The objects may not be used without permission in any way whatsoever in which you charge money, or collect fees.
Comment & Rating (5)