Perfect 15° Lithophane Lightbox


Print Profile(2)


Bill of Materials


Description
Perfect 15° Lithophane Lightbox
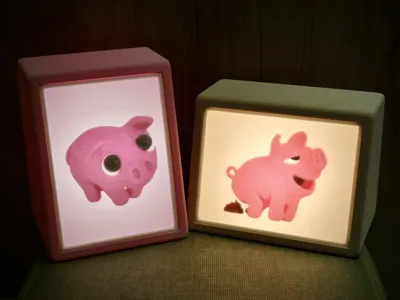
The Perfect 15° Lithophane Lightbox is designed with the ideal viewing angle of 15 degrees, wrapped in a clean and minimal design. Whether you're preserving an unforgettable portrait, a landscape from your travels, or a candid moment caught on instant film, this accessory offers a new way to bring your photography into the physical world. Just upload your favorite photo to MakerLab’s “Make My Lithophane” tool to create your model—then let it glow softly on your desk or by your bedside. A gentle light, a personal memory, and a touch of calm.

-
Don't forget to purchase an LED light—you're welcome to use the affiliate links provided under this model.
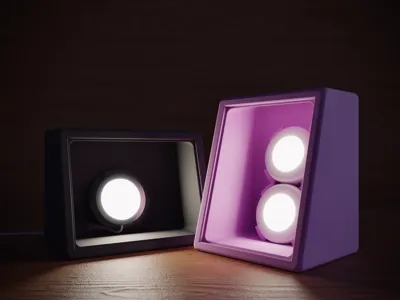
The Perfect 15° Lithophane Lightbox is available in two light module variants:
1.MH001 (LED Lamp Kit Collection)
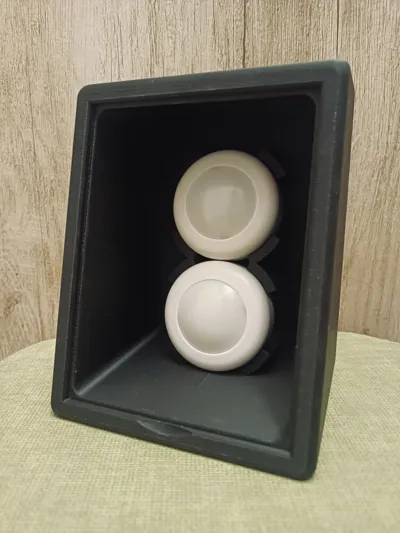
2.KC007 (Remote Controlled 16-color RGBW Puck Lights)
Both light options have their own advantages and limitations, summarized in the table below:
| MH001 | KC007 |
| Brighter lighting | Lower brightness |
| No battery worries (always plugged in) | Battery-powered (require replacements) |
| Has a visible cable | Clean wireless look |
| Not remote-controlled | Comes with remote control |
 |  |
-
The Perfect 15° Lithophane Lightbox is designed for lithophane models with dimensions of 108 mm × 144 mm × 2.5 mm — the same size generated by MakerLab’s “Make My Lithophane” tool.
Please make sure your lithophane matches these dimensions before printing.
How to create and print a lithophane model:
1.Choose a photo you like
2.Go to the MakerWorld website and click MakerLab at the top
3.Click Make My Lithophane
4.Create a New Project
5.For Lithophane Type, select either:
– Mono Litho with Fixed Frame
– Colorful Litho with Fixed Frame
6.Download the generated .3mf file and print it
(Tip: printing slowly yields better results)

-
3D Printing Notes:
1.It is recommended to apply glue on the build plate to prevent warping.
2.The model includes a 4mm chamfer at the base. To ensure proper printing of the steep overhang at the bottom, the print profile uses Variable Layer Height—please make sure this feature is enabled.
3.For best light-blocking performance, use black or dark-colored filament. Lighter colors may allow light to bleed through. If you prefer using light-colored filament, maybe try increasing the wall thickness.

-
Quick Installation Guide:
MH001: Insert the LED unit into the lightbox through the hole at the lower back. Twist off the top cover of the LED unit, secure it with the two included screws, then twist the cover back on.

KC007: Simply place the two LED puck lights into the lightbox — no tools needed.
-
If you are satisfied with this Perfect 15° Lithophane Lightbox, feel free to boost or buy me a coffee. Your support means a lot to me!
https://buymeacoffee.com/benbenben
Boost Me (for free)
Wishing you smooth 3D printing!
License
You shall not share, sub-license, sell, rent, host, transfer, or distribute in any way the digital or 3D printed versions of this object, nor any other derivative work of this object in its digital or physical format (including - but not limited to - remixes of this object, and hosting on other digital platforms). The objects may not be used without permission in any way whatsoever in which you charge money, or collect fees.
Comment & Rating (5)