


Print Profile(1)

Description
This Rocket Pop-inspired red, white, and blue popsicle soap cover reminds me of childhood summers—swimming with my friends at the pool and celebrating the Fourth of July. It’s designed to fit a foaming soap bottle, with an optional insert so that Softsoap and Dial hand soaps also fit.
Boost Me (for free)
Do you like my work? A boost is free and really helps me out.
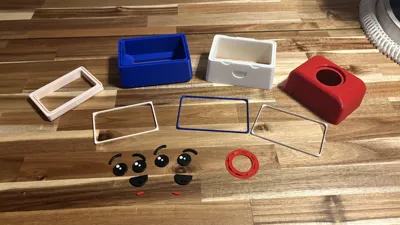
🧼 Print Includes:
- 1 “Stick” (Beige)
- 1 Lower Body (Blue)
- 1 Torso (White)
- 1 Head (Red)
- 4 Eyebrows
- 4 Eyes
- 2 Mouths
- 2 Tongues
- 3 Color-Coded Connector Rings
- 1 Softsoap Adapter
🛠️ Tools Needed:
- CA Glue with precision tip
- Tweezers
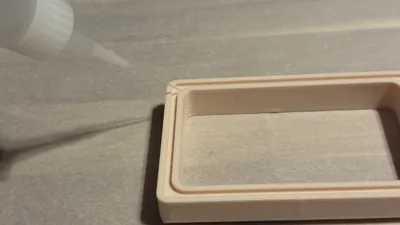
🧩 Assembly Instructions:
These instructions will guide you through assembling the Popsicle Soap Bottle Cover. Begin with the main body, building from the bottom up, followed by the face components. You’ll then attach the face components to the main body. The tolerances are fairly snug, so apply glue sparingly. Tip: Run through the assembly process without glue first to ensure you understand the placement of all components.
- Remove supports from the head component (Red).
- Apply glue around the slot at the top of the “Stick” component (Beige).
- Insert the beige connector ring into the slot on the “Stick.”
- Apply glue to the slot at the bottom of the lower body (Blue).
- Insert the protruding part of the beige connector ring into the slot on the lower body.
- Apply glue around the top slot of the lower body.
- Insert the blue connector ring into the slot at the top of the lower body.
- Apply glue around the bottom slot of the torso (White).
- Insert the protruding part of the blue connector ring into the bottom of the torso.
- Adjust the alignment so the surfaces mate smoothly.
- Apply glue to the top slot of the torso.
- Insert the white connector ring into the slot.
- Apply glue to the slot at the bottom of the head.
- Insert the protruding white connector ring into the slot at the bottom of the head.
- Fine-tune alignment again for smooth mating surfaces.
😋 Face Assembly:
- Apply glue into the tongue-shaped voids in each mouth.
- Using tweezers, carefully insert a tongue into each mouth. The tongues have a small chamfer on the top surface—this should face outward.
- Lay the main body down with one face side up.
- Apply glue to each eyebrow slot and insert eyebrows using tweezers.
- Apply a small amount of glue into each eye socket.
- Insert an eye into each socket—orient the white dots upward and to the left.
- Apply glue to the slot for the mouth.
- Carefully insert the mouth into its slot.
- Allow a few minutes for the glue to cure.
- Repeat the face assembly steps on the opposite side of the cover.
- Stand the cover upright.
💧 Filling Instructions:
- If the pump is locked, unlock it. It may be difficult to relock once inside the cover.
- Remove the pump from the soap bottle and set it aside.
- If using Softsoap or Dial hand soap, insert the adapter ring into the top of the cover.
- Insert the bottle through the hole in the bottom of the cover so the threads protrude from the top.
- Press the bottle firmly against the top of the cover, then insert the lid into the bottle and tighten.
License
You shall not share, sub-license, sell, rent, host, transfer, or distribute in any way the digital or 3D printed versions of this object, nor any other derivative work of this object in its digital or physical format (including - but not limited to - remixes of this object, and hosting on other digital platforms). The objects may not be used without permission in any way whatsoever in which you charge money, or collect fees.
Comment & Rating (0)