CSR-SWRDFSH: Functional Toy Blaster


Print Profile(1)

Bill of Materials


- Compression Springs x 1: See Hardware Table
Description
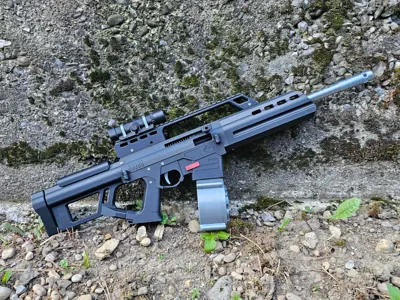
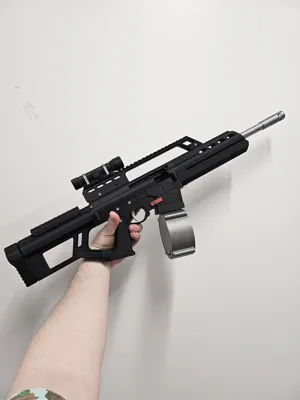
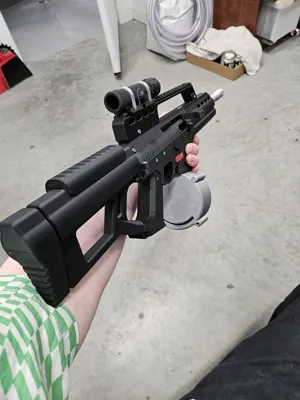
CSR-SWRDFSH (A.K.A Canadian Space Rifle MK2)
IMPORTANT SAFETY INFORMATION!!: This is a toy that fires a projectile! Never fire at pets or unwilling participants. This can damage drywall and eyeballs, use caution and protective eyewear. Never brandish this as a real weapon or bring it out in public. Just because you know it's a toy, doesn't mean other people will. Make sure to check your local laws regarding replica firearms/ toy guns. Enjoy, be safe, and be smart!
The CSR-SWRDFSH is a bolt-action, magazine fed toy blaster with shell-ejection. Perfect for cosplay or indoor target shooting! It is fairly powerful so it shouldn't be used for battles with friends unless you are both wearing eye protection and long sleeves, as the printed projectiles can be painful on bare skin at close range. I am an Amateur designer who is still learning and seeking to improve, so I have included the .step files for all of the parts so any Talented or New designers to make changes and improvements as they see fit.
This is a reimagining of one of my earlier projects, the CSR-MK1, to make it even more sci-fi looking. It is inspired by both real and fictional firearms like the FAMAS, H&K SL18 and the BR75 Battle Rifle from the Halo Video game series. Although it is functionally the same as the CSR-MK1, I redesigned most of the frame parts and made some improvements to the internal mechanisms like the bolt.
BEFORE YOU START:
This is a moderately advanced project to print and build, it also requires additional non-printed hardware like screws, hexnuts, compression & extension springs. Operating it can be finnicky and requires a bit of practice and skill, so make sure you are up for a bit of a challenge before you start printing or ordering any parts. If you have built the CSR-MK1 or any of my other blasters, this should be an easy process for you.
Firing:

EJECTING:

FEATURES:
- Bolt-Action Cycling.
- Shell Ejection
- Semi-Accurate Scope themed iron sight.
- Carrying Handle.
- Double-Stack Magazine Designed by Silverback | Published - MakerWorld.
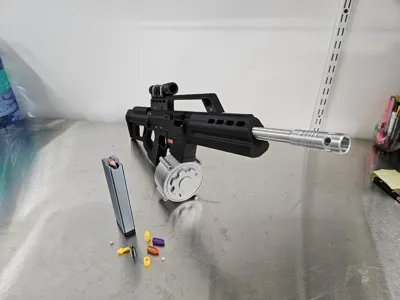
- Drum Magazine (Work in Progress)
- Fires printed projectiles and 6mm BB's
- Compatible with CSR-MK1 Magazines
PRINTED PARTS:
Recommended Filament: PLA, PLA+, PLA-CF
| Part Name: | Walls/Top/Bottom: | Infill %: | Supports Required?: | Purpose: |
| Lower Frame | 3+ | 15% | Yes | Holds the trigger and magazine release mechanisms. |
| Upper Frame | 3+ | 15% | Yes | Holds the firing & ejecting components. |
| Barrel Cover | 3+ | 15% | Yes | Holds the barrel. |
| Grip | 3+ | 15% | No | Part of the frame |
| Stock | 3+ | 15% | Yes | Part of the frame |
| Stock Pad | 3+ | 15% | Yes | Part of the frame |
| Cheek Rest | 3+ | 15% | Yes | Decorative |
| Barrel | 3+ | 15% | No | Guides the projectile |
| Muzzle | 3+ | 15% | No | Decorative |
| Connector | 3+ | 15% | No | Holds together parts of the frame |
| Carrying Handle | 3+ | 15% | Yes | Allows the mounting of optics |
| Magazine Catch | 3+ | 15% | No | Holds the magazine in place, allows it to be removed when pressed. |
| Trigger | 5+ | 15% | No | Moves the Striker latch |
| Striker Latch | 5+ | 15% | No | Holds the striker in place |
| Striker* | 5+ | 15% | Yes | Launches the projectile |
| Bolt* | 5+ | 15% | Yes | Picks up rounds from the magazine and helps eject empty ones. Holds the casing in place. |
| Charging Handle Bar | 5+ | 15% | No | Connects the charging handle to the bolt |
| Charging Handle | 5+ | 15% | No | A grip that allows for cocking of the gun |
| Magazine | 3+ | 15% | No | Holds the projectiles |
| Magazine Base | 3+ | 15% | No | Holds the spring in the magazine |
| Magazine Follower | 3+ | 15% | No | Pushes up and orients the projectiles in the magazine. |
| Drum Magazine | 3+ | 15% | No | Base frame for the drum magazine |
| Drum Magazine Cover | 3+ | 15% | No | Front cover for the drum magazine |
| Dummy Round | 3+ | 15% | No | Fills empty space in drum magazine to create spring tension |
| Dummy Round Link | 3+ | 15% | No | Connects the dummy rounds together |
| Dummy Round Follower | 3+ | 15% | No | Pushes and aligns the bullets |
| Drum Pusher Arm | 3+ | 15% | Yes | Pushes the dummy rounds, connects to an extension spring |
| Scope Body | 3+ | 15% | Yes | Main frame for the scope |
| Scope Reticle | 3+ | 15% | Yes | Reticle and eyepiece for scope |
| Scope Band | 3+ | 15% | No | Decorative |
| Scope Knob | 3+ | 15% | No | Decorative |
| Bullet | 3+ | 15% | No | The projectile |
| Casing | 3+ | 15% | No | Holds the projectile |
*The orientation in which the bolt and striker are printed is of utmost importance, to ensure they are strong enough. They must be printed horizontal to the print bed with organic supports.

HARDWARE:
| PART: | DIMENSIONS: | NUMBER NEEDED: | SOURCE: |
| M3 Machine Screw | M3x6mm | 2 | Makers Supply/Amazon/AliExpress |
| M3 Machine Screw | M3x8mm | 8 | Makers Supply/Amazon/AliExpress |
| M3 Machine Screw | M3x12mm | 6 | Makers Supply/Amazon/AliExpress |
| M3 Machine Screw | M3x14mm | 3 | Makers Supply/Amazon/AliExpress |
| M3 Machine Screw | M3x20mm | 2 | Makers Supply/Amazon/AliExpress |
| M3 Machine Screw | M3x22mm | 1 | Makers Supply/Amazon/AliExpress |
| M3 Machine Screw | M3x25mm | 6 | Makers Supply/Amazon/AliExpress |
| M3 Machine Screw | M3x30mm | 2 | Makers Supply/Amazon/AliExpress |
| M3 Hexnut | 26 | Makers Supply/Amazon/AliExpress | |
| Compression Spring (Magazine Latch & Striker Latch) | 0.5x5x20mm | 2 | Makers Supply/Mechanical Pen or Pencil |
| Compression Spring (Bolt) | 0.8x10x145mm | 1 | AliExpress |
| Compression Spring (Double-stack Magazine) | 0.8x10x150mm | 1 | AliExpress |
| Compression Spring (Striker) | 1.0x10x305mm | 1 | AliExpress |
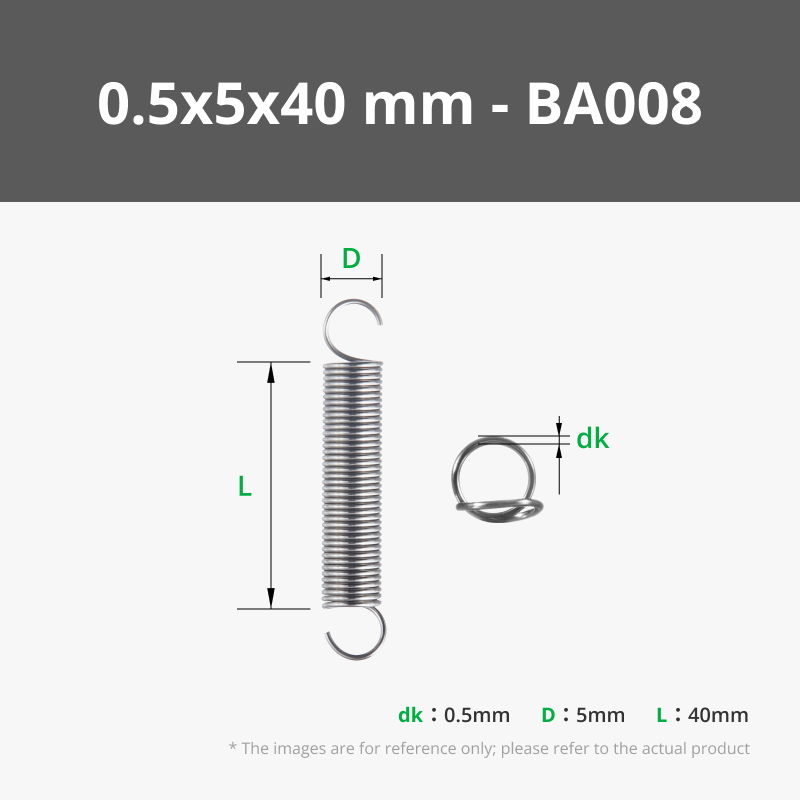
| Extension Spring (Drum Magazine) | 0.5x5x40mm | 1 | Makers Supply |
STEP 1: Insert hexnuts into the lower frame.

STEP 2: Install Trigger System.

STEP 3: Install the magazine catch.

STEP 4: Insert Bolt and Striker into the Upper Frame, make sure you insert a hexnut into the bolt before installing.

STEP 5: Secure the upper frame to the lower frame assembly.

STEP 6: Insert hexnuts into connector blocks, then slide into slots in the upper frame.

STEP 7: Assemble the charging handle and fasten it to the bolt.

STEP 8: Insert the barrel into the barrel cover.

STEP 9: Attach the barrel cover assembly to the frame assembly and secure it in place. Slide muzzle over the tip of the barrel, then attatch the carry handle to the two tabs.

STEP 10: Assemble the Grip and stock as shown, glue may be required to secure some parts.

STEP 11: Insert the the compression springs into the rear slots and then attach the stock/grip assembly.


DRUM MAGAZINE:


Comment & Rating (85)