


Print Profile(2)

Bill of Materials


Description
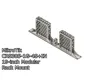
A 19-inch, 2-part, modular rack mount for the MikroTik CRS305-1G-4S+IN switch.
I have included two variations of this model, one meant to mount the switch if you already installed its rubber feet, and another for those who haven't installed them. To identify those models, look for “feet” in the file name or build plate description.
There are also variants with and without keystone slots. To identify those with keystone holes, look for “keystone” in the file name or build plate description.
This switch can get really hot while operating. Do not print it in PLA/PLA+ or PETG. Use filaments like ABS, ASA, PA or PC.
This mount is part of a 19-inch modular rack mount system I designed, you can mix and match the modules with other mounts. Take a look at my models here to find out the other 19-inch mount modules.
Boost Me (for free)
I make these models for free, and it takes time and material to test them out. Your boost will help me keep releasing new models! Thank you!
Membership
Want to support me further? Or sell my prints? Please consider one of my membership tiers. Thank you!
Do you like my models? Consider buying me a coffee ;)

Parts
- 3x M5 screws (Min size: 10mm, max size: 16mm).
- 3x M5 hex nuts.
Assembly
OBS.: The modules used in this tutorial are only for illustration purposes, and I'm using it for the whole series. It might not reflect the models you download at this page.
- To assemble the parts, insert the 3 screws into the Right module.

- Then align it with the Left module.

- After that, insert the hex nuts in the screws, and using a screwdriver or Allen key.

- Tighten the screws until you start feeling resistance and the nuts are securely into place. After that, you can install the mount in your rack.

Print Settings
Rafts:
Doesn't Matter.
Supports:
No.
Resolution:
0.2 or 0.24
Walls/Perimeters:
At least 3.
Infill:
20% or more
Filament:
ABS/ASA/Nylon/PC
Comment & Rating (4)