Search models, users, collections, and posts

Parametric Lens Cap – 50 to 95mm

Print Profile(2)

All
P1S
X1 Carbon
X1
A1
H2D
P1P
X1E
H2D Pro
H2S
P2S
H2C
X2D
A2L
A1 mini

A1 - P1S - X1 - 0.2mm layer, 2 walls, 15% infill
Designer
31.2 h
13 plates
5.0(21)

A1 mini - 0.2mm layer, 2 walls, 15% infill
Designer
35.5 h
20 plates
4.8(6)

Open in Bambu Studio
Boost
283
835
49
27
1.2 k
572
Released 

Description

!READ DESCRIPTION!


The Ultimate Lens - now parametric!


For a prebuilt 3mf file with many logos and sizes check out my original model or use the print profiles: 


One lens cap prints in roughly 35 minutes! Read instructions below.

Fits most common camera lenses. Just look for your filter diameter and choose the right size in the parametric editor. 

Combine different colors for unique styles or add custom text.


Suitable for filter sizes from 50mm to 92mm.


Materials:

I recommend printing in PET-G for durability and less risk of material fatigue, but PLA also seems to work fine.


Printing (IMPORTANT!): 

After editing the filter size and importing into Bambu Studio make sure to split the object first and adjust the orientation. Then you can choose different colors for the cap and the slider or add custom text.


For custom text:

Use the text tool on the blank cap. Set the Thickness to 0.05 and the Embedded depth to 0.6. Choose the desired color for the text.


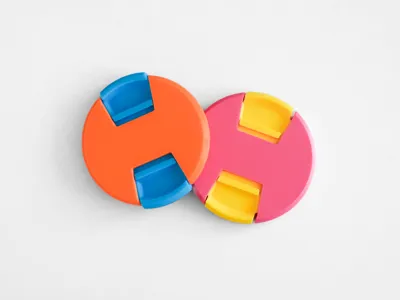
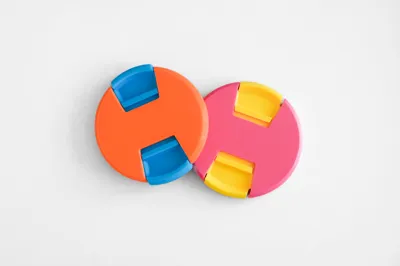
Assembly (see pictures): 

Step 1:

Push the slider together while pressing one side into the cap. 


Step 2: 

Push the other side into the cap. With a bit of force it should click securely into the cap.


Step 1
Step 2


Enjoy!


Boost Me (for free)

If this was useful to you, consider leaving me boost!

Comment & Rating (49)

(0/1000)

Print Profile
A1 - P1S - X1 - 0.2mm layer, 2 walls, 15% infill
Good. So cute.
1
Reply
hello, how did you split the two parts? thank you
(Edited)
Show original
1
Reply
Replying to @user_680640829 :
You do it by clicking on 'O' / 'Split to objects' like you can see on the photo down below ;)
0
Reply
Print Profile
A1 - P1S - X1 - 0.2mm layer, 2 walls, 15% infill
🫶
1
Reply
how do I split the two parts? I'm new to 3D printing, thanks
Show original
0
Reply
Replying to @user_680640829 :
You do it by clicking on 'O' / 'Split to objects' like you can see on the photo down below ;)
0
Reply
Hello there! I noticed an issue when I cranked it down to the minimum value, attached as images for the correct and "faulty?". Hope I could help raising this! Will be printing this in the future to replace my lost lens cap!
(Edited)
1
Reply
I like it very much
1
Reply
Boosted
nice print
0
Reply
Boosted
It sits really well on my 72 lens. The mechanism slides well. Thank you for the model! Printed with PETG
0
Reply
Print Profile
A1 - P1S - X1 - 0.2mm layer, 2 walls, 15% infill
Top quality. Thanks for the model!!! 😁
0
Reply
Print Profile
A1 mini - 0.2mm layer, 2 walls, 15% infill
🙌
0
Reply
Print Profile
A1 - P1S - X1 - 0.2mm layer, 2 walls, 15% infill
Printed well and i will see hwo it works later but super coop a can replace and old lost cap
0
Reply
Trying to generate a 52mm and it creates a layer over the interior locking mechanism. 67mm generates fine.
1
Reply

License

This user content is licensed under a Standard Digital File License.

You shall not share, sub-license, sell, rent, host, transfer, or distribute in any way the digital or 3D printed versions of this object, nor any other derivative work of this object in its digital or physical format (including - but not limited to - remixes of this object, and hosting on other digital platforms). The objects may not be used without permission in any way whatsoever in which you charge money, or collect fees.