
Zabuza Sword - Kubikiribocho Cosplay Replica
Print Profile(4)



Description
First read the instructions before printing.
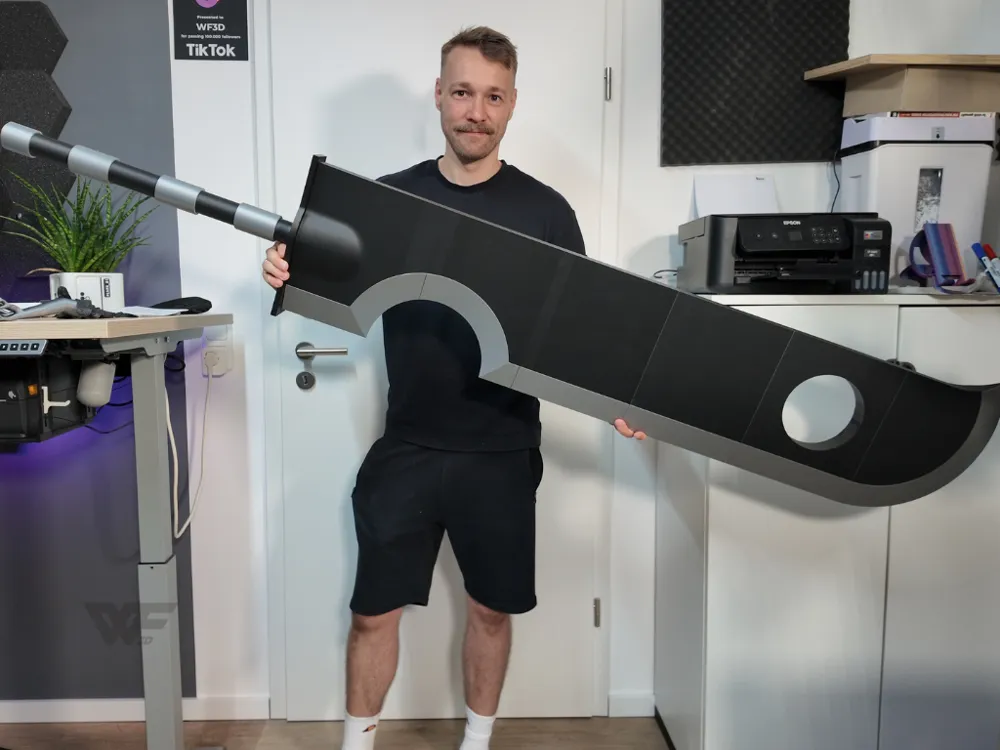
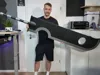
This is a multipart 3D model of Zabuza’s legendary Kubikiribōchō sword – fully printable without any wood or metal reinforcements. All structural connections rely on 3D-printed plastic parts, using hex-shaped pins that slot into matching holes inside each segment. The sword is about 1,8 m (6 ft) tall.
Boost Me (for free)
Boost if you like giant swords! :D
🛠️ Important Assembly Notes
• Blade:
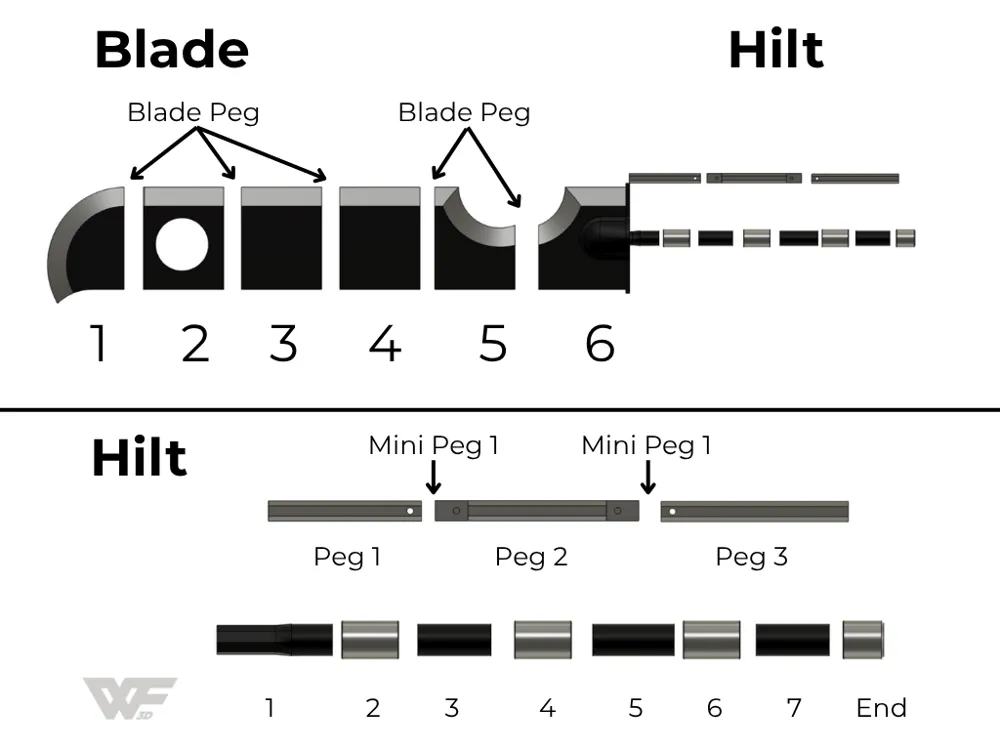
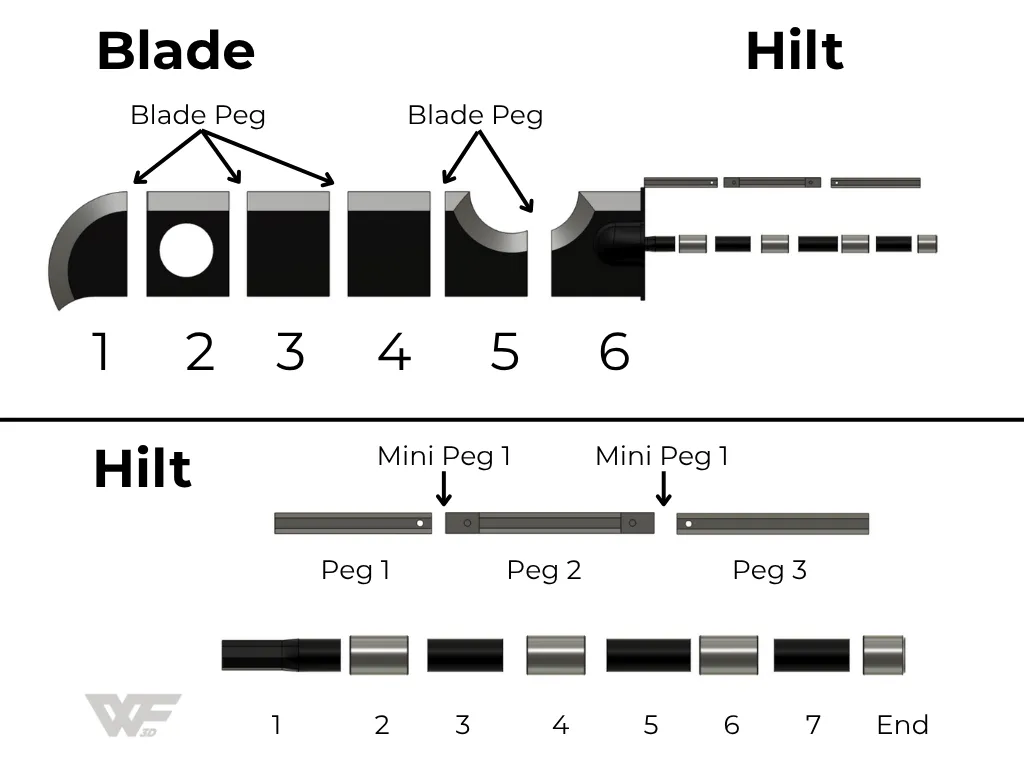
The blade is split into 6 parts and connects via round pegs (⌀ 30 mm, length 100 mm) that insert into 50 mm deep sockets.
⚠️ You need to print the peg 10 times!
Each blade segment is uniquely keyed – do not swap their order, or alignment issues will occur. Always dry-fit the full blade before gluing!
• Handle:
The handle consists of alternating black and silver decorative cylinders, starting with black and ending with silver.
Three silver pieces require supports – if you’re using my Bambu Studio Project, all settings are already applied.
The internal diameter is 25 mm, designed to fit either:
- My 3-part hexagonal stiffening rod, joined together with hex pins (mini pegs)
A wooden or plastic dowel, 588 mm long (⌀ 24–25 mm), for extra stability
→ If you’re using a thinner rod, just print an adapter to reduce the inner diameter. It works – I promise ;)
Assembly Tip:
Build the handle step by step:
Start with the first (black) piece, insert a hex pin, slide the next silver part onto it, and glue the pin in place. Then add two or three more handle segments, extend with another hex pin, glue again – and repeat until the handle is complete.
This incremental method ensures better alignment and makes the process easier.
Don’t forget: you’ll need a lot of glue for the handle! (See glue tips below.)
I recommend using construction adhesive (also called grab adhesive or mounting glue – fast tack, cures within 24h) together with superglue.
Mounting Glue recommendation for Germany: https://amzn.to/448OWYQ
Super Glue recommendation for Germany: https://amzn.to/3Gcl6cJ
Superglue alone is not enough. Use plenty of glue to fill the gaps around the pins and provide extra stability – but do not overfill the blade holes. A clean, precise fit is crucial for the blade alignment.
🔩 Tips for Best Results
- Always dry-fit all parts before gluing
- Use strong adhesive, especially on structural joints
- Use mounting glue for the handle for extra durability
- Build the handle in stages, one pin at a time
- Print all connectors (hex pins, pegs, stiffeners) with high perimeters and high infill
License

You shall not share, sub-license, sell, rent, host, transfer, or distribute in any way the digital or 3D printed versions of this object, nor any other derivative work of this object in its digital or physical format (including - but not limited to - remixes of this object, and hosting on other digital platforms). The objects may not be used without permission in any way whatsoever in which you charge money, or collect fees.


Comment & Rating (60)