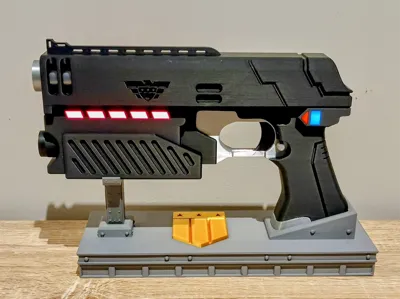
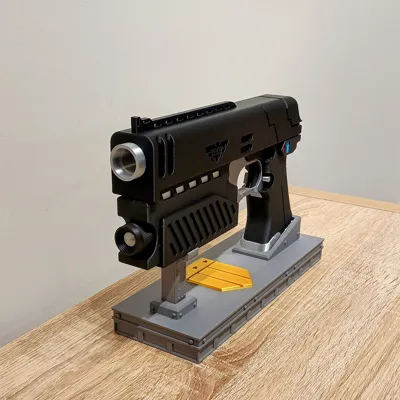
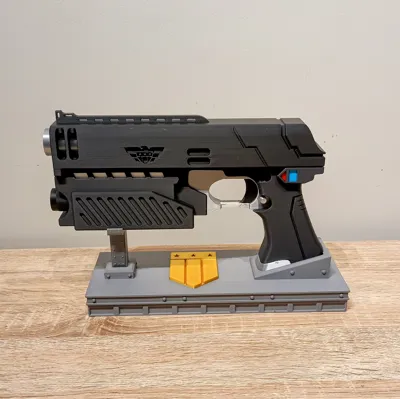
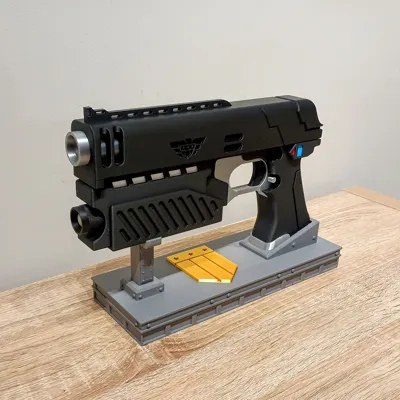
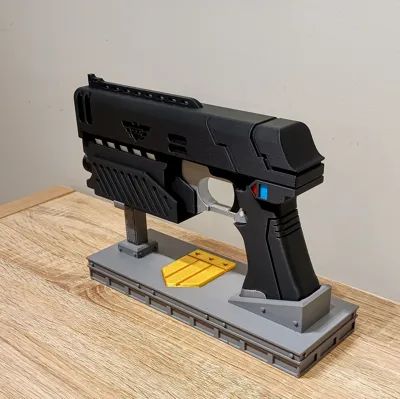
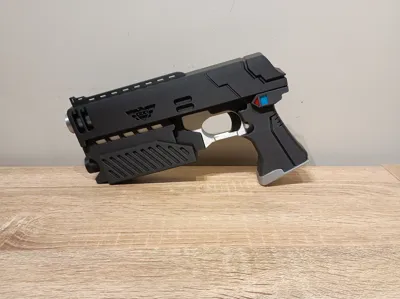
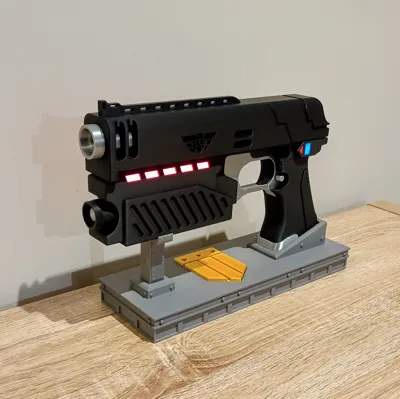
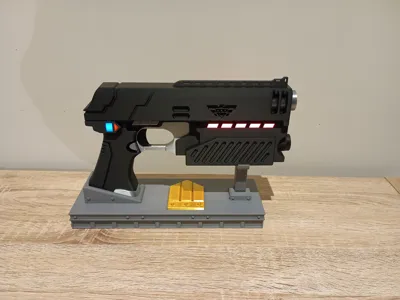
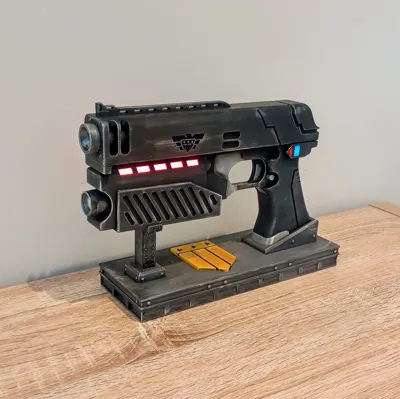
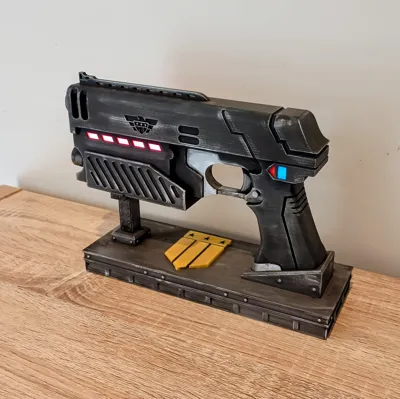
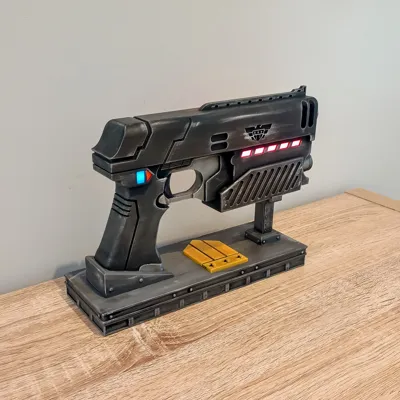
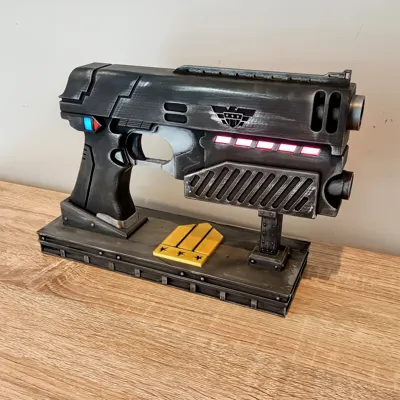
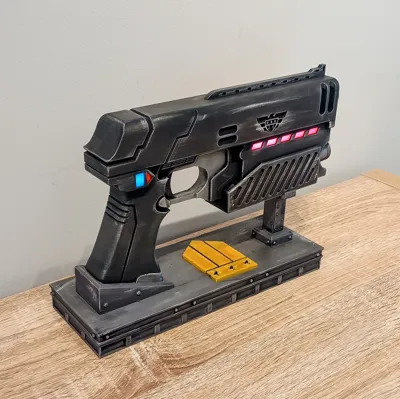
Judge Dredd Lawgiver Mk II (1995 Film Version)


Print Profile(1)


Description
Thanks for checking out my model! Interested in supporting my work or selling prints?
Support Crew – Show some love and help keep the projects flowing
Galactic Maker Foundry – Sell physical prints of my original designs
Foundry License+ – Sell prints and use my photos for listings
🎉 Supporter-only Discord coming soon – get early access, tips, and sneak peeks!
Membership
Join here to support or get a license
Boost Me (for free)
🔫 By order of the Hall of Justice, press that 🚀 Boost button!
Support this model and help bring more law to the MakerWorld sector. Your points help keep justice 3D-printed and free!
Judge Dredd Lawgiver Mk II (1995 Film Version)
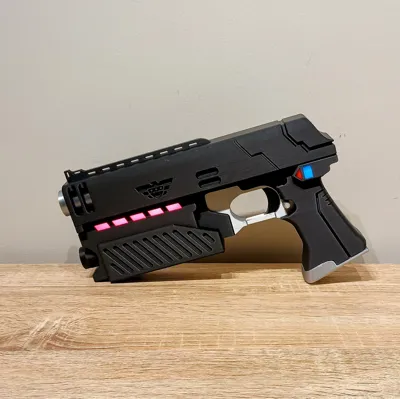
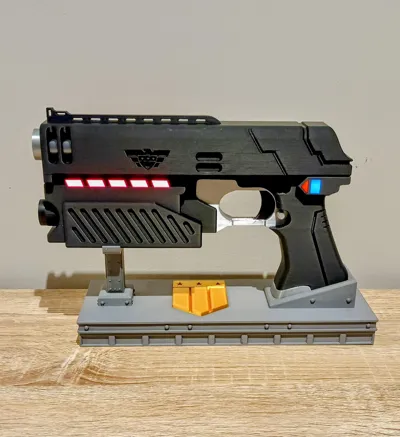
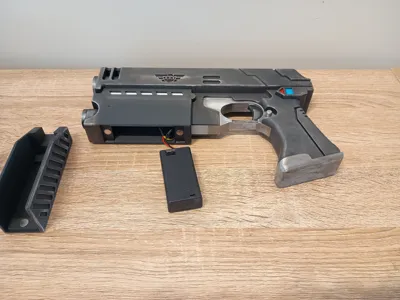
🛡️ Two Versions Included – With or Without Electronics Support!
This is a detailed 3D printable replica of the iconic Lawgiver Mark II as seen in the 1995 Judge Dredd film. Designed to capture the futuristic aesthetic of Mega-City One's most infamous weapon, this prop includes two build options:
🔧 Version 1: Electronics-Ready
This version is designed for hobbyists who want to add functional lights and electronics. Features include:
- LED Support:
- Front barrel has space for 2x 60mm red LED filaments
- Rear indicators can be printed in translucent red and blue and backlit with a single 40mm white LED filament
- Optional: print light elements in white to diffuse the light more evenly
- Power: Runs off a 2xAA battery box with the on/off switch magnetically hidden under the front grip
- Easy Access: Grip is held in place using 6x 8mm x 2mm round magnets for quick battery replacement or recharging
- Functional Trigger: Uses 2x 4mm x 20mm compression springs for spring-loaded trigger action (non-functional, just tactile)
🎨 Version 2: Static Display
Don’t want electronics? No worries. This version replaces LEDs with printable red and blue parts, making it easy to create a great-looking display piece with coloured filament. No soldering required – just print, assemble, and display.
🛠️ Assembly Instructions
- Trigger Assembly
- Insert the trigger into the Trigger Guard, ensuring smooth movement
- Add the 2x 4mm x 20mm compression springs
- Test-fit the Trigger Guard into the Grip (slide it in from the front for easier alignment)
- Once satisfied, glue the flat faces where the guard meets the grip, and add a few drops to the front seams
- Lower Front & Rear Housing
- Glue the Front Lower piece to the Trigger Guard/Grip using 2x 5x5mm pins for alignment
- Add the Rear LED Housing (or non-LED version), inserting diffusers or the triangle/square parts depending on your version
- Install the rear LED cover to reduce light bleed
- Install 40mm White LED filament and secure with a dab of hot glue
- Thread power wires through the tube into the Front Lower section
- Front LED Assembly
- Glue the front diffuser in place, noting the wire cutout
- Insert the 2x LED filaments into the holder:
- Positives to the center, negatives on the outside
- Orient filaments so the brighter side faces the diffuser
- Secure with hot glue to prevent sagging
- Lower the holder into place; it should rest on the diffuser edges—secure with glue in each corner
- Electronics Housing & Wiring
- Route wiring through the hole in the Electronics Cover and glue the cover in place
- This ensures the battery box sits flush and doesn’t interfere with the filaments
- Connect the 2 positives and 3 negatives to the battery box (preferably with built-in switch)
- Test before gluing to confirm everything works
- Magnets & Final Assembly
- Add magnets:
- 1 in each magnet holder
- 2 in each hole of the Foregrip (watch polarity!)
- Glue the holders into the two Front Lower slots
- Attach the Top Slide Lip to the Top Slide (or use the one-piece version) and glue to the top of the grip assembly
- Add Top Barrel and Bottom Barrel pieces, aligning seams downward
- Add Bottom Barrel Round, Mag Bottom (using pins), Safety, Mag Release, and Left Side Button
- Add magnets:
- Finishing Touches
- Weathering can be applied using silver Rub 'n Buff or AK’s Silver Metallic Wax
- Use a cloth wrapped around your finger to lightly apply it to edges, corners, and high-wear areas like the trigger
🏆 Includes a themed display stand inspired by Mega-City One industrial design
📦 Bill of Materials (BOM)
| Item | Quantity | Link |
|---|---|---|
| 2xAA(3V) Battery Holder with Switch | 1 | https://www.aliexpress.com/item/4001270779608.html? |
| 60mm Red LED Filament (3V) | 2 | https://www.aliexpress.com/item/1005007653455791.html? |
| White LED Filament (3V) | 1 | https://www.aliexpress.com/item/1005007653455791.html? |
| 4mm x 20mm Compression Springs | 2 | https://www.aliexpress.com/item/1005006870296781.html? |
| 8mm x 2mm Round Magnets | 6 | https://www.aliexpress.com/item/1005008882136145.html? |
| Hook-up Wire (26AWG) | As needed | https://www.aliexpress.com/item/4001283806251.html? |
| Hot Glue | As needed | https://www.aliexpress.com/item/1005008055271799.html? |
| CA Glue (Super Glue) | As needed | https://www.aliexpress.com/item/1005003643576389.html? |
| Solder 60/40 | As needed | https://www.aliexpress.com/item/1005008695639704.html? |
| Soldering Iron | 1 | https://www.aliexpress.com/item/1005007099216072.html? |
License
You shall not share, sub-license, sell, rent, host, transfer, or distribute in any way the digital or 3D printed versions of this object, nor any other derivative work of this object in its digital or physical format (including - but not limited to - remixes of this object, and hosting on other digital platforms). The objects may not be used without permission in any way whatsoever in which you charge money, or collect fees.
Comment & Rating (45)