Keyball 61 Case, Tenting Legs, and Gridfinity Base


Print Profile(1)

Description
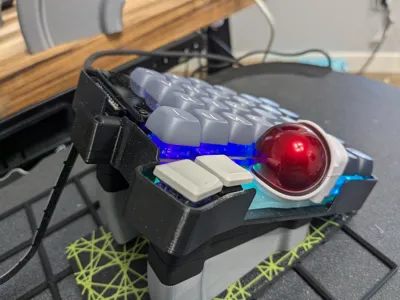
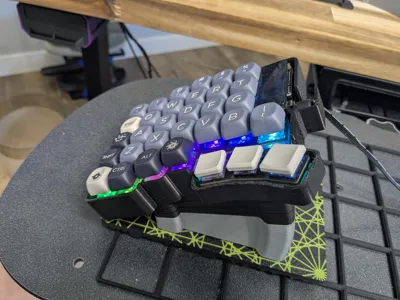
This is a case I modeled from for the Keyball61 keyboard by HolyKeebs. I started with the PCB designs for the keyboard, imported them into Fusion 360, and modeled a case to fit it very precisely.
This case is designed to just drop the keyboard with an acrylic base into it directly. It does not screw in or anything, it is just for an additional layer of protection around the outside and the ability to tent the keyboard by attaching legs.
Key Features and Design Highlights
This Keyball61 case offers innovative features for enhanced usability and customization:
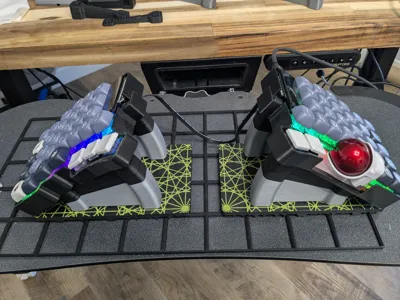
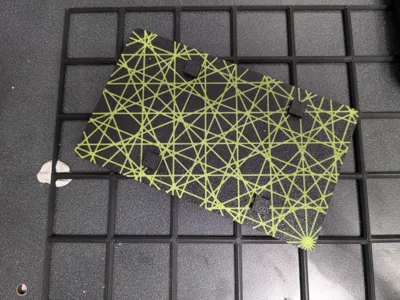
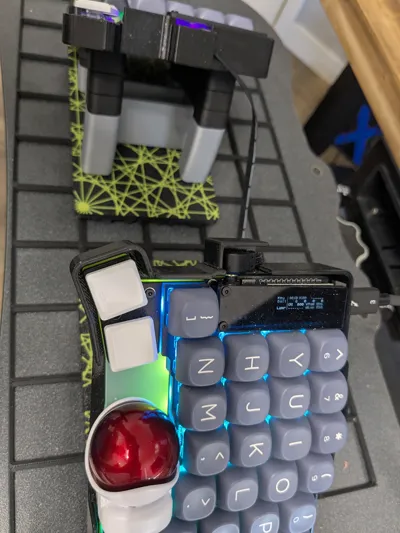
- Versatile Gridfinity Base Platform: The case incorporates a Gridfinity-compatible base that provides incredible flexibility and precision positioning with no sliding. This base features four different orientation angles allowing you to rotate the entire keyboard at various positions on your Gridfinity setup. It can be placed every half Gridfinity unit for precise placement. The base features alignment lines on the top that allow you to easily line them up with the grid below in order to get the exact placement you need.
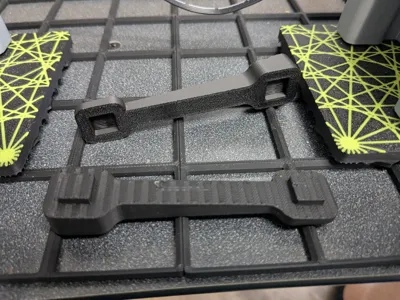
- Modular Tenting Legs with Adjustable Angles: The case utilizes angled tenting legs with integrated posts. These posts allow you to securely attach multiple legs together, providing a stable and customizable tenting solution. The legs themselves are designed with specific angles to achieve four different tenting angles for ergonomic comfort.
- Seamless Leg-to-Case Attachment: The tenting legs attach directly into the bottom of the 3D printed keyboard case using the same peg system found on the Gridfinity Base Platform. This ensures a secure and consistent connection.
- Tool-Free Assembly: The design prioritizes ease of use. Both the keyboard insertion and leg attachment are tool-free, allowing for quick setup and adjustments.
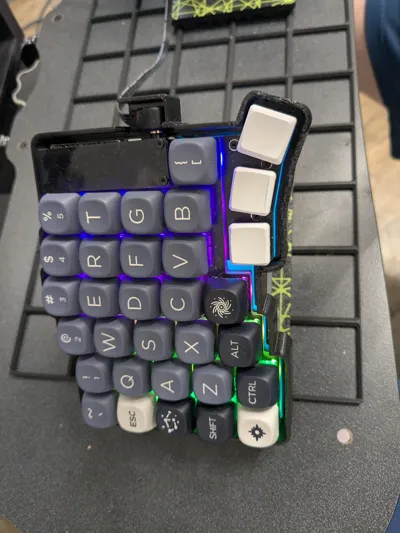
- Enhanced Protection: Beyond its tenting capabilities, the case provides a robust outer shell, offering an extra layer of protection for your Keyball61 keyboard.
Printing and Assembly Tips
- For best results, print this case with your preferred filament (PLA and PETG are good choices). Ensure your printer is well-calibrated for accurate dimensions, especially for the peg and hole tolerances.
- This whole set is designed to be printed without supports. In order to do this on the Gridfinity Base Platform, the studs that the tenting legs attach to are printed as separate pieces. Glue the ends with the slanted walls into the spaces on the base.
- There is a plate with just studs, spaced at the appropriate positioning. These studs can be attached to any other model with a flat side if you want to use the keyboard on some other type of surface. Tenting legs or the openings in the keyboard case can attach directly to whatever surface you attach them to using the studs.
- The model is designed for the Keyball61 with the ball on the right side. You can simply mirror the case models before printing if you have the ball on the left side.
- The Gridfinity Keyboard Base Platform is designed so the corner with all the lines converging into a design that looks like an * goes in toward the center.
I have some future improvements in mind for this case. Be sure to check back occasionally to see what additional features have been added!
I'd love to see your prints and hear about your experience with this Keyball61 case! Feel free to share your makes and any modifications you come up with.
Comment & Rating (0)