
AMS 1 & 2 Pro & HT Modular Sliding Stacking System
Print Profile(14)


Bill of Materials
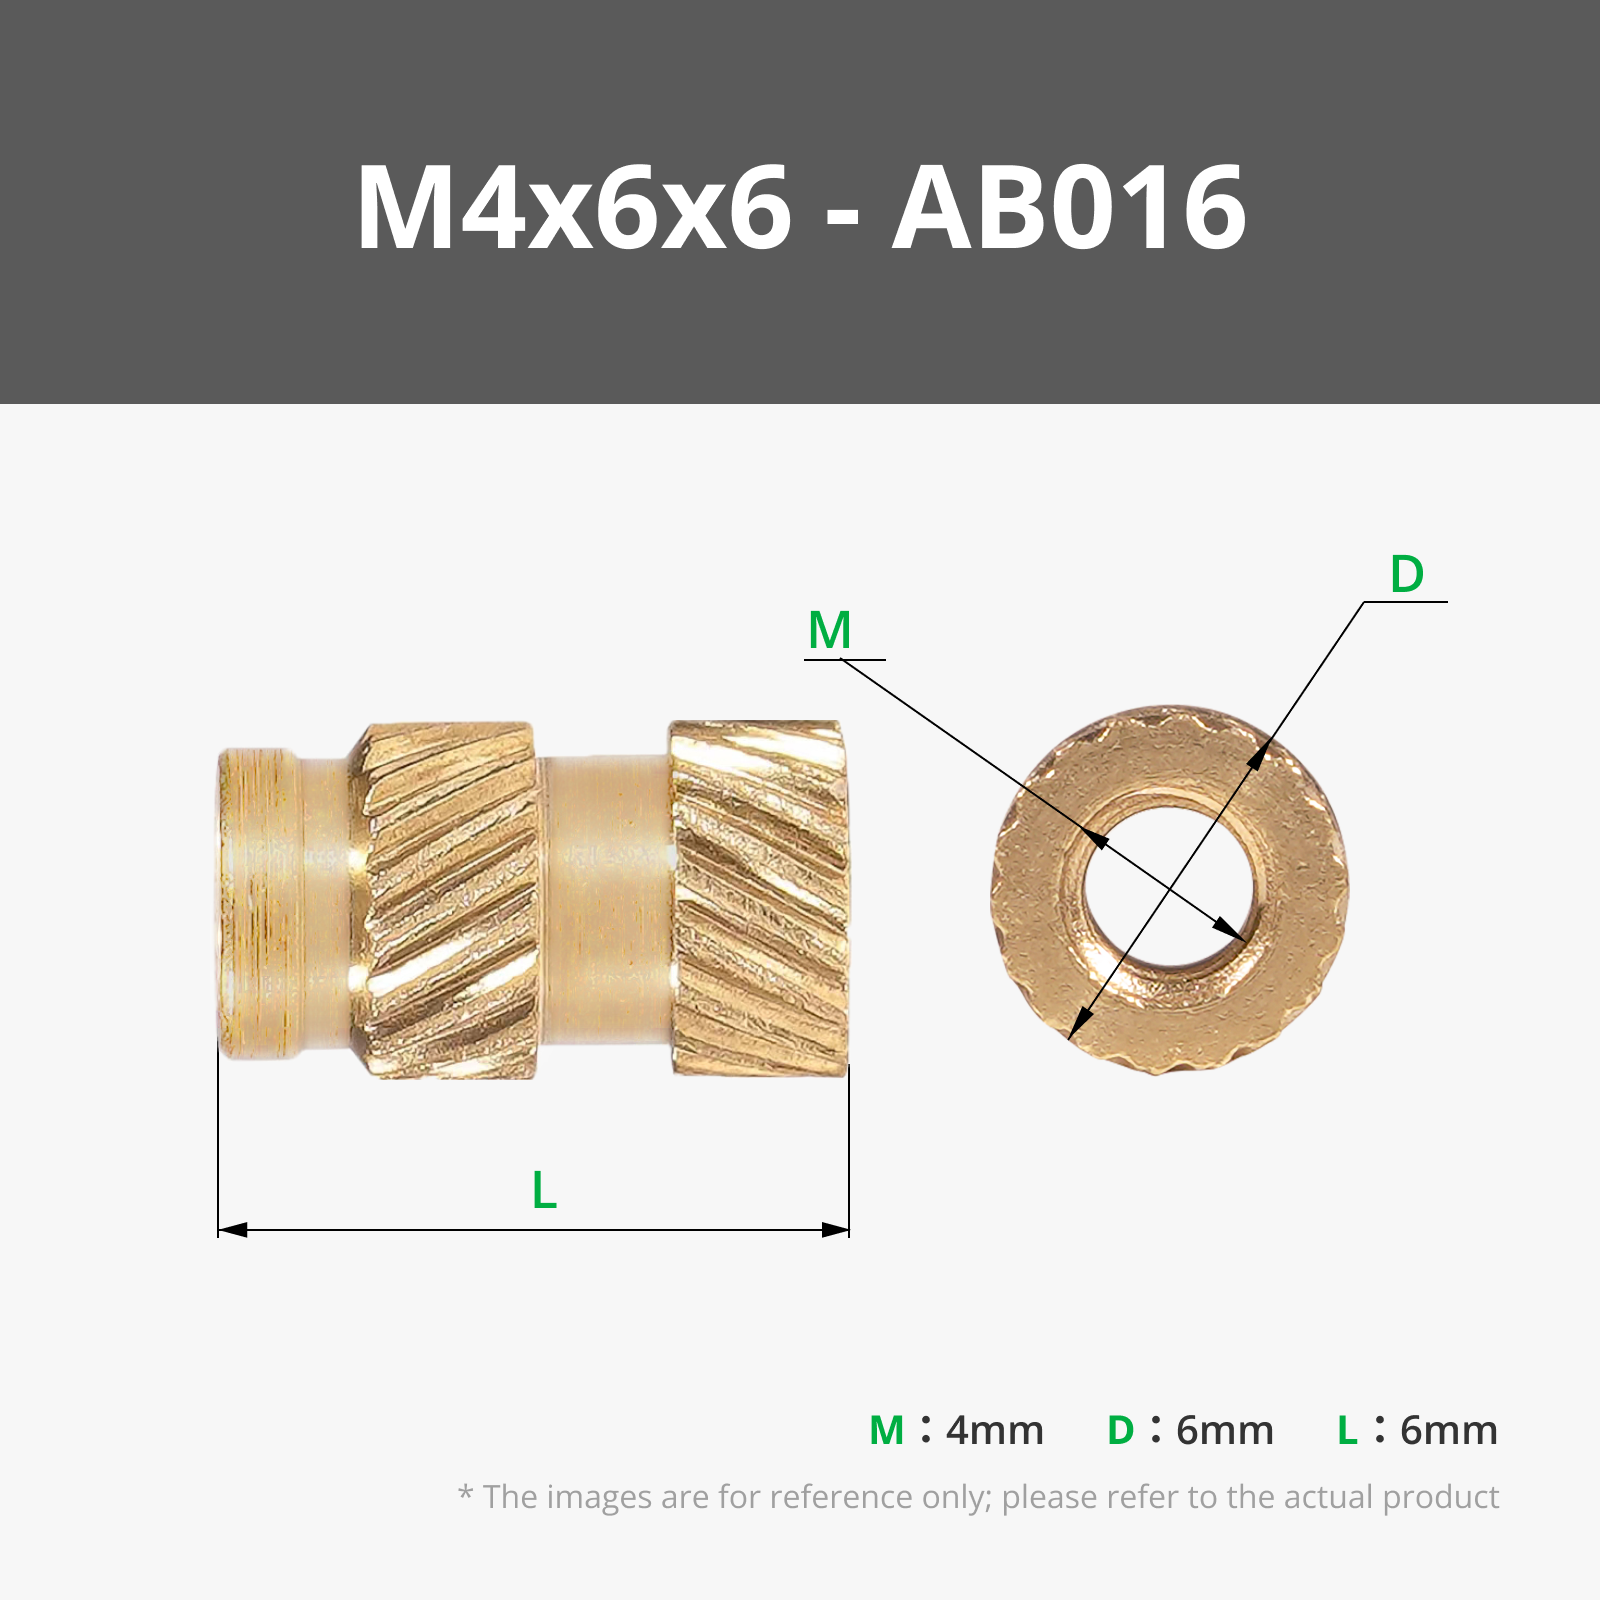


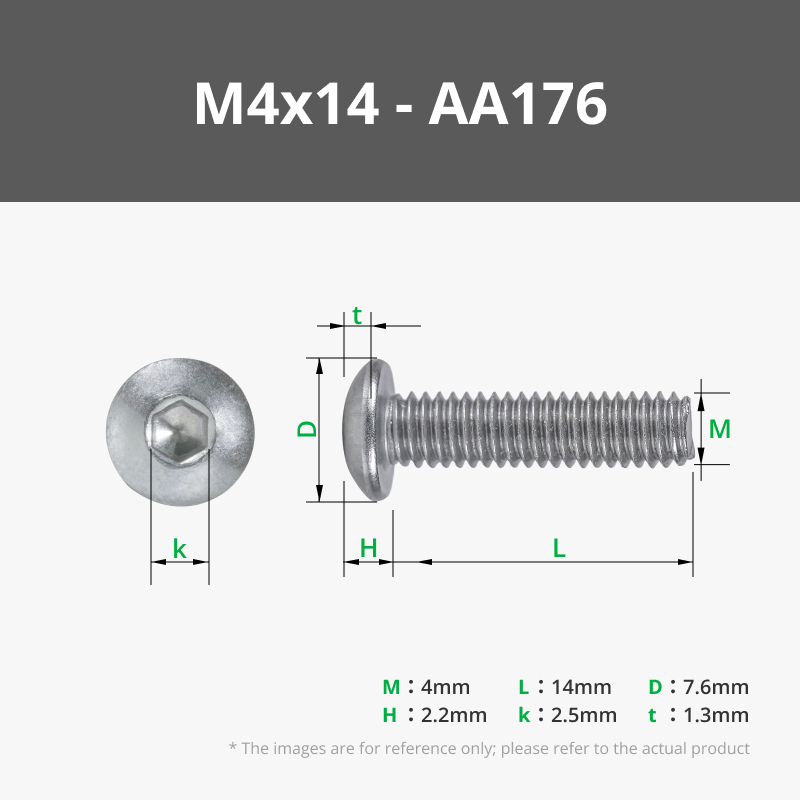


Description
Boost Me (for free)
Greetings! I am a maker with a passionate dedication to design and innovation. Through 3D modeling and printing, I translate concepts into tangible realities. Your support enables me to create elegant, practical solutions! Ways to Contribute: •Experiment with My Designs: Test them and provide valuable feedback. • Spread the Word: Share my creations within your network. • Collaborate or Offer Encouragement: Your support fuels my creative pursuits! Thank you!
Related Extended Design
AMS 1 & 2 Pro & HT 1 layer Holder
Introduction
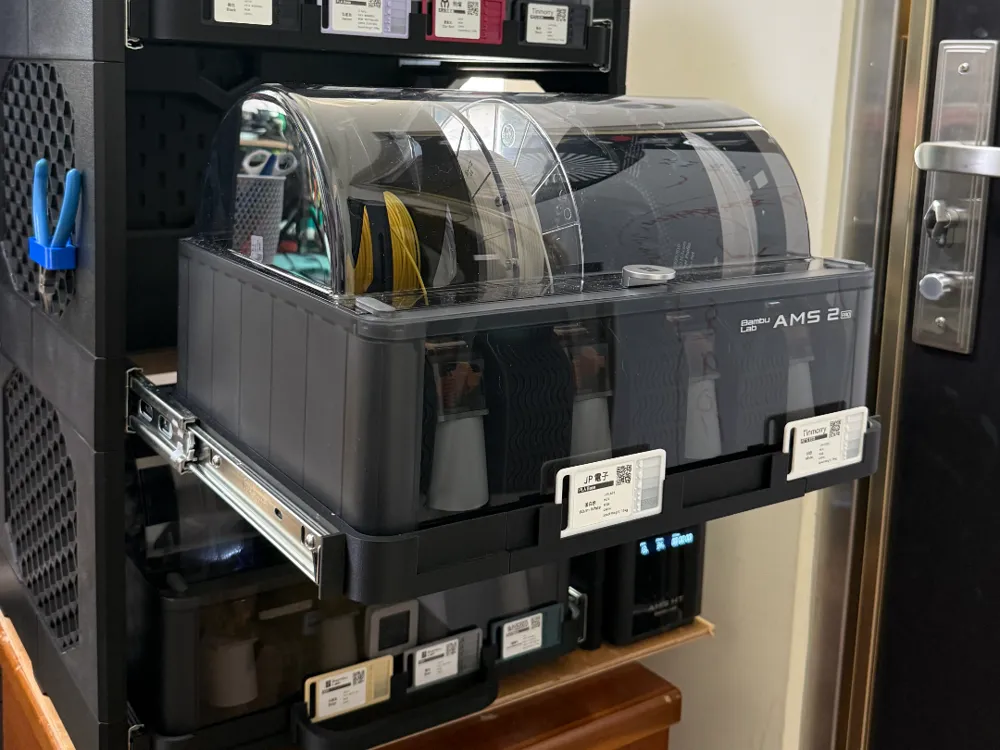
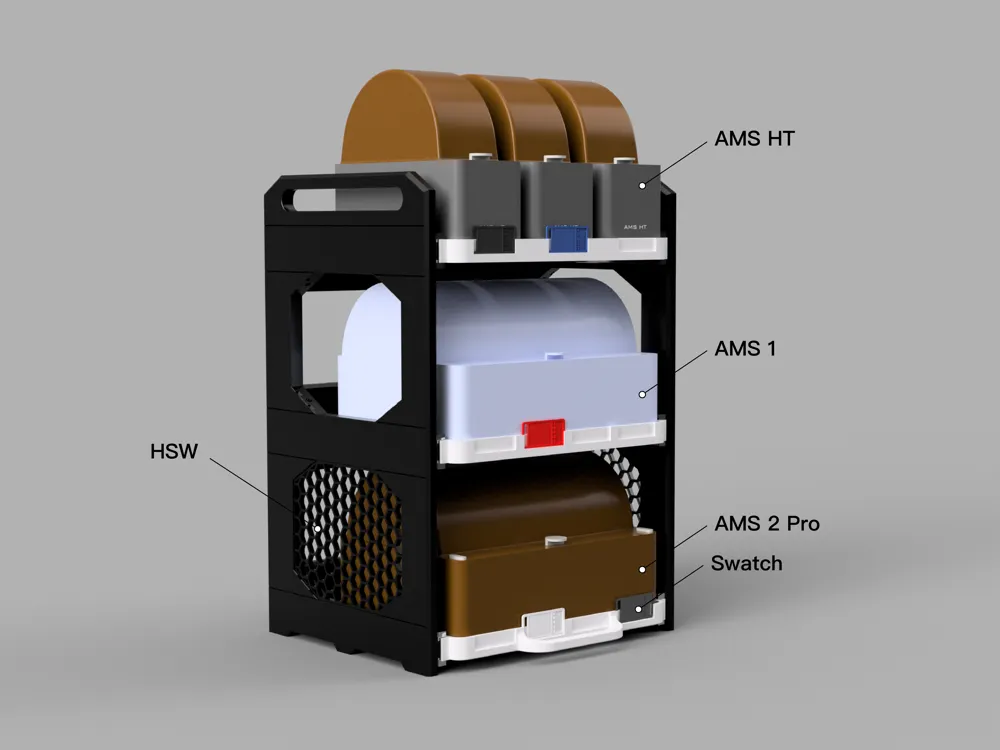
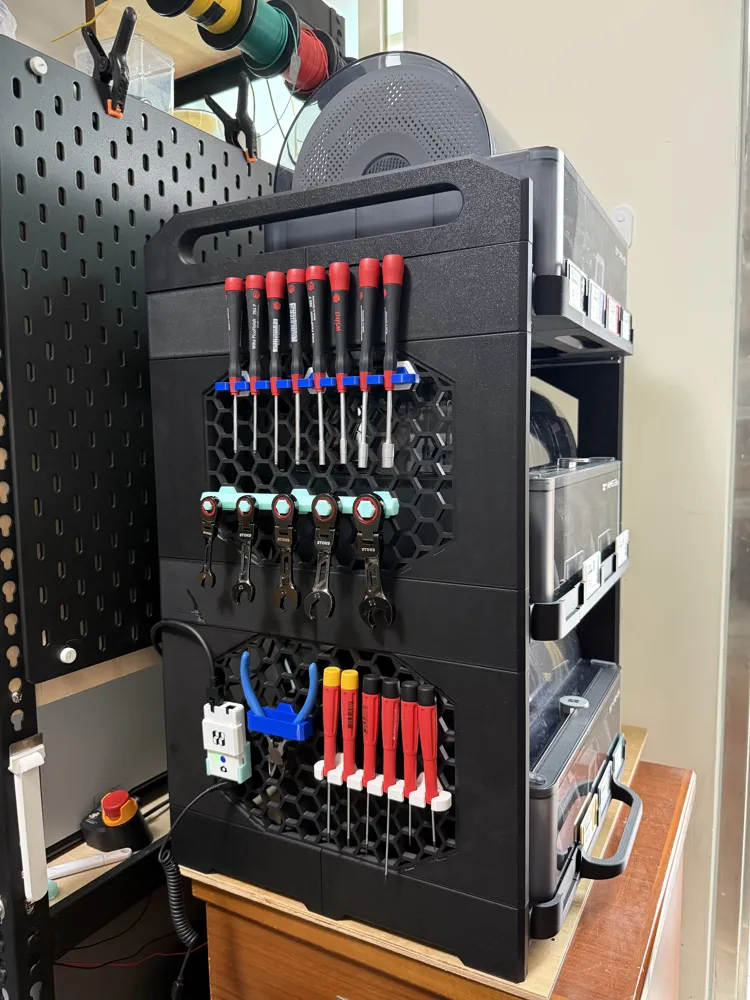
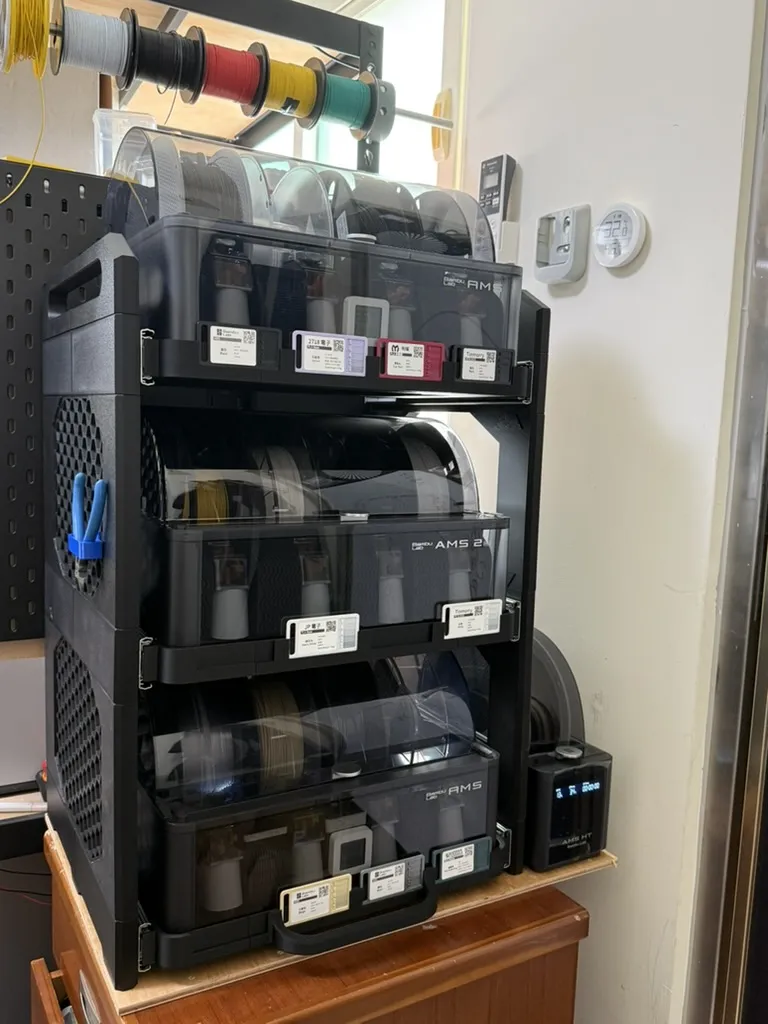
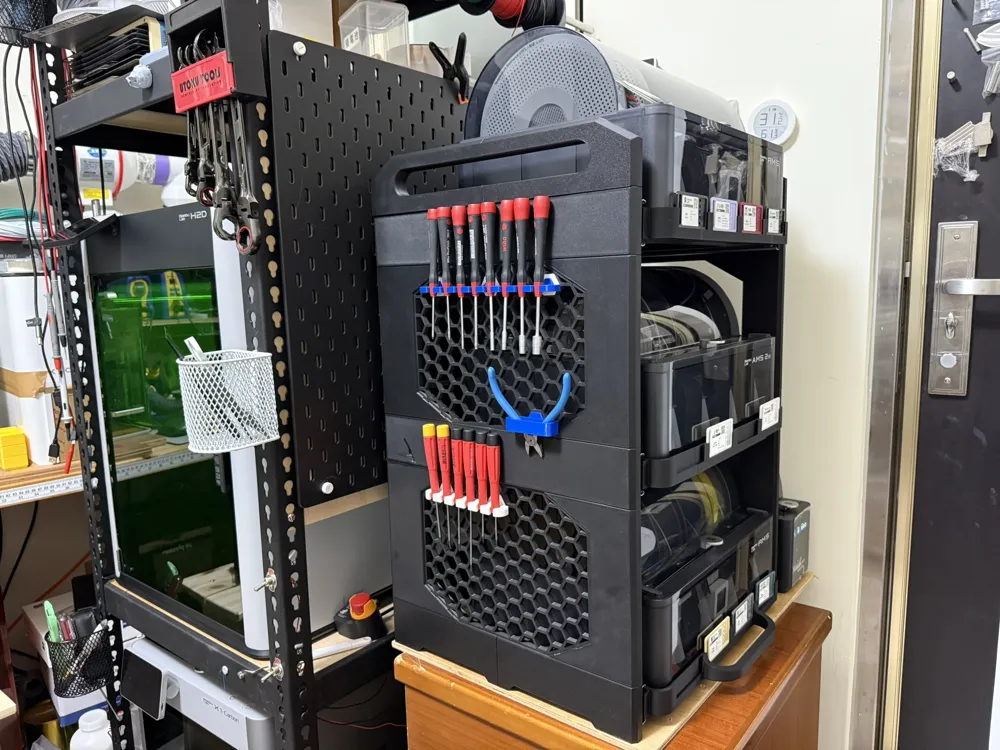
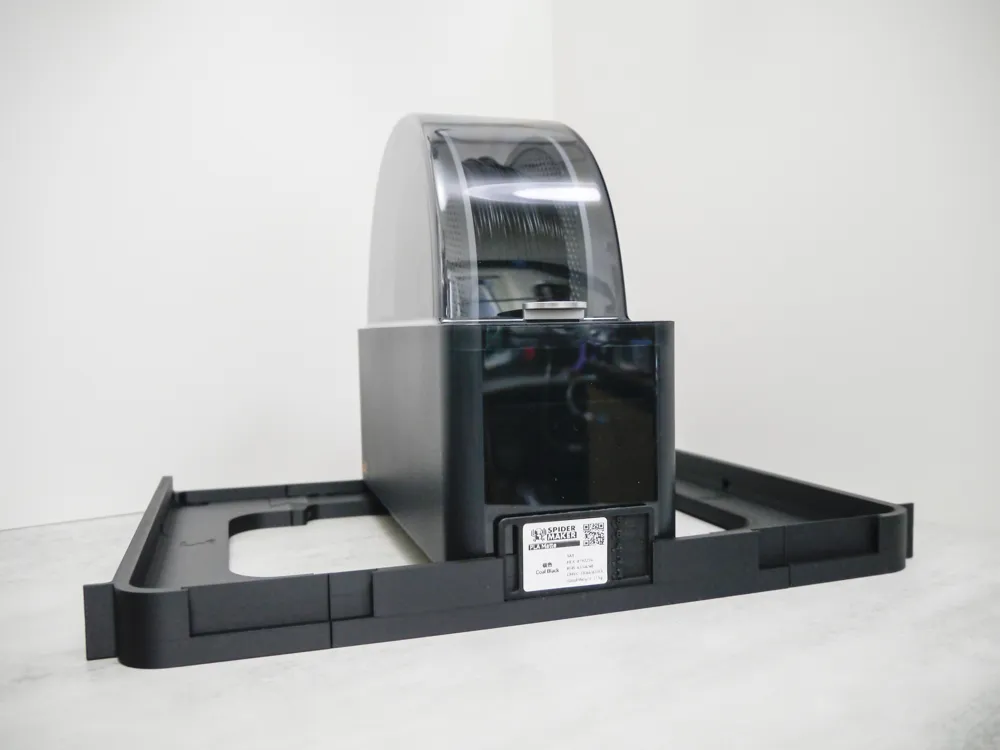
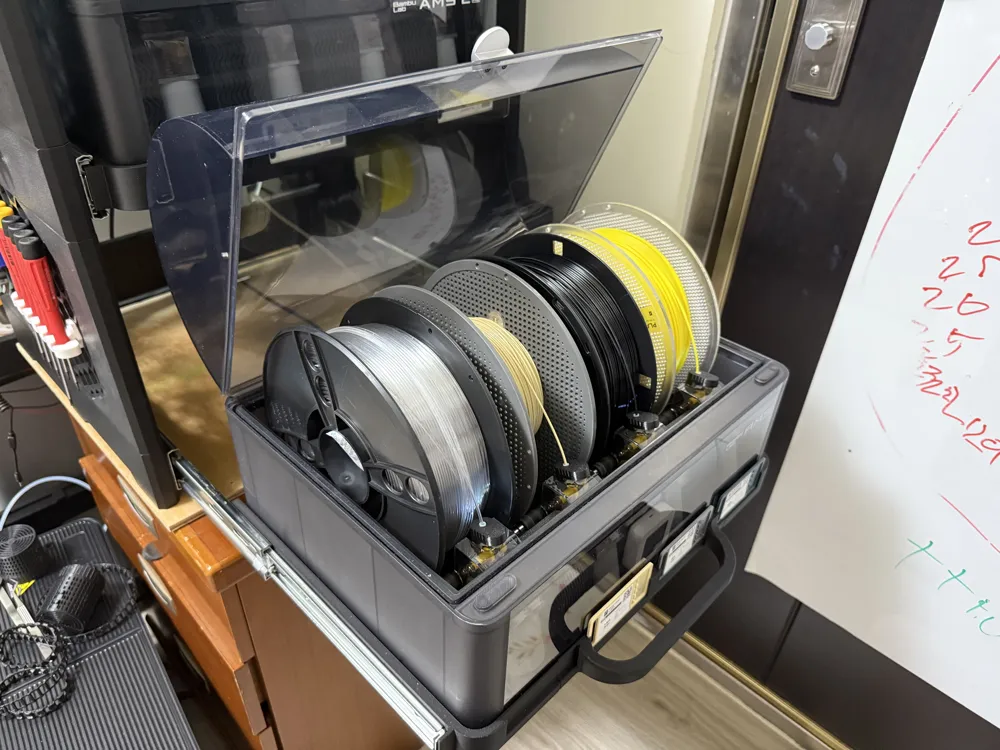
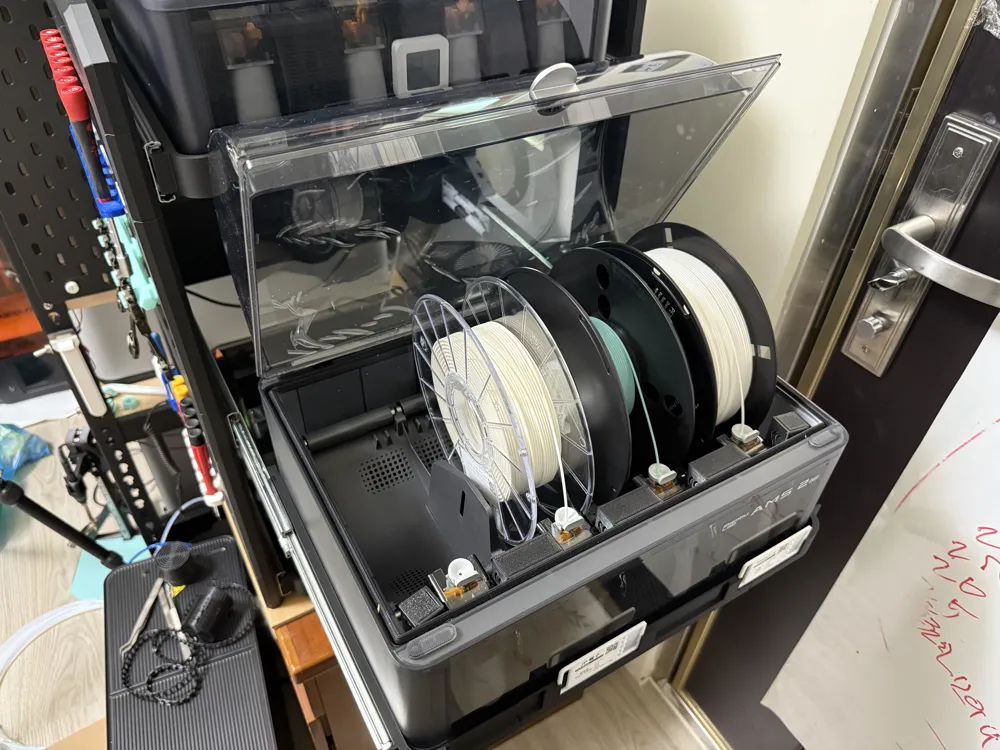
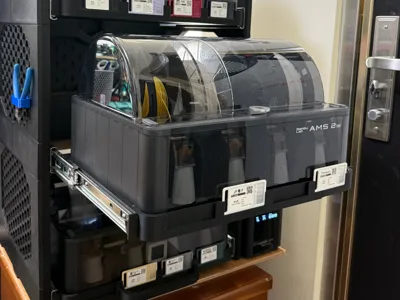
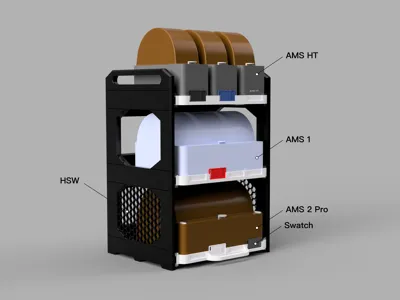
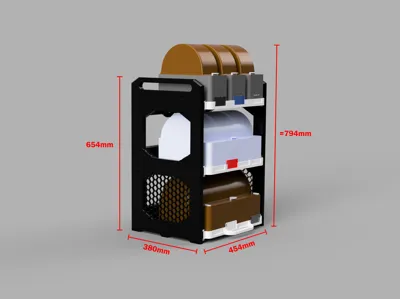
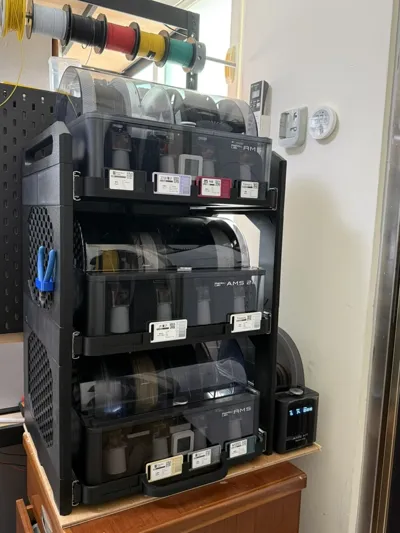
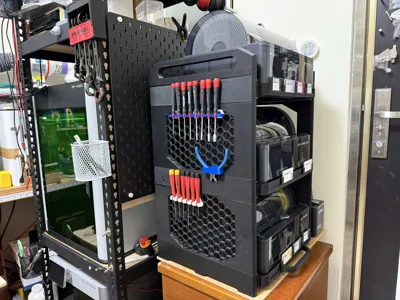
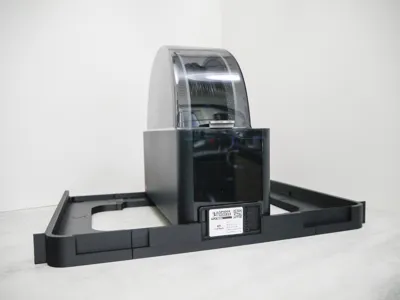
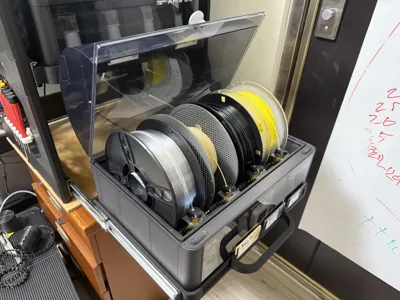
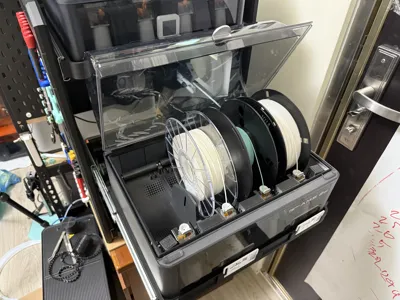
This modular stacking system is specifically designed for Bambu Lab AMS, AMS 2 Pro and AMS HT, AMS HT. Featuring drawer-style sliding trays, it allows multiple AMS units to be stacked vertically with minimal height while maintaining easy access and excellent stability.
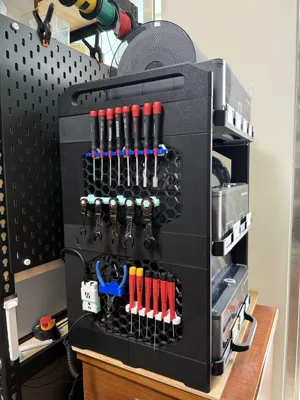
The system is fully compatible with the Honeycomb Storage Wall (HSW) standard, offering flexible organization for tools and filament. Compatible wall mounts and accessories can be found here:
https://makerworld.com/en/search/models?keyword=Honeycomb
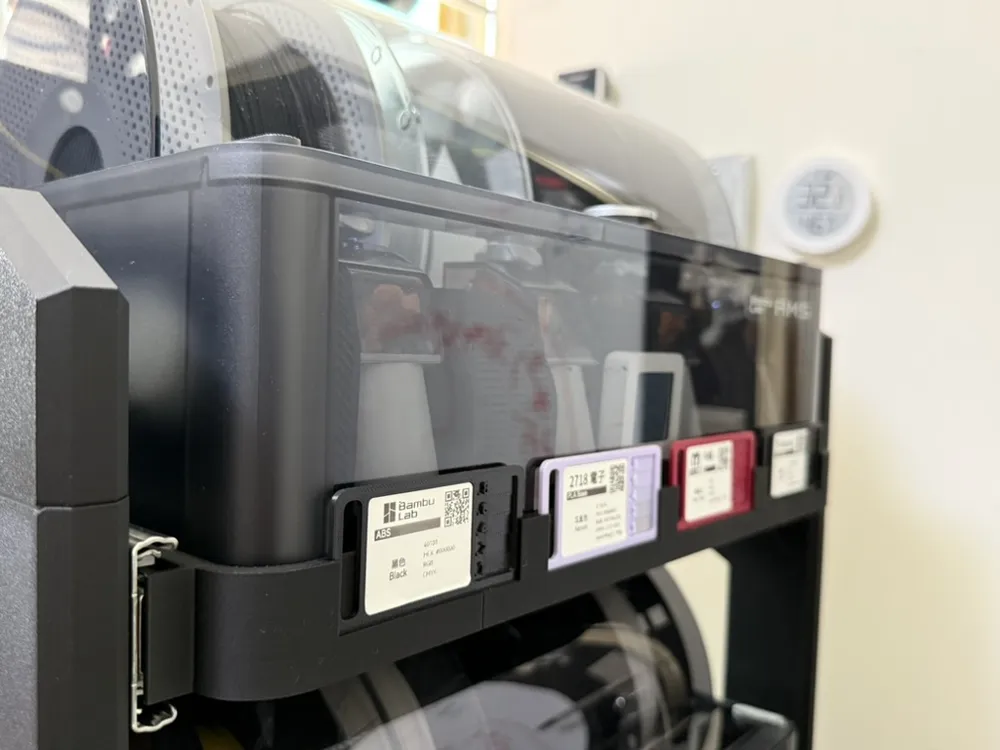
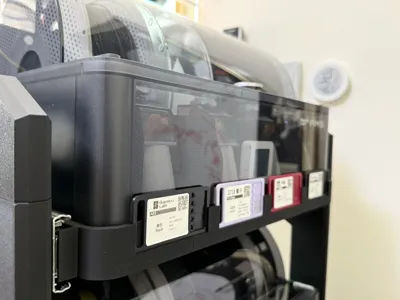
Each AMS tray includes a dedicated holder for filament swatches (75mm width supported), allowing clear labeling and efficient material identification, especially useful for multi-material setups.
You can find the supported filament swatch sample at the link below.
https://makerworld.com/en/models/70155-filament-sample-card#profileId-74478
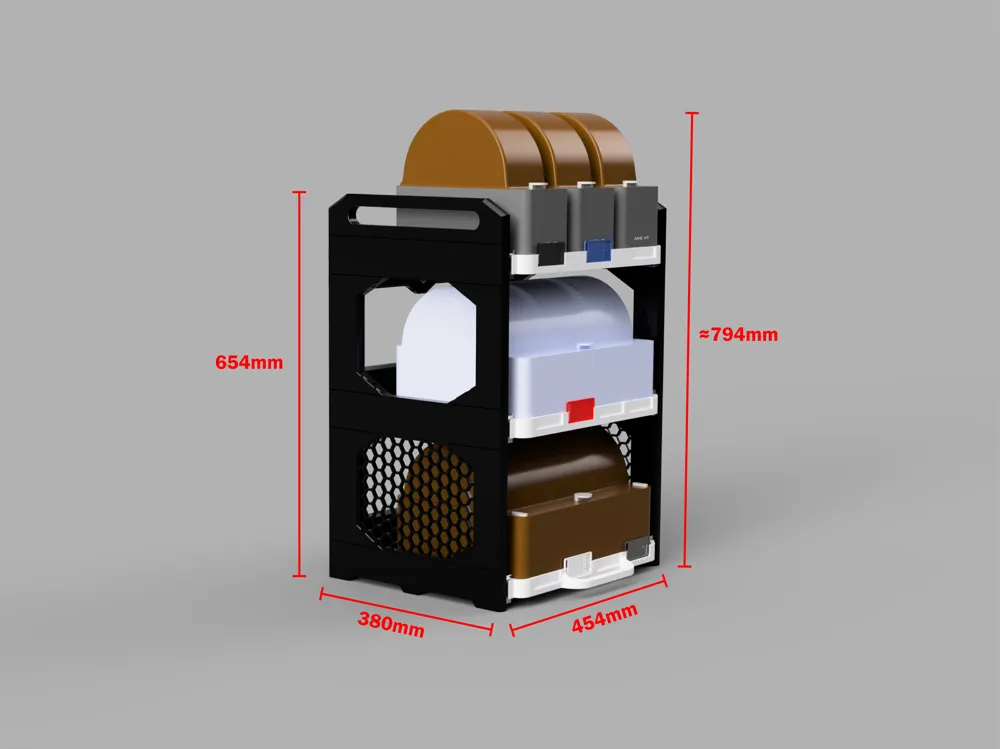
Stacking is virtually unlimited. Whether it’s 1, 2, 3, 4, or more layers, this system can be expanded to build a high-density multi-AMS workstation tailored to any workspace.
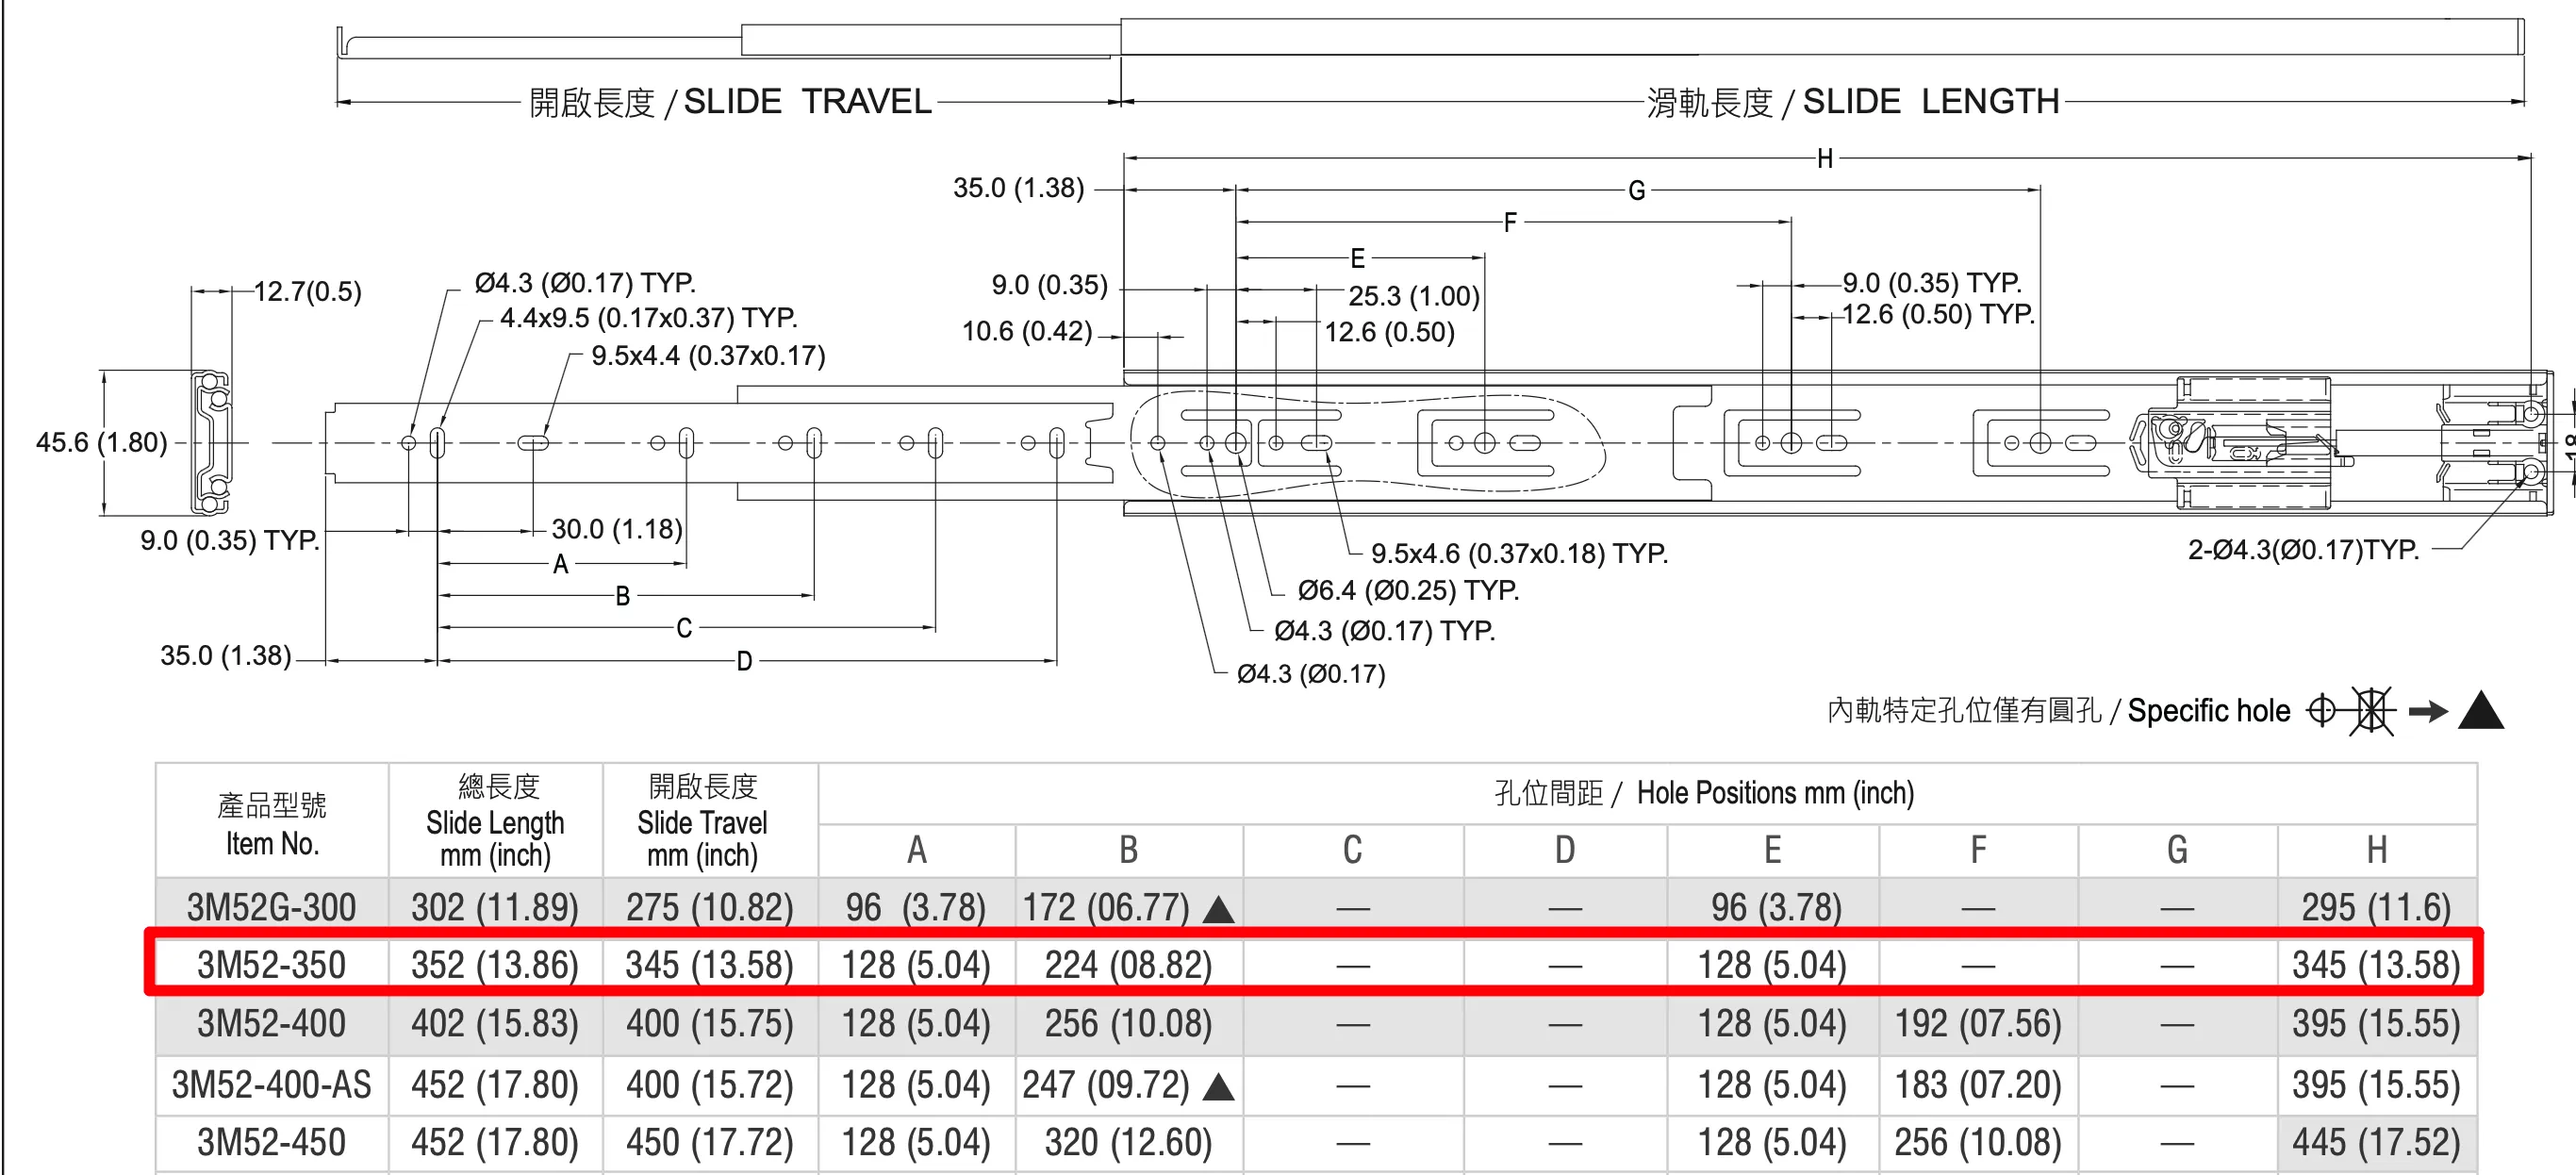
The design is based on the Taiwan-made King Slide® 3M52-350 (14-inch) rail system. STEP files for trays and rail mounts are available for download, enabling users to adapt the design for alternative rails. Custom rail specifications are welcome, and assistance with design modification can be provided upon request.
Amazon Purchase: Link
King Slide® 3M52-350 (14-inch) Regional Purchase Link
Taiwan Purchase: Link
Australians Purchase: Link
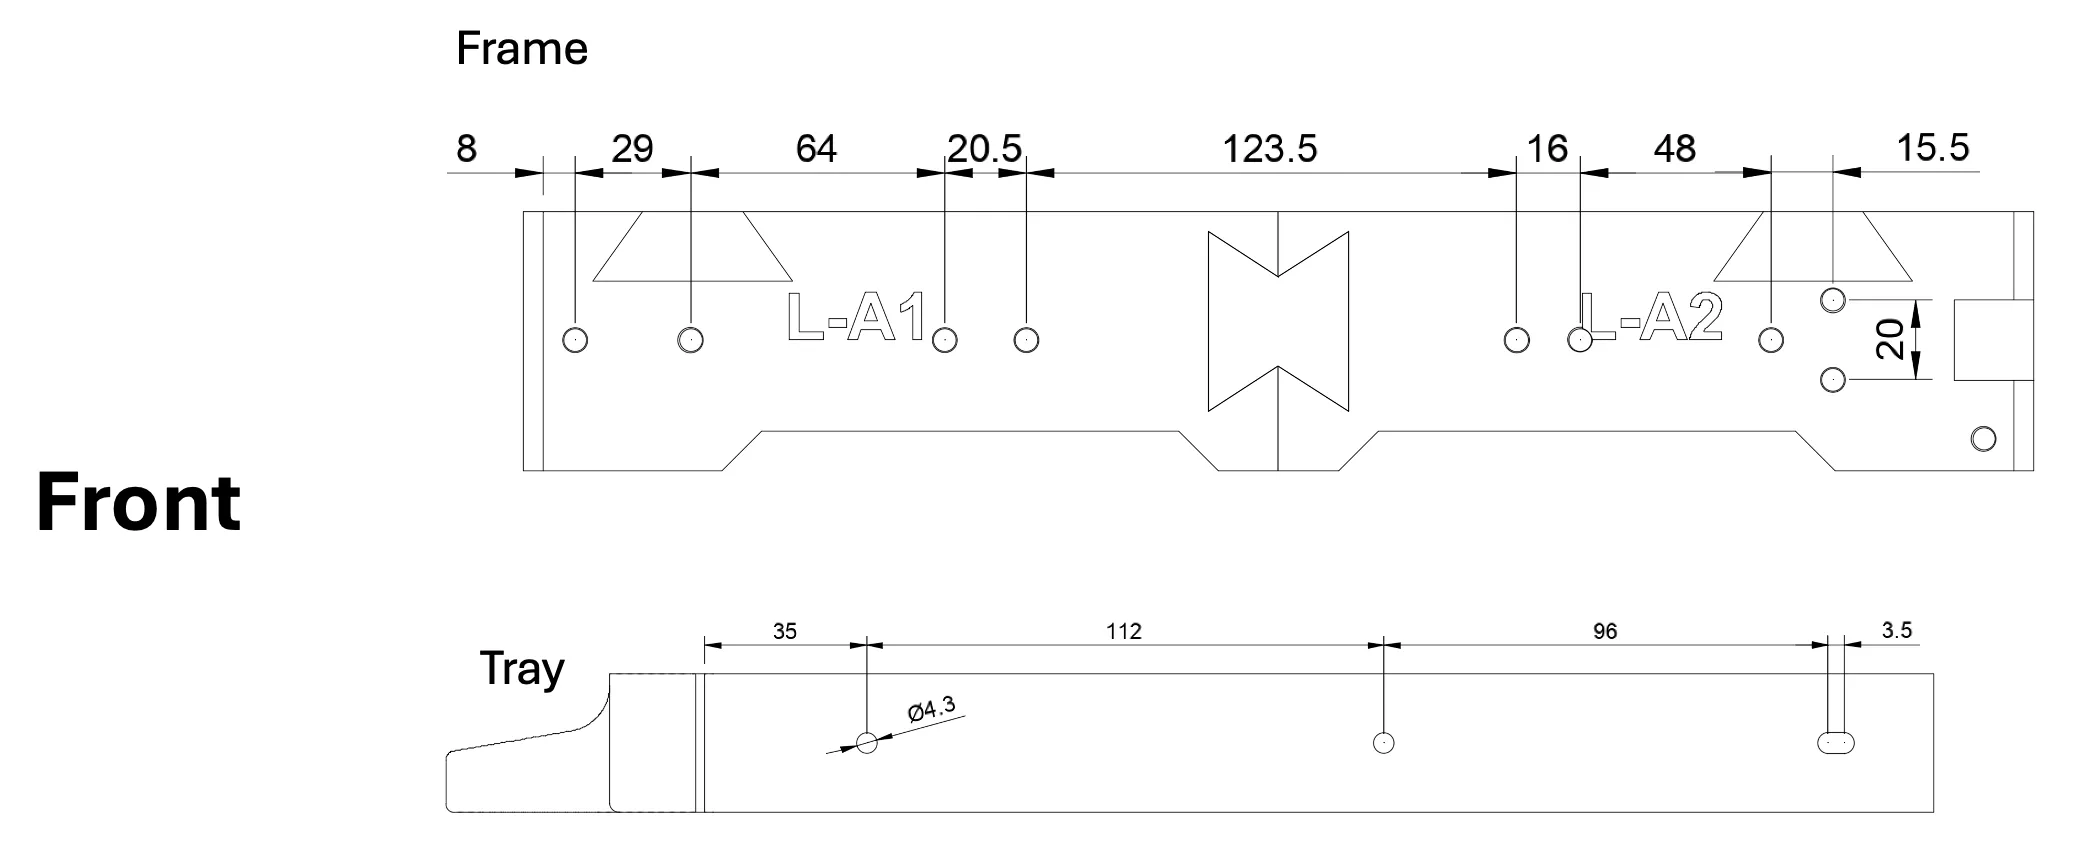
Support for the VADANIA VK1245-350 and VA1045-350 rail now!
The model is now fully compatible with the VADANIA VK1245-350 and VA1045-350 rail slides.
Before printing the final parts, I strongly recommend printing the alignment test piece to ensure the mounting holes are correctly positioned.
You can download the test file from the link below:
AMS-1-2 VADANIA Rail Alignment Test Piece
Important Note:
Since the VK1245-350 rail is not available in my region, I obtained the official 2D drawings and 3D model directly from VADANIA as references for this design.
However, because the original drawings had unclear annotations and some dimensional inconsistencies, I cannot guarantee a perfect physical fit at this time.
The current release has been validated through community feedback and confirmed to work without issues.
Big thanks to Andy for the helpful feedback!
Testing shows that the VADANIA VK1245 may not hold the AMS lid open on its own (manual support is required), while the VADANIA VA1045 performs without this issue.
For better usability, we recommend using the VADANIA VA1045 as the preferred option.
Update — 2026.06.28
Thanks to just_a_person for testing and sharing the results. The NECILO 14-inch Silver Full-Extension Drawer Slides worked perfectly with this model.
Amazon: https://www.amazon.com/dp/B0DK2WH4DN
Update — 2026.05.25
Due to my increasingly heavy workload, along with design changes to some of the rails that have resulted in different screw hole placements, I’ve decided to open-source the rail components of the frame. This way, if anyone runs into compatibility issues with the mounting holes, you can easily modify the parts yourself. You can now download the STEP files from the “Download STL/CAD Files” section.
Thank you for your support and understanding!
Key Features
- Compatible with Bambu Lab AMS / AMS 2 Pro
- Drawer-style modular trays for easy access and vertical stacking
- Designed to mount onto Honeycomb Storage Wall systems
- Integrated 75mm filament swatch holders on each tray
- Supports unlimited stacking for scalable setups
List of items compatible with my Honeycomb Storage Wall (HSW) system
AMS 1 & 2 Pro Sliding Stacking System Frame Assembly Guide
This kit is designed for the AMS 1 & 2 Pro sliding stacking system. All parts are organized by assembly order into separate print plates. Simply follow the sequence for quick and easy installation.
The quantity listed in the BOM reflects the required amount for 3 AMS bracket assemblies.
Base Rail Assembly
For H2D Print Bed:
• A. Frame base – 1 Layer
• B. Fixed seat (optional) – Only needed if you wish to secure the system to the ground
For X1 / S1 / A1 Print Beds:
• A. Frame base – 1 Layer
• B. Frame base – 1 Layer
• C. Fixed seat (optional) – Used for mounting on the floor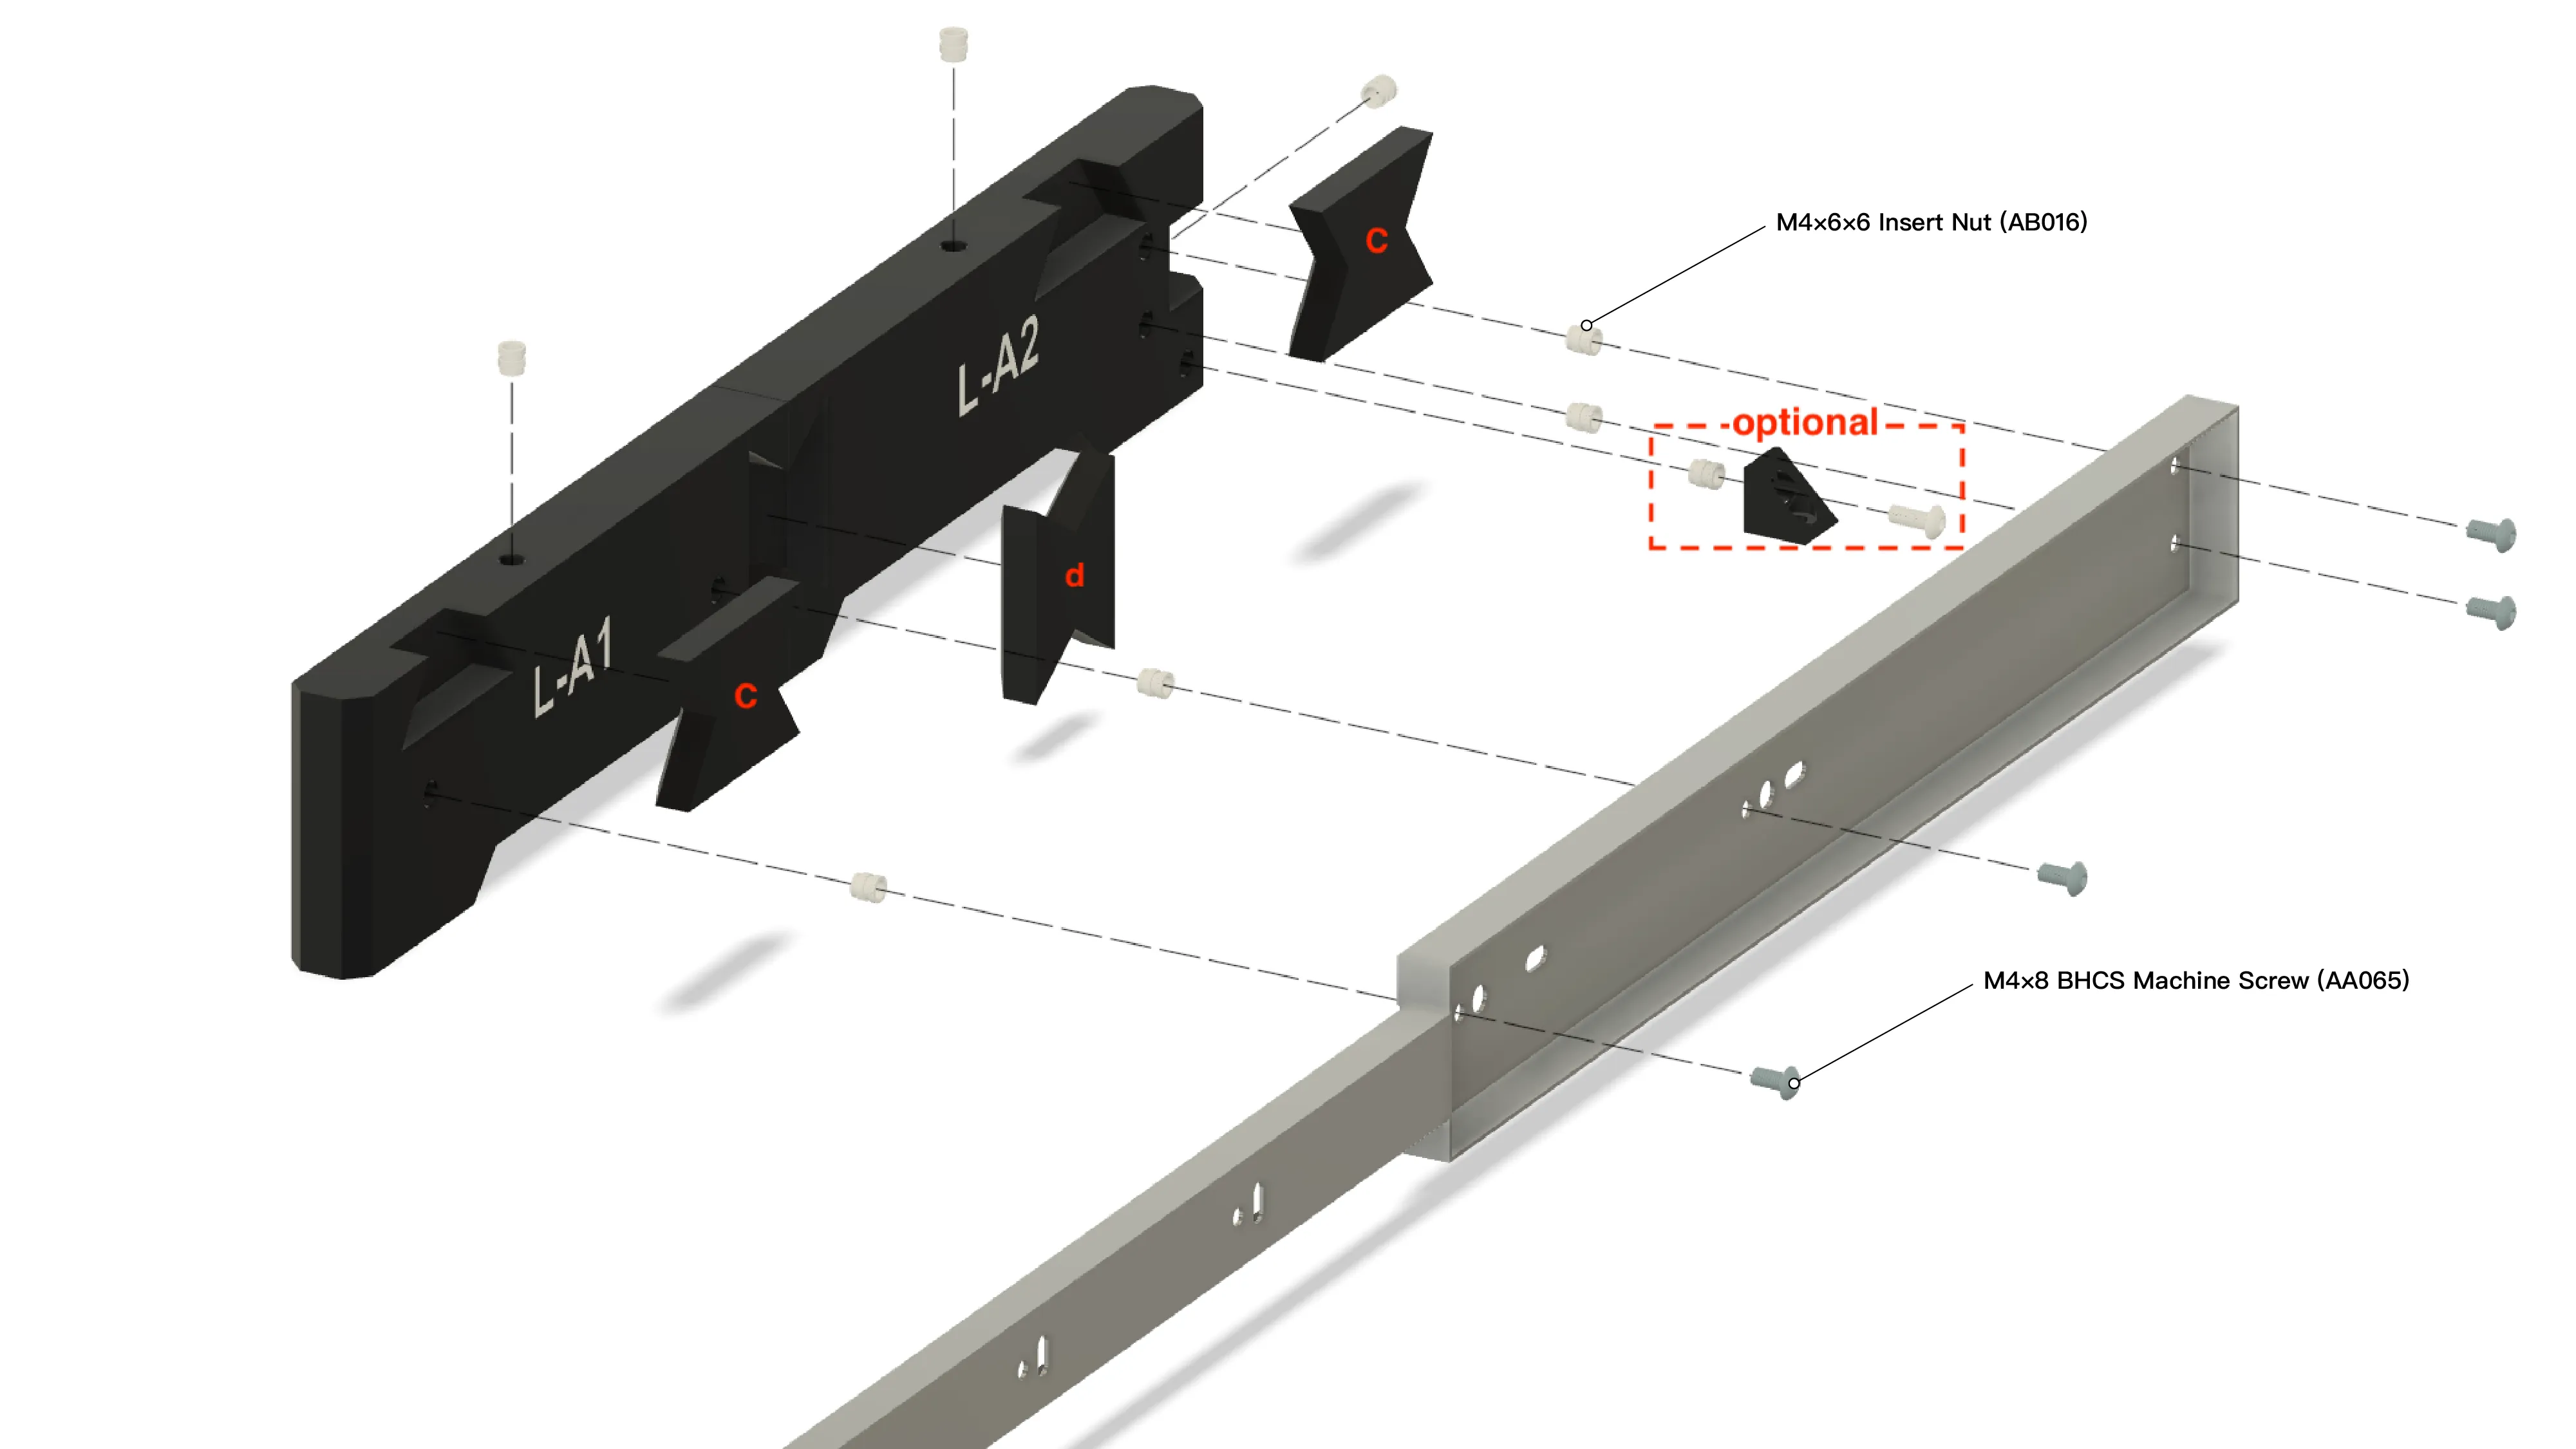
Notes:
- “d”-type joints are used for mid-frame interlocking
- L-A1, L-A2, R-A1, R-A2 include insert nut holes for future expansion
Side Frame Support Assembly
For H2D Print Bed:
• C. Frame support set – 2 Layer
• D. Frame support set – 2 Layer
• G. Frame support set – 3 Layers or more
• H. Frame support set – 3 Layers or more
For X1 / S1 / A1 Print Beds:
• D. Frame support set – 2 Layer
• E. Frame support set – 2 Layer
• I. Frame support set – 3 Layers or more
• J. Frame support set – 3 Layers or more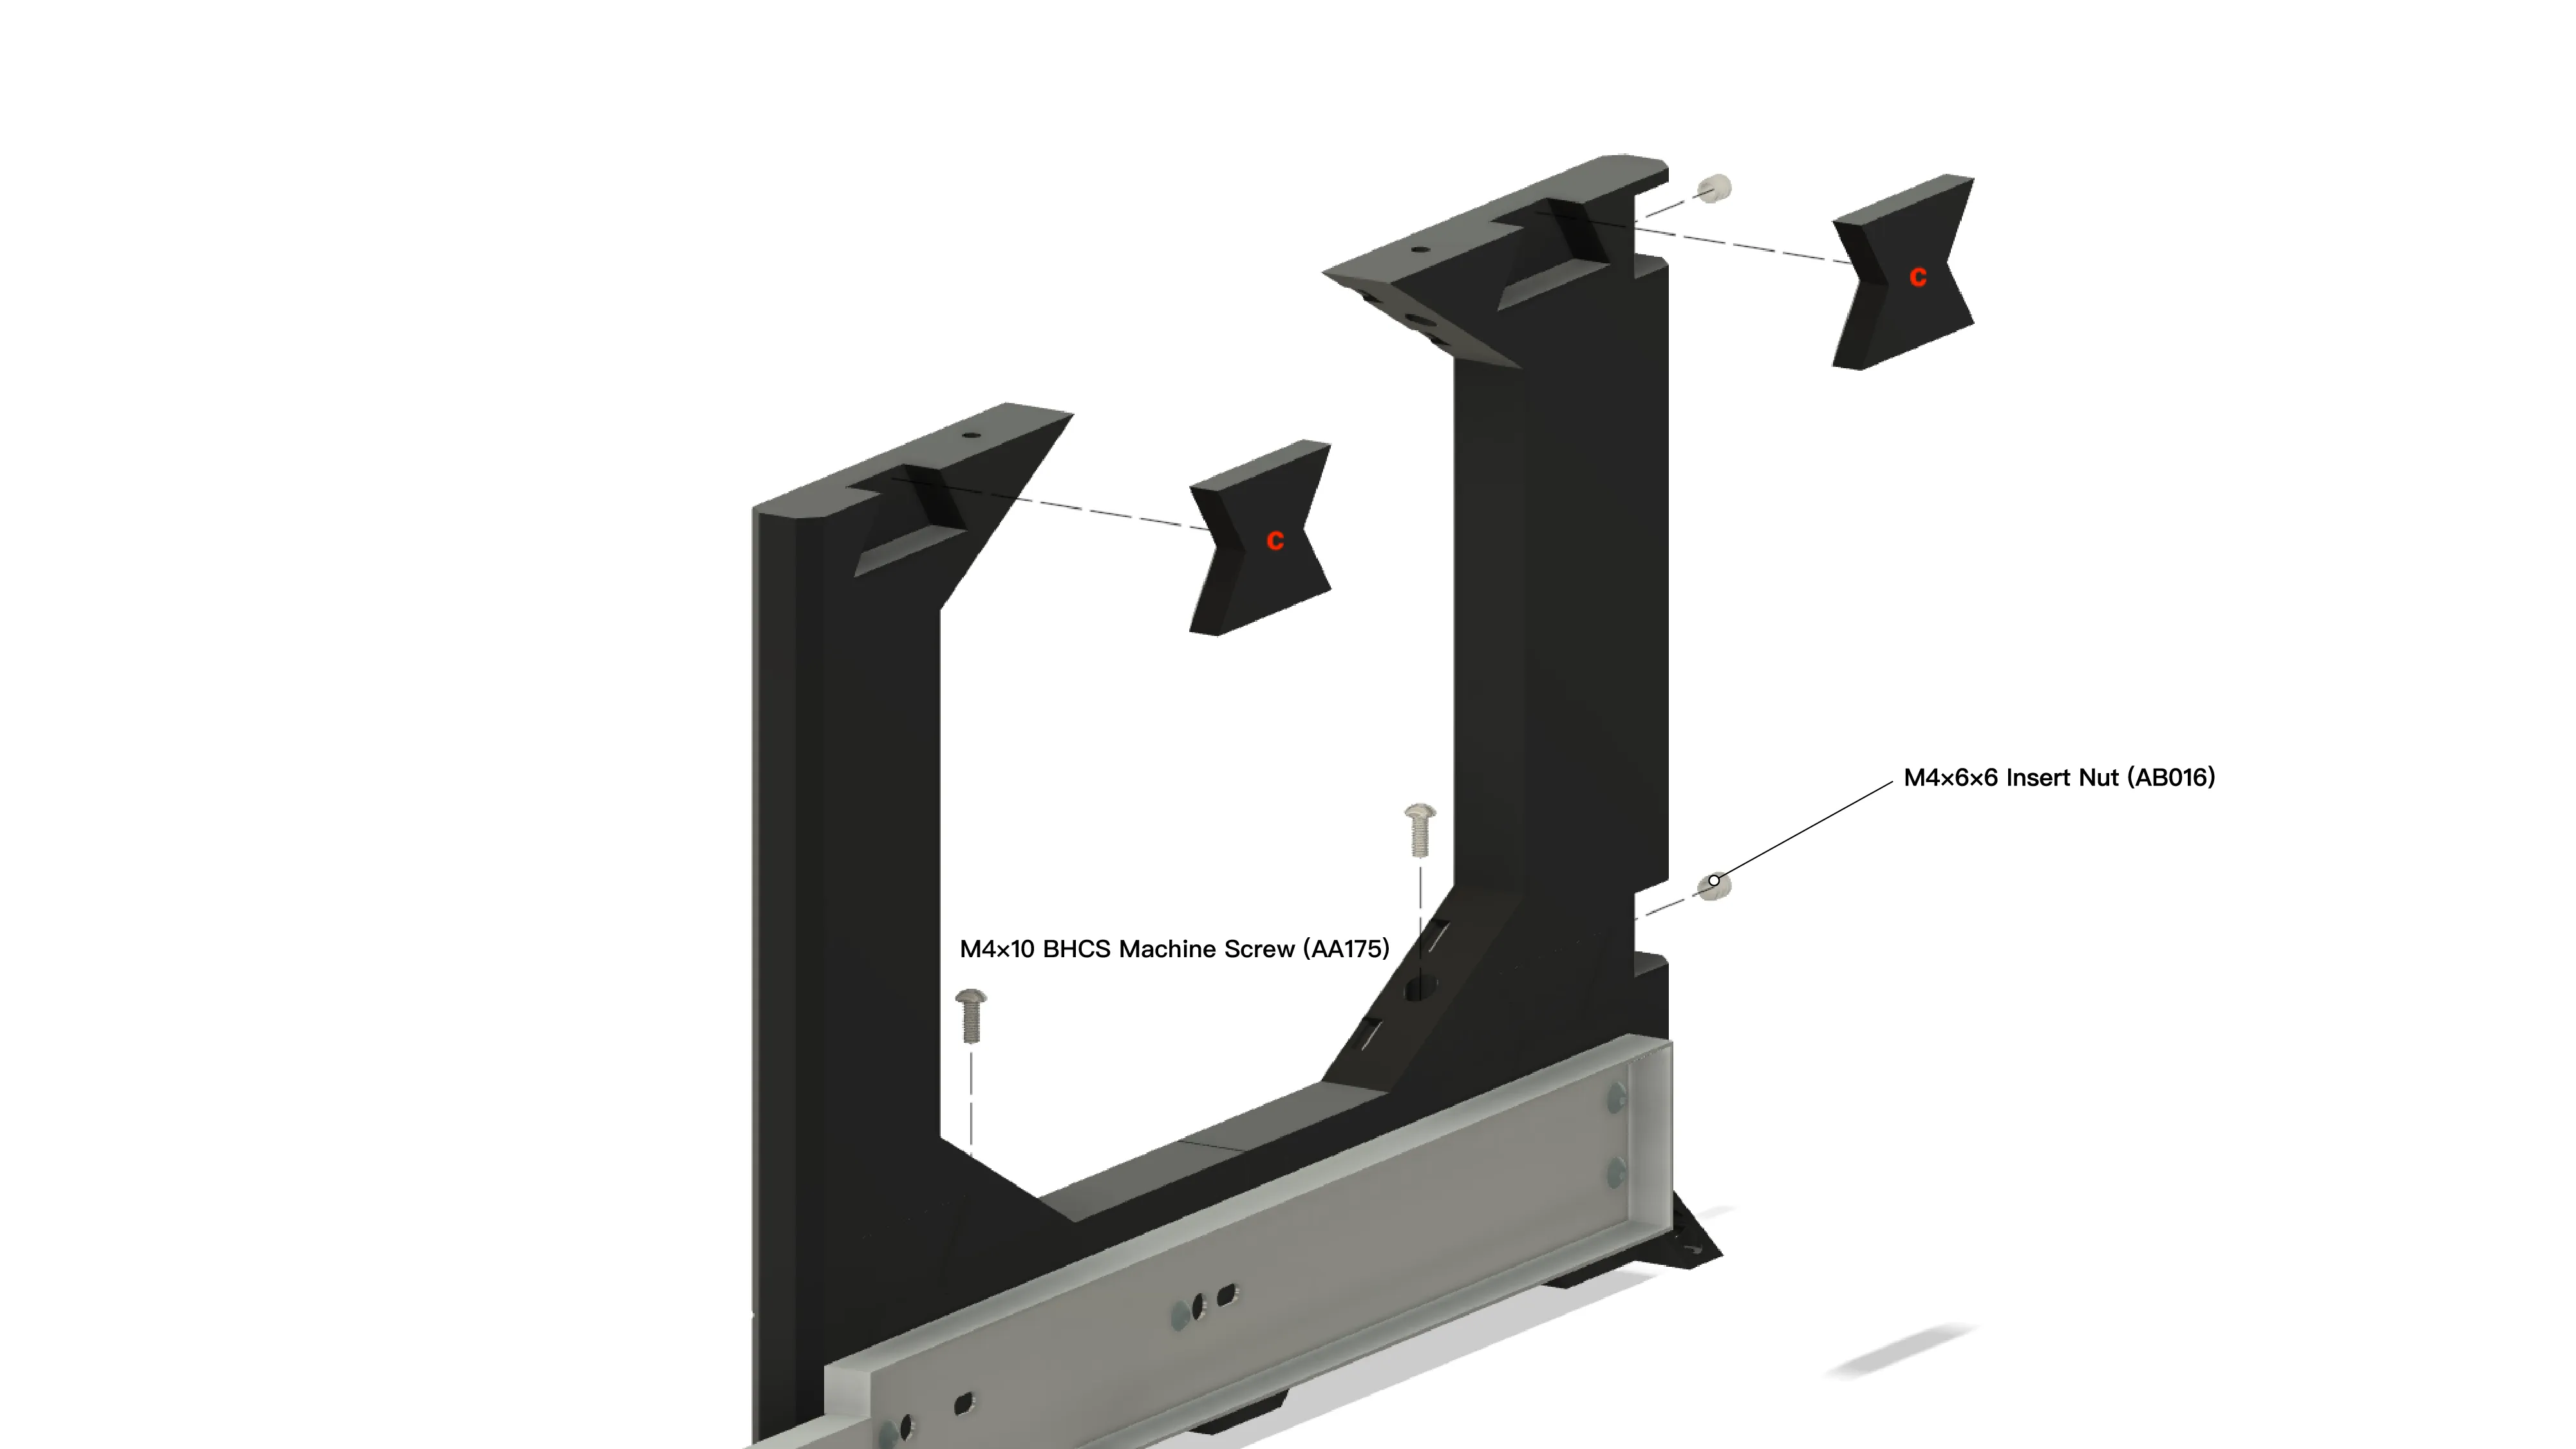
Bottom & Top Beam Assembly
For H2D Print Bed:
• E. Base Beam
• K. Top Beam
• N. Weighted Base Beam (optional)For X1 / S1 / A1 Print Beds:
• F. Base Beam
• O. Top Beam• S. Weighted Base Beam (optional)

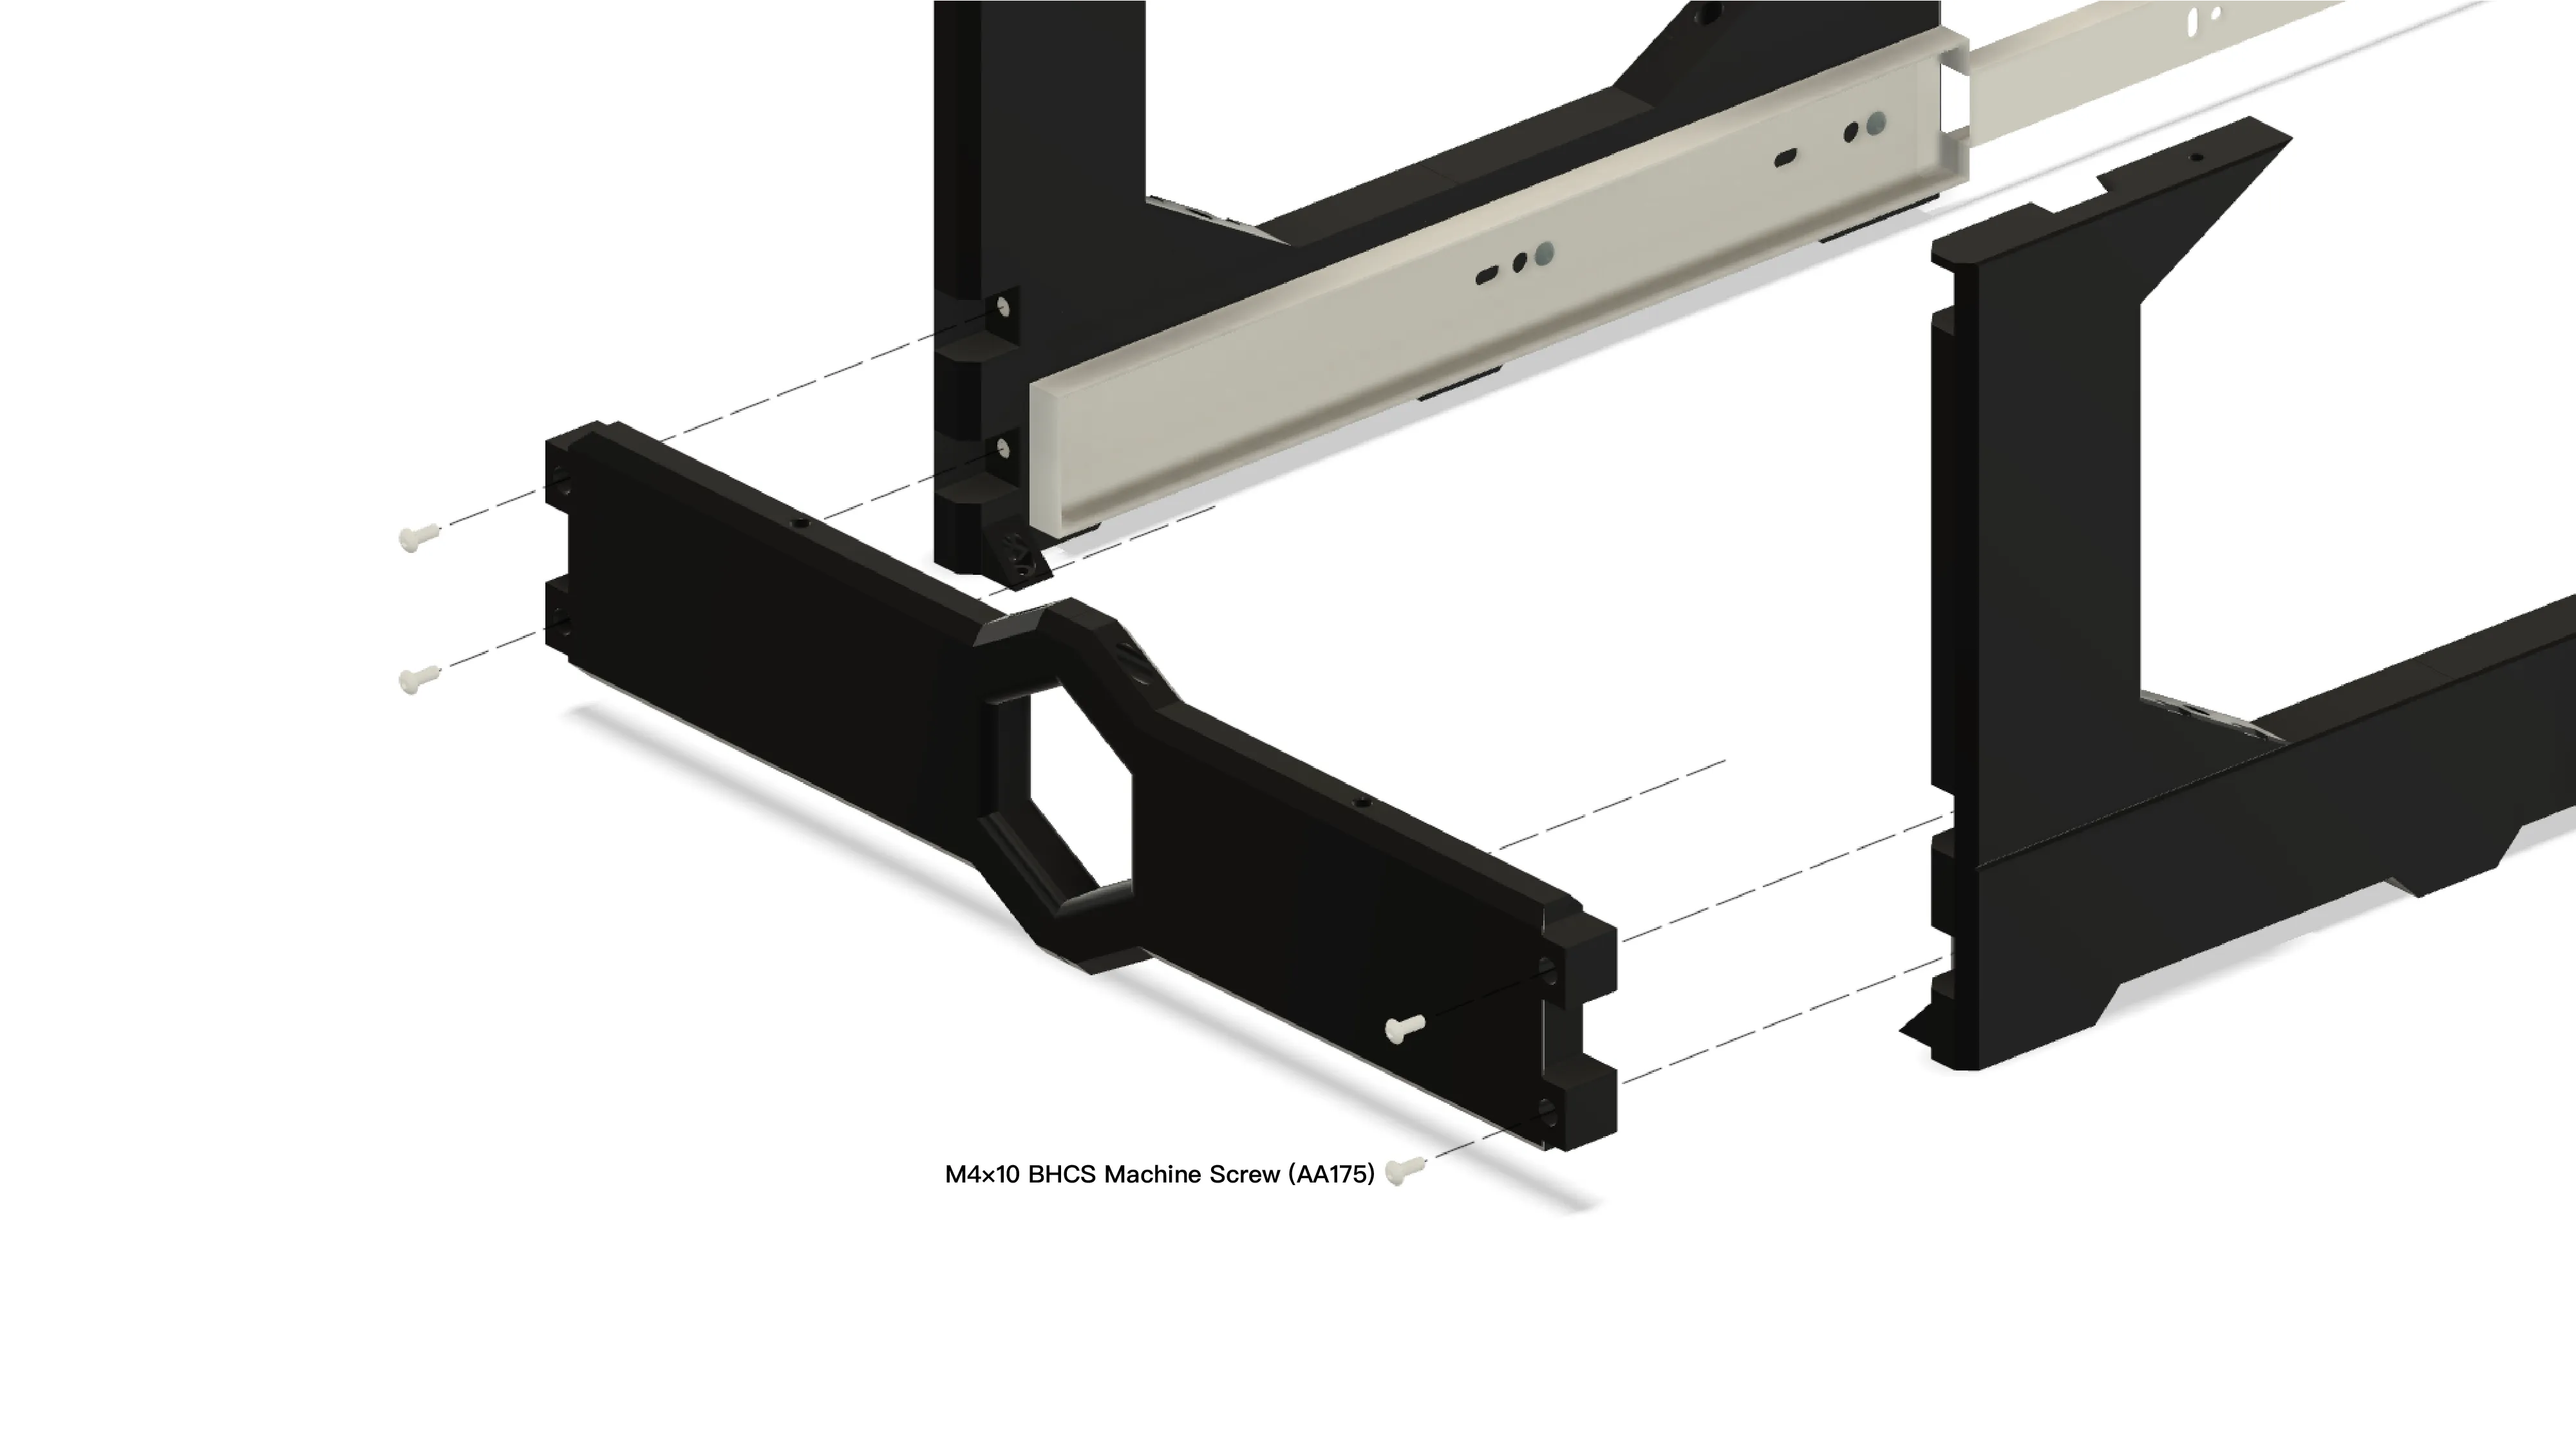
Additional Sliding Rails for Layer 2 and Above
For H2D Print Bed:
• F. 2 Layer or more
• J. Top LayerFor X1 / S1 / A1 Print Beds:
• G. 2 Layer or more
• H. 2 Layer or more
• M. Top Layer
• N. Top Layer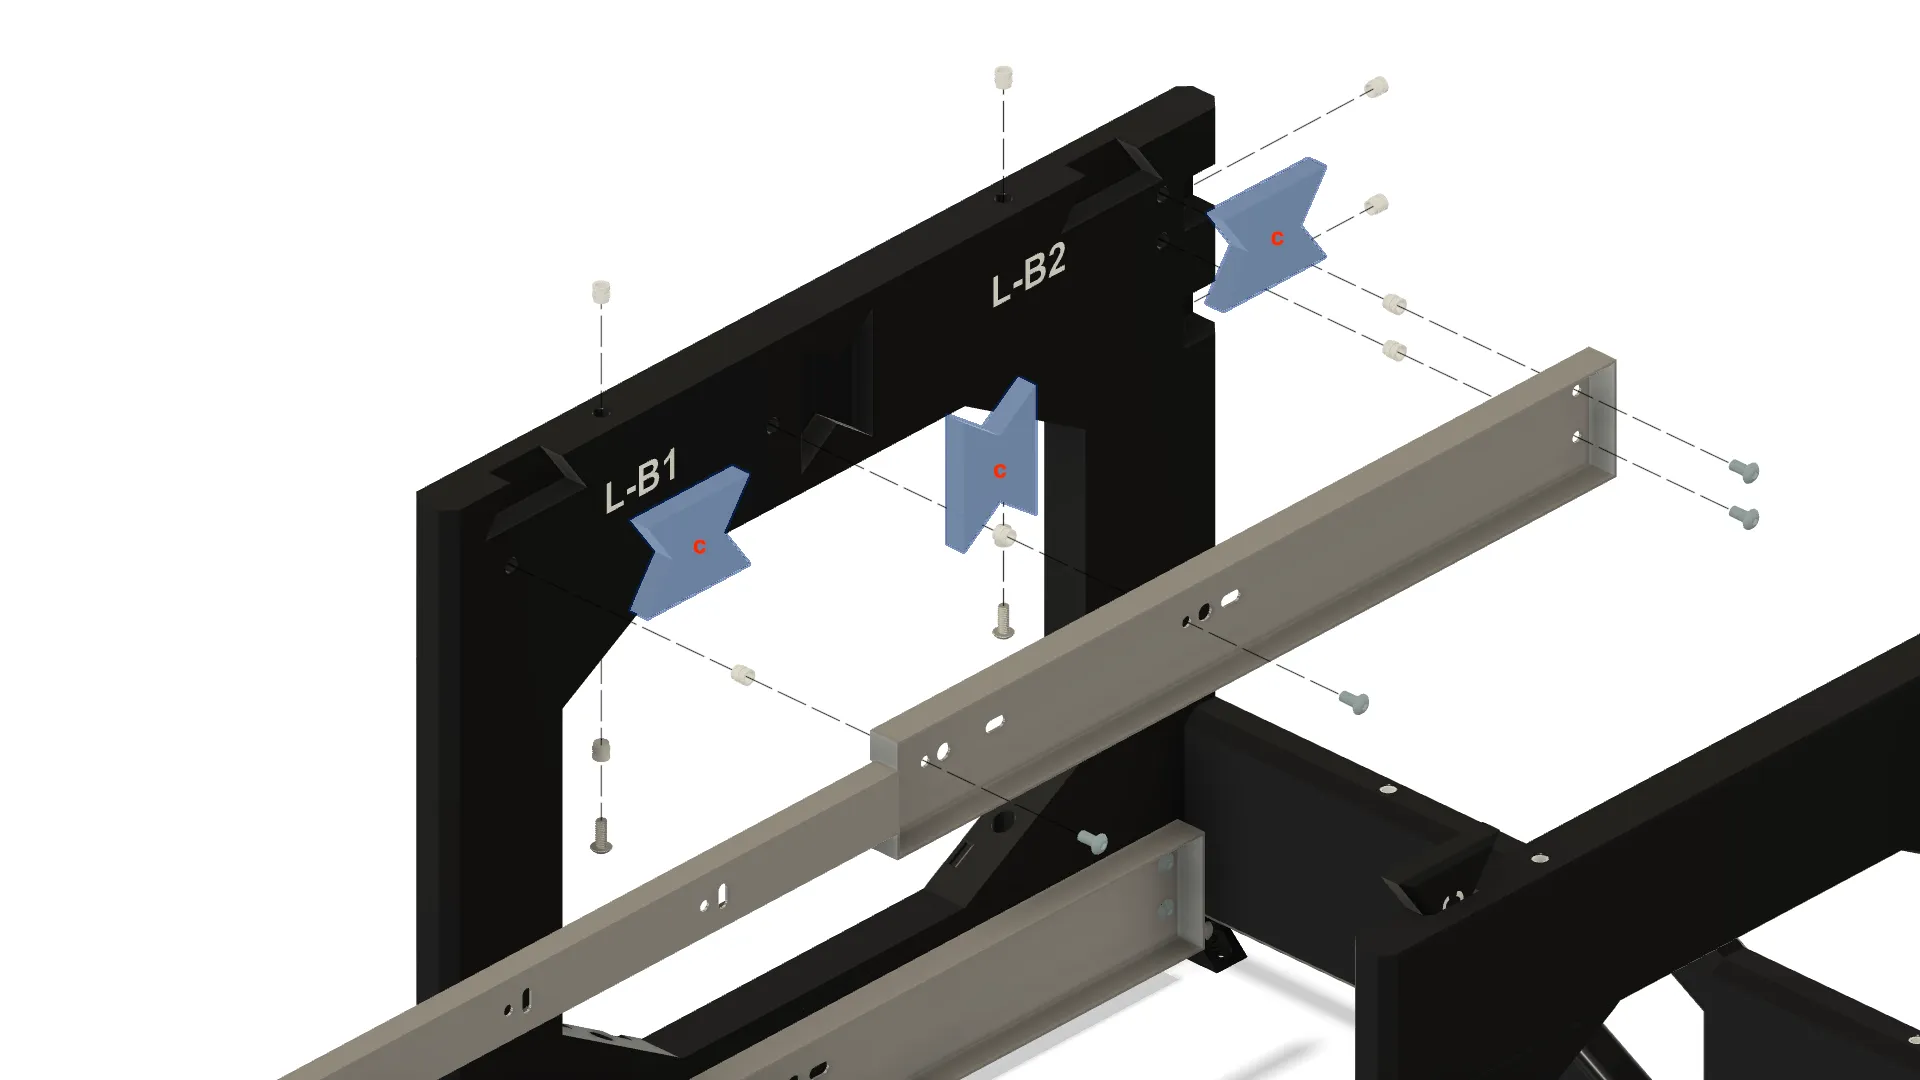
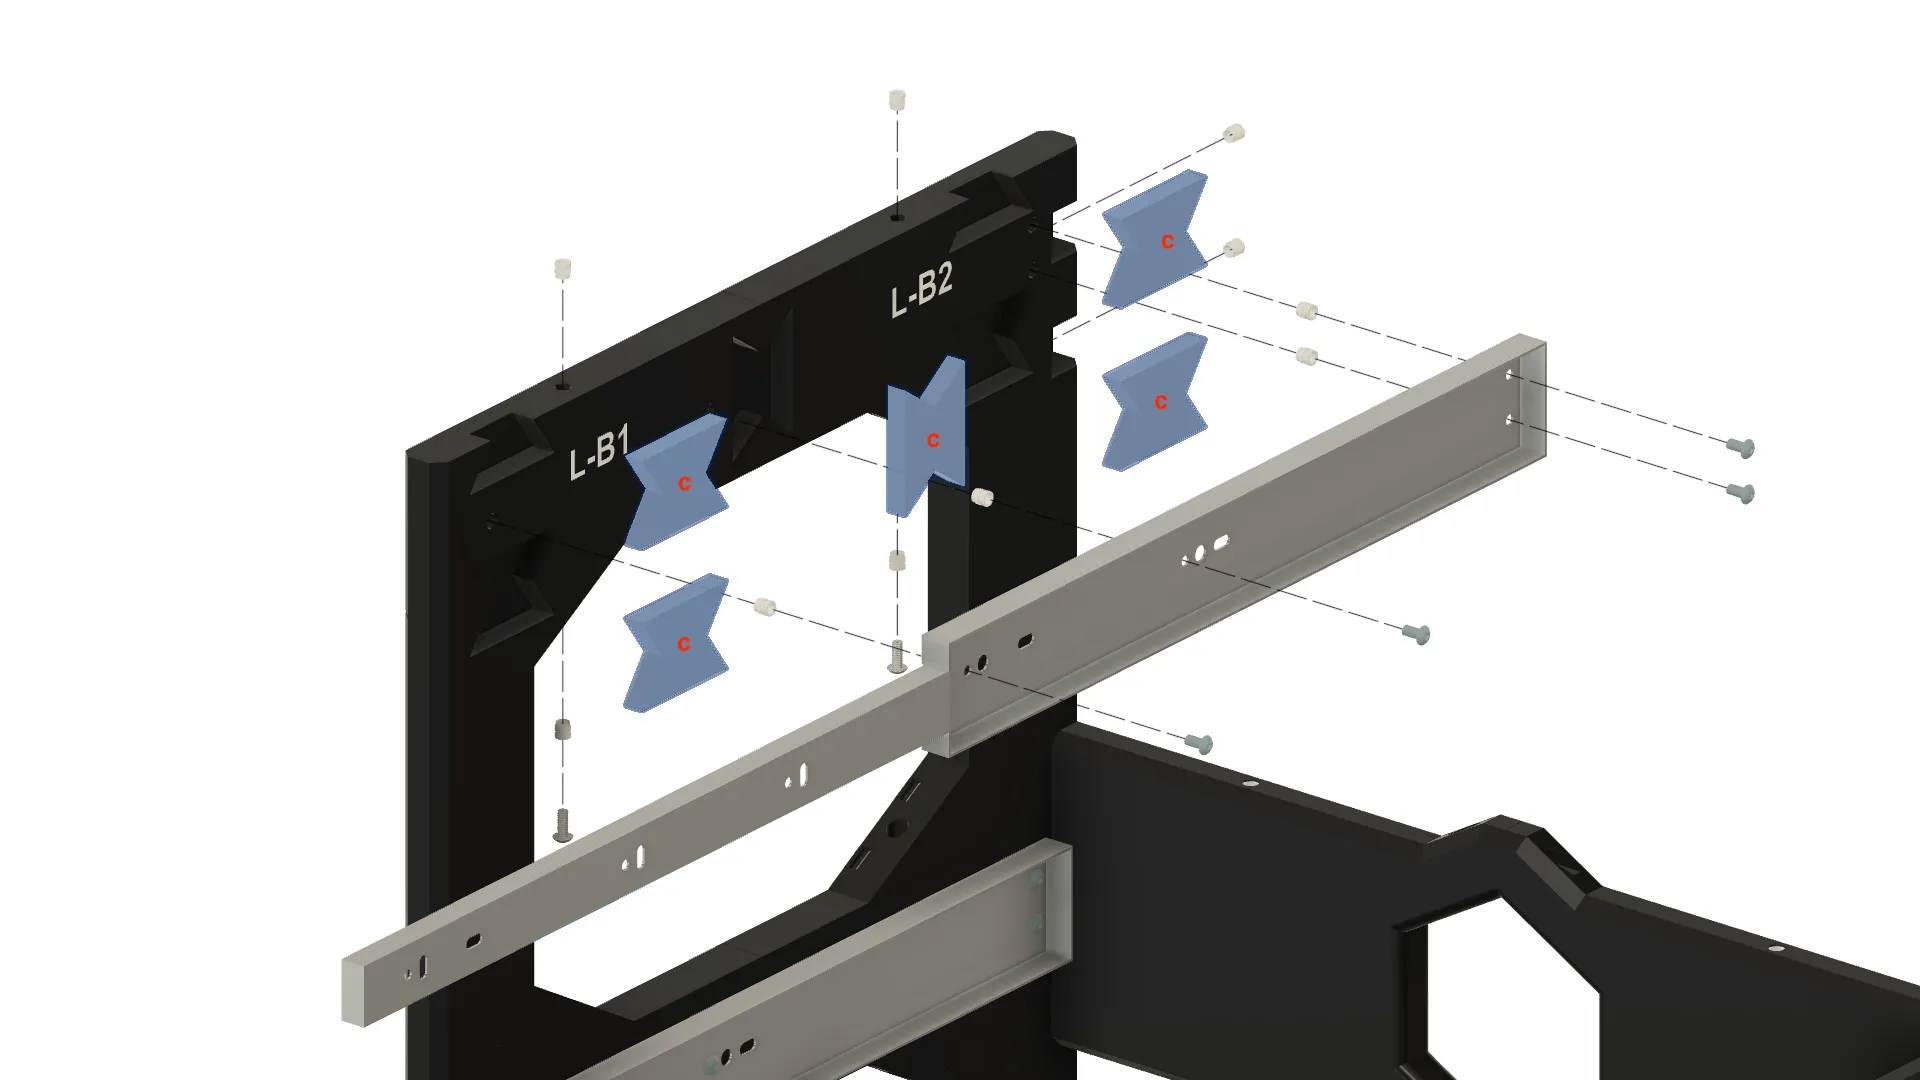
Center Beam (for Layer 2+)
For H2D Print Bed:
• I. Center Beam – 2 Layer or more
• O. Weighted Center Beam (optional)For X1 / S1 / A1 Print Beds:
• K. Center Beam – 2 Layer or more
• L. Center Beam – 2 Layer or more• T. Weighted Center Beam (optional)
• U. Weighted Center Beam (optional)
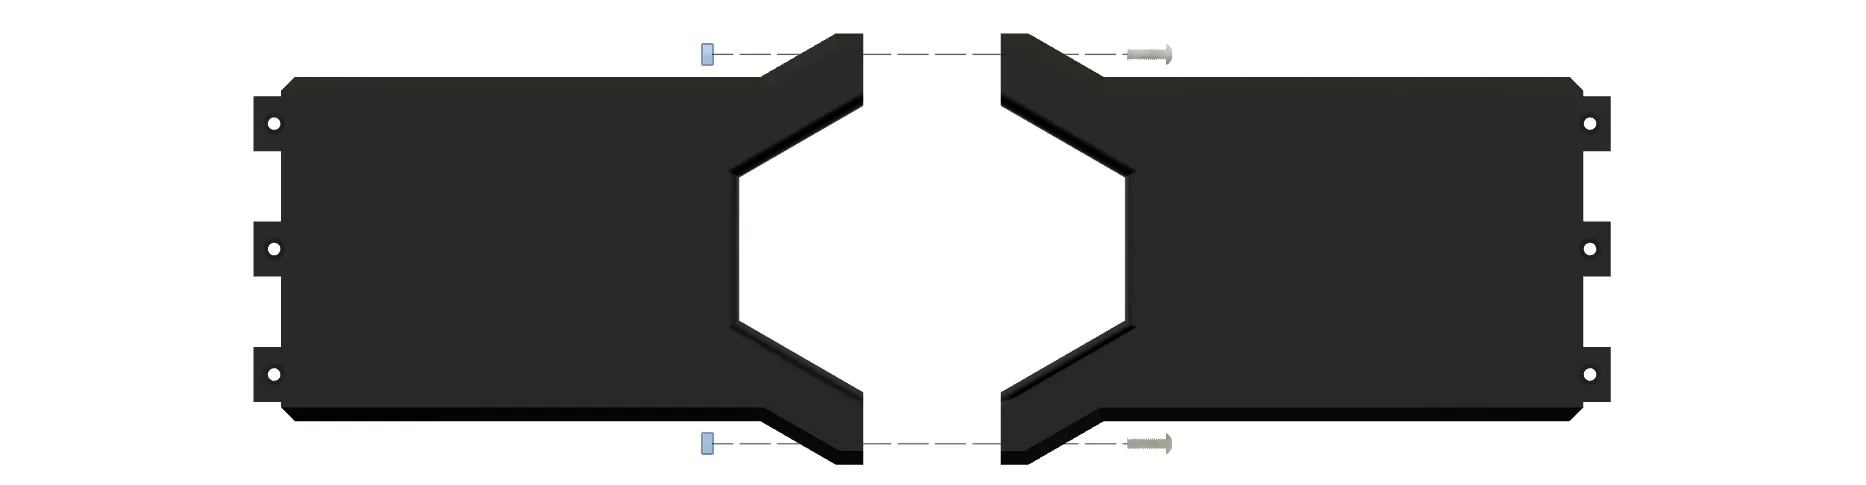
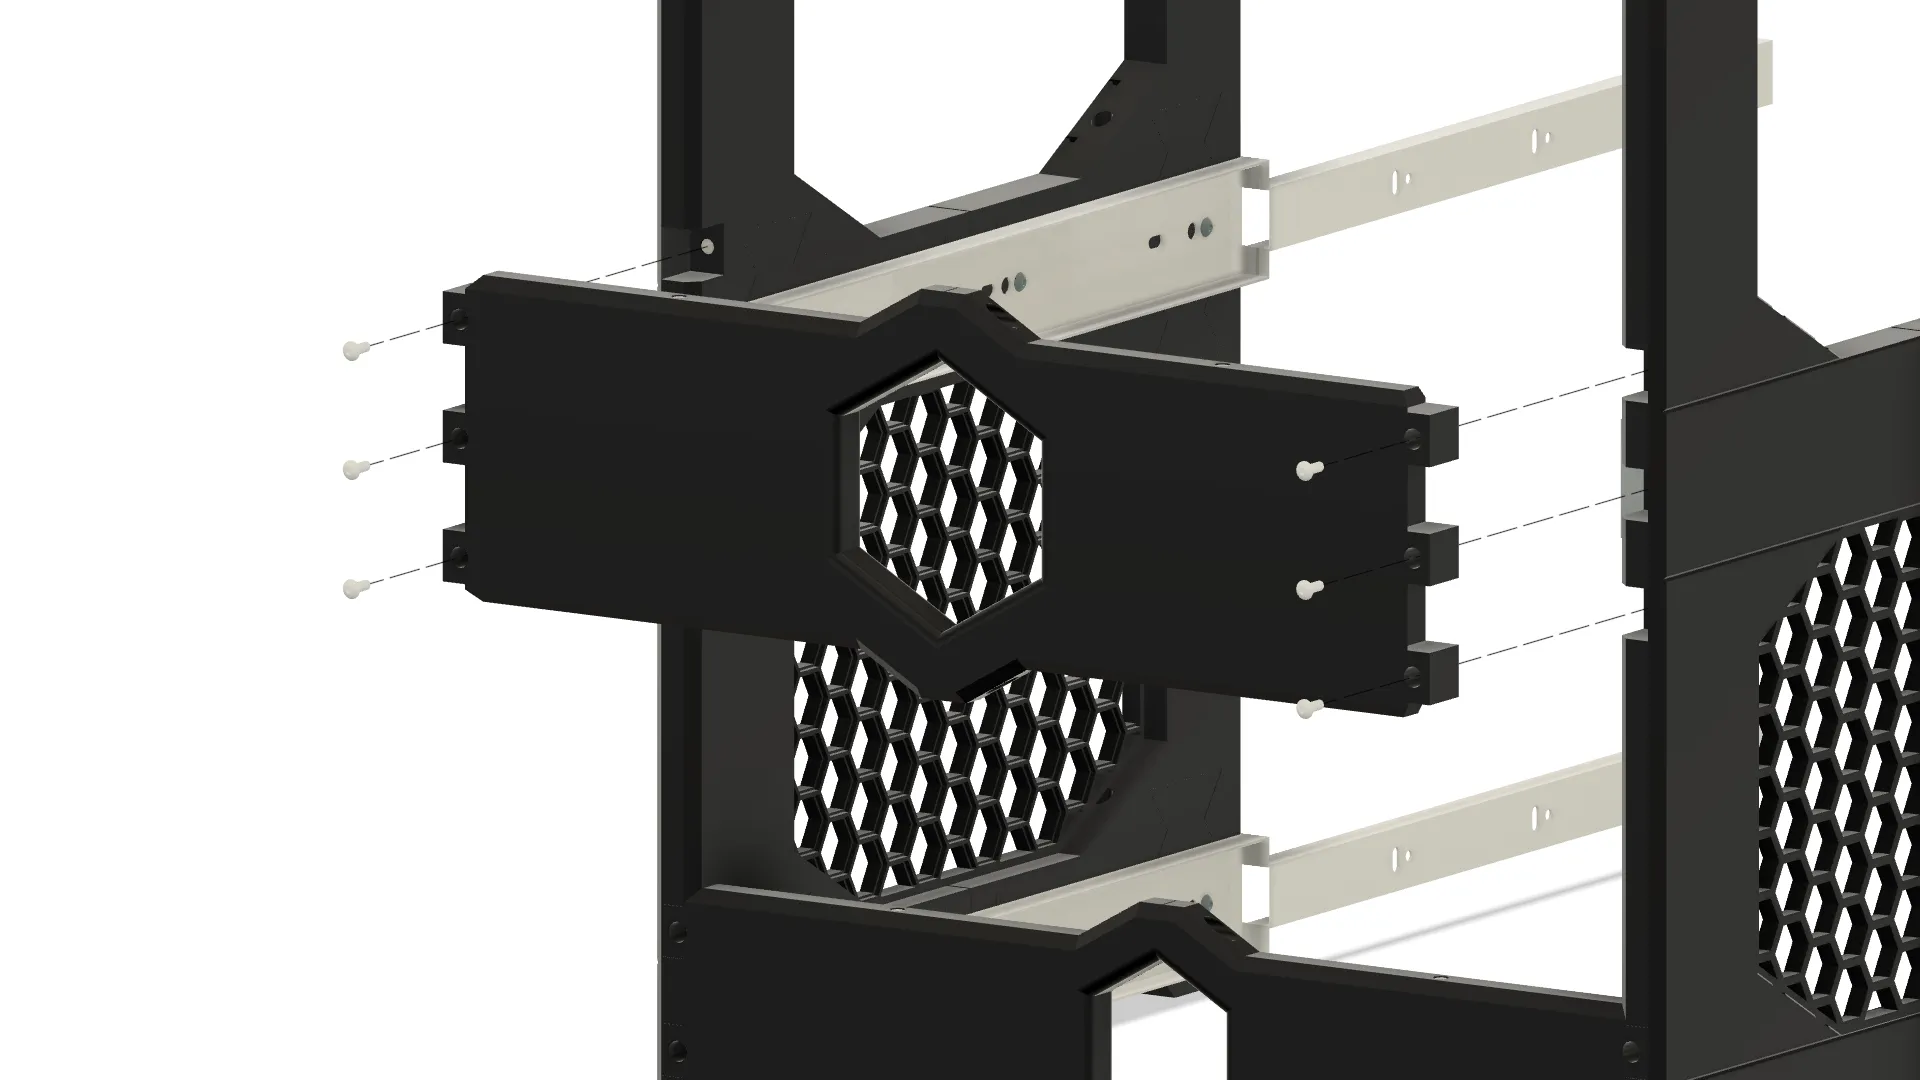
Handle Assembly
For H2D Print Bed:
• L. Handle
For X1 / S1 / A1 Print Beds:
• P. Handle
• Q. Handle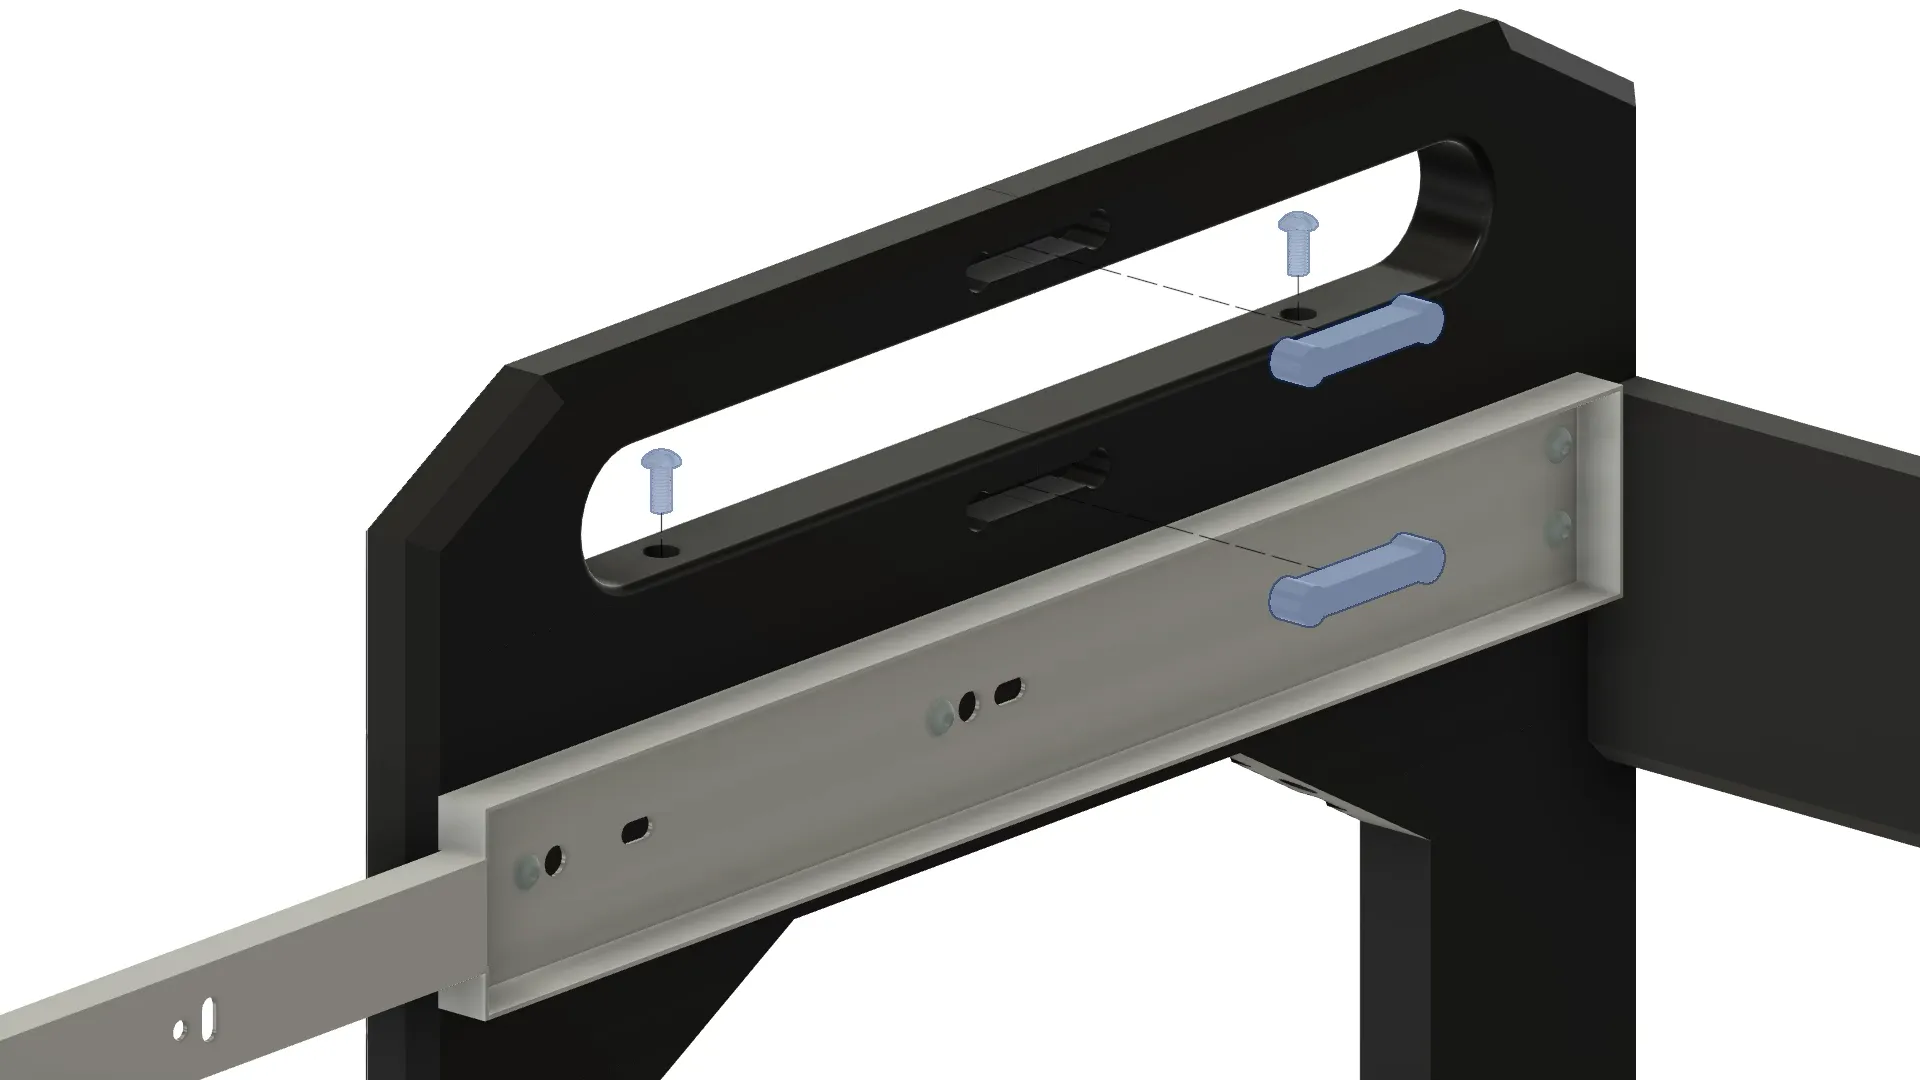
Honeycomb Storage Wall Installation (Optional)
For H2D Print Bed:
• M. Honeycomb Storage Wall
For X1 / S1 / A1 Print Beds:
• R. Honeycomb Storage Wall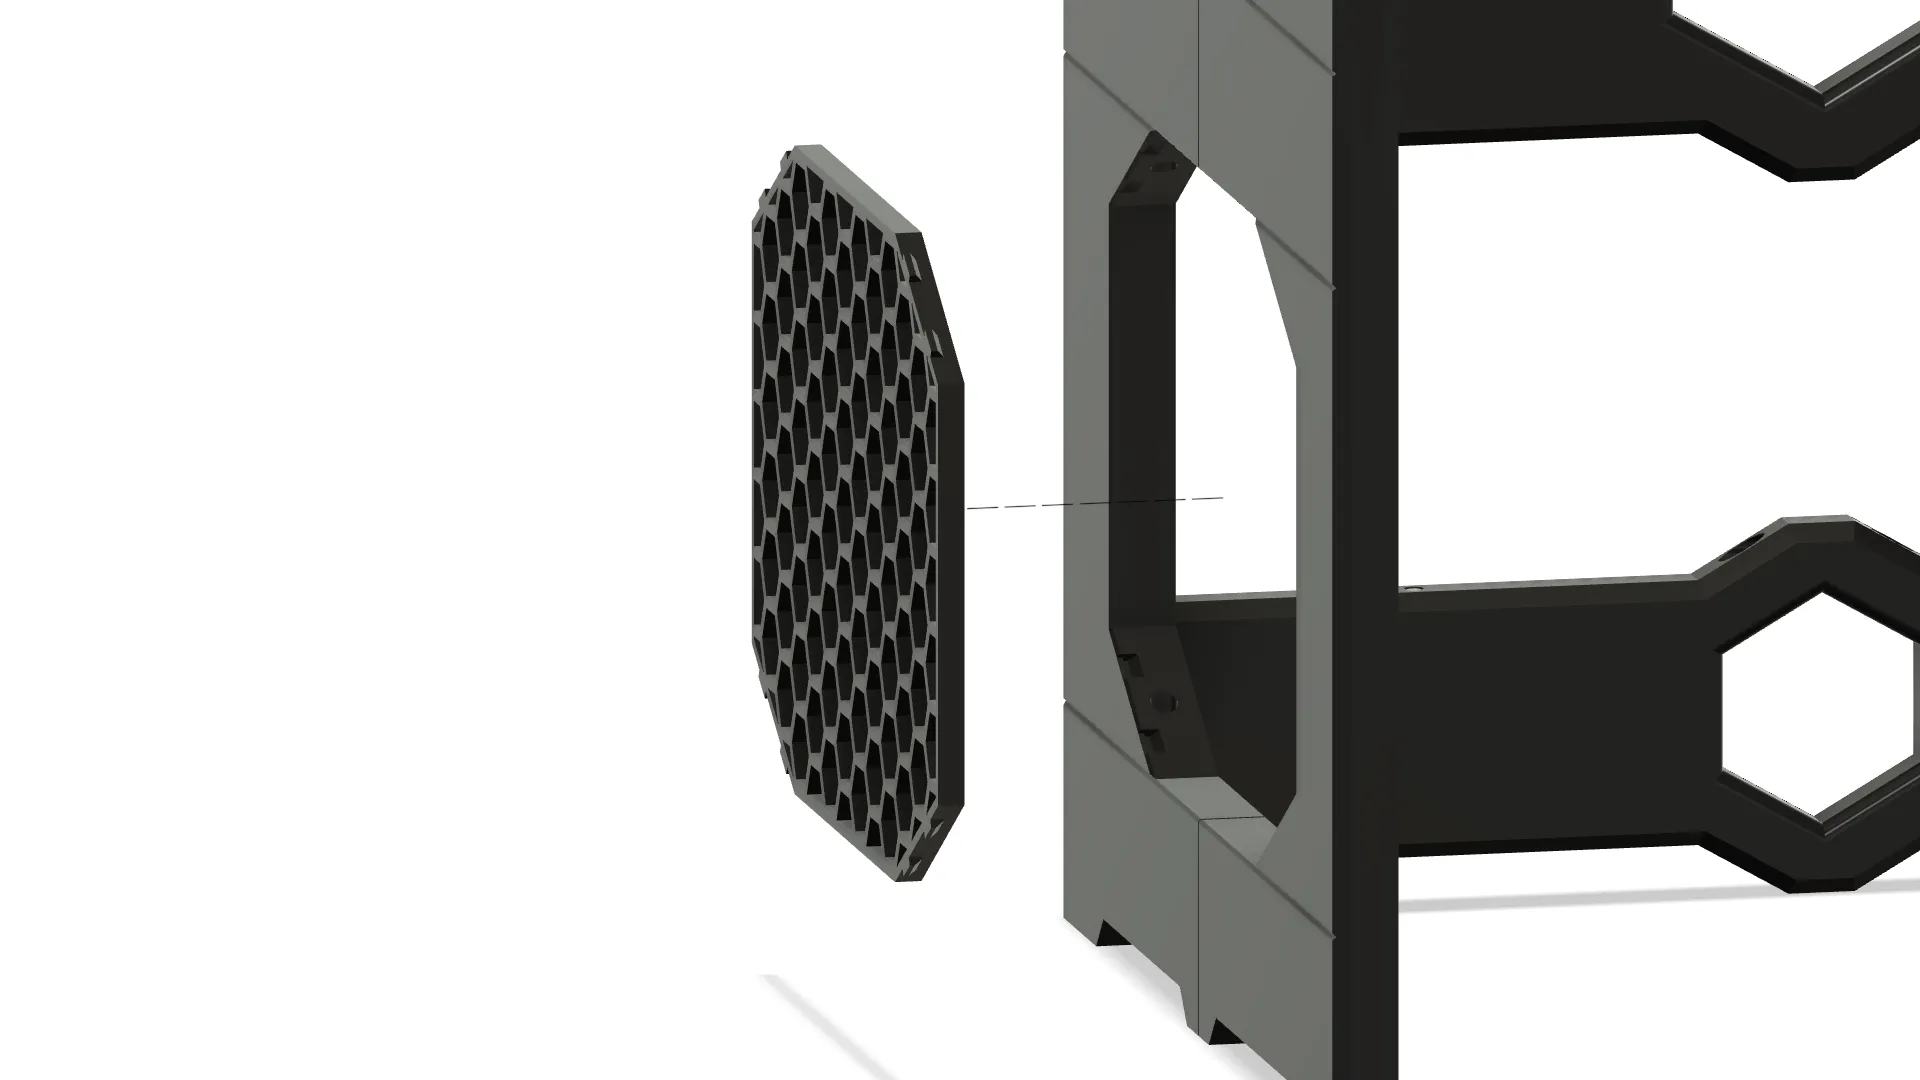
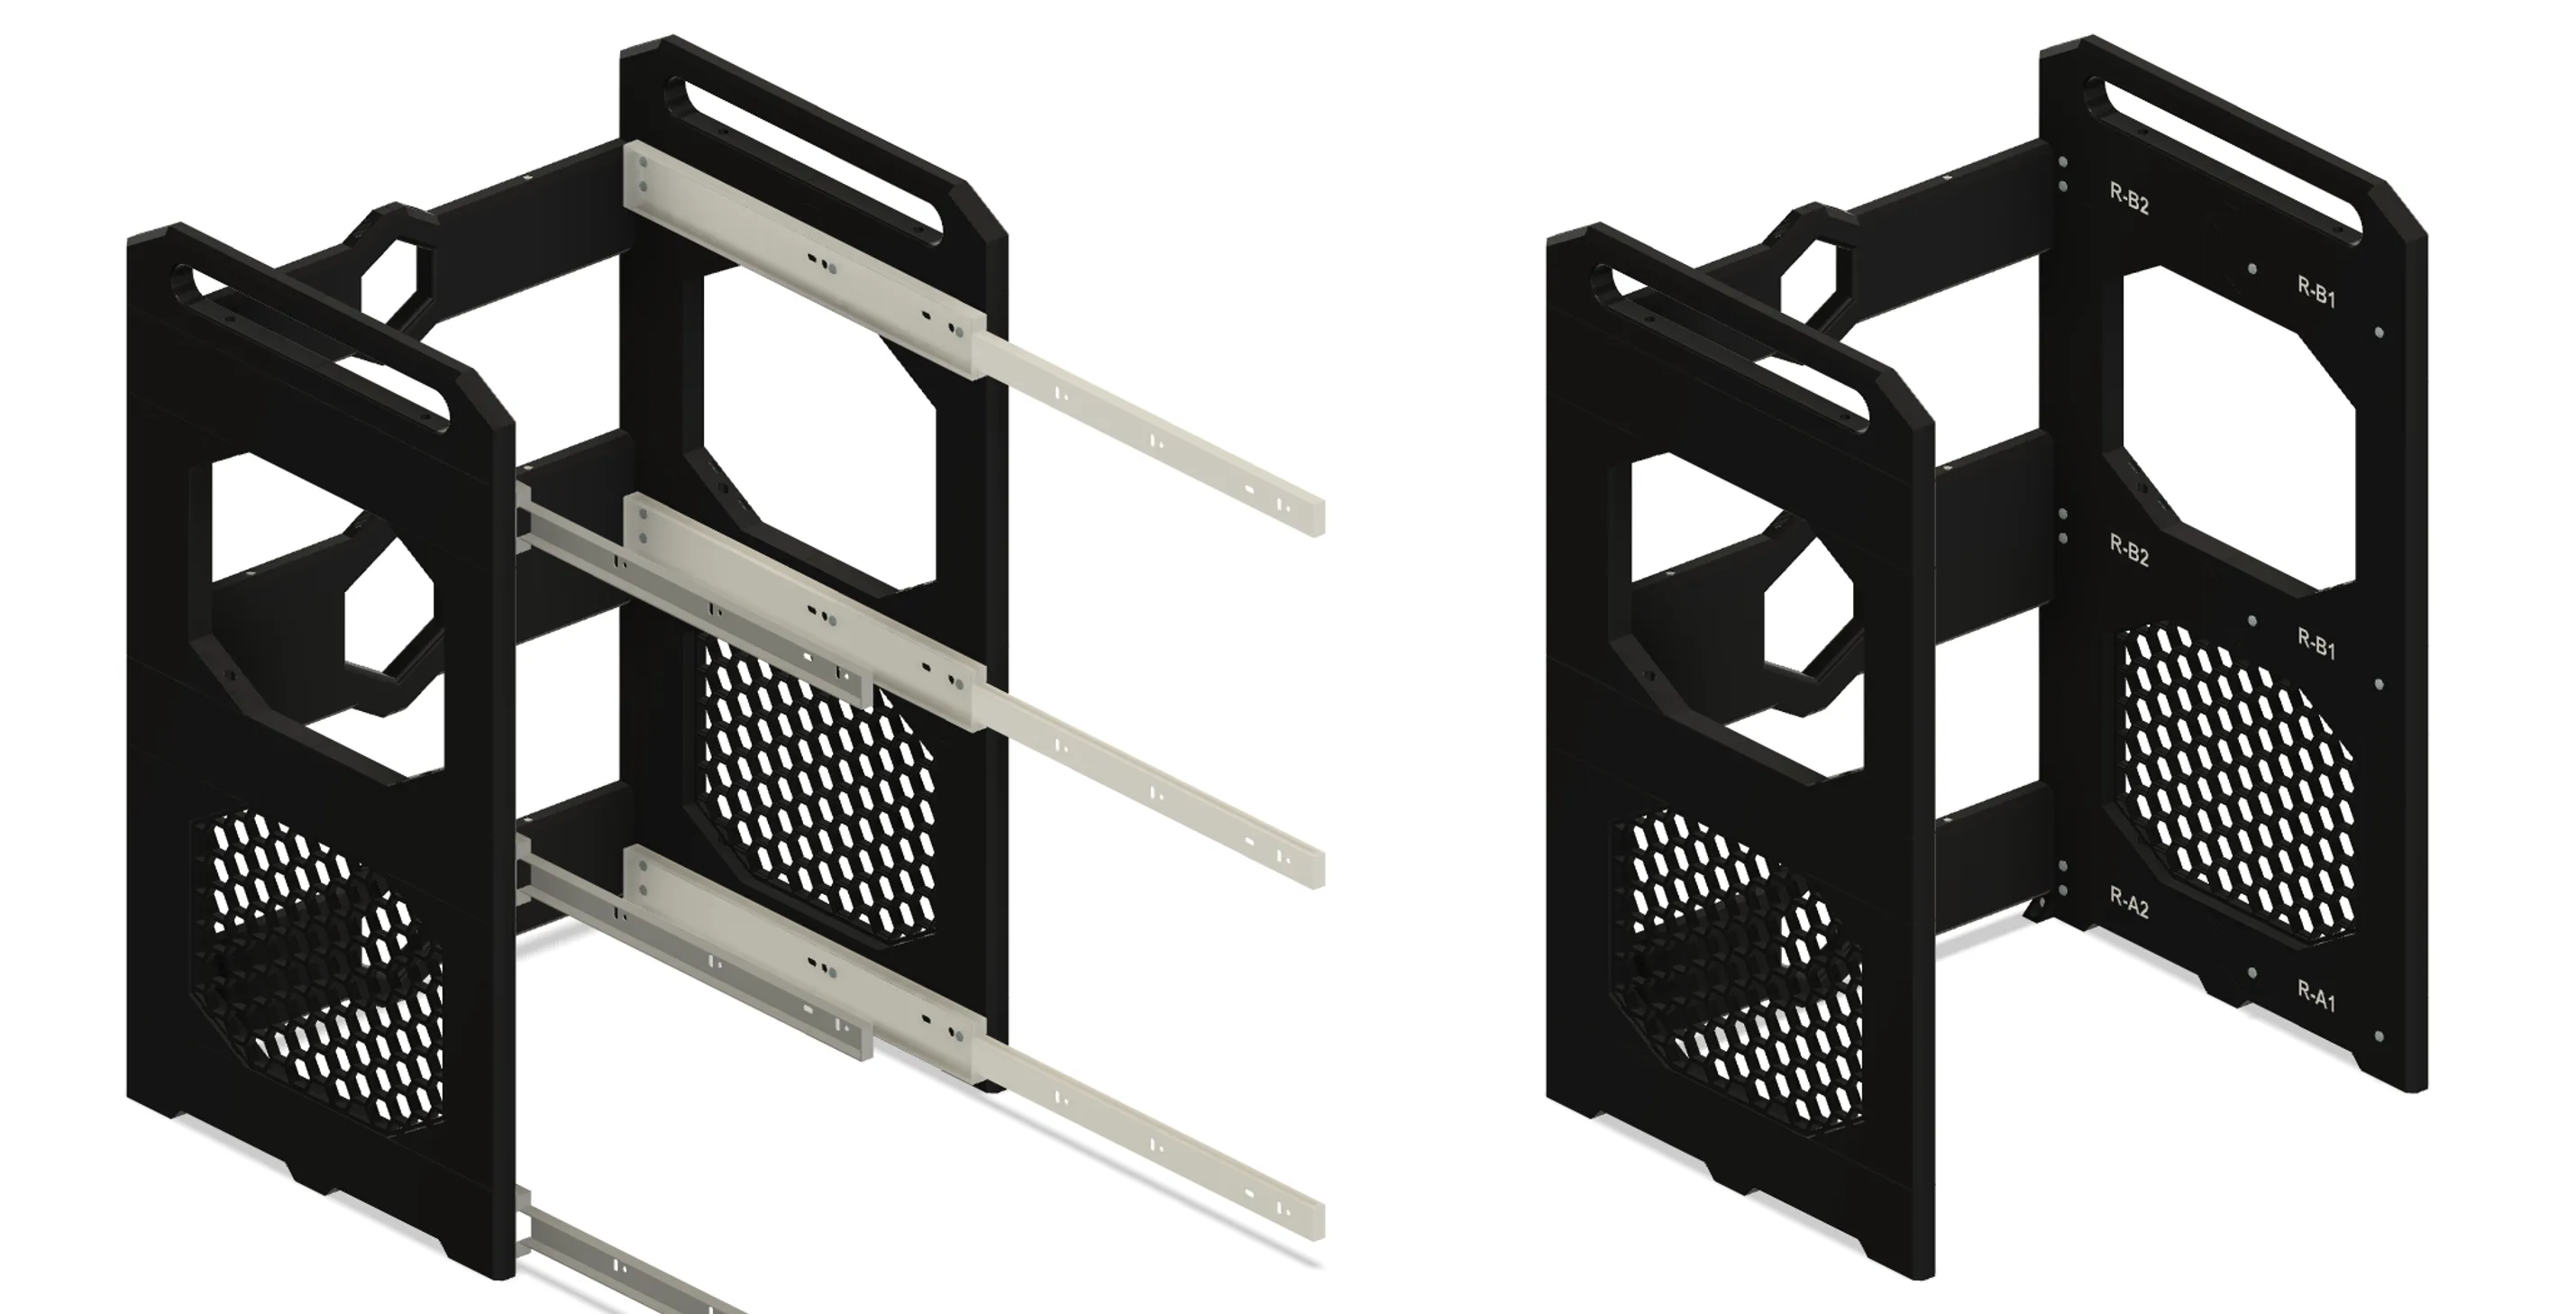
Final System Frame Illustration
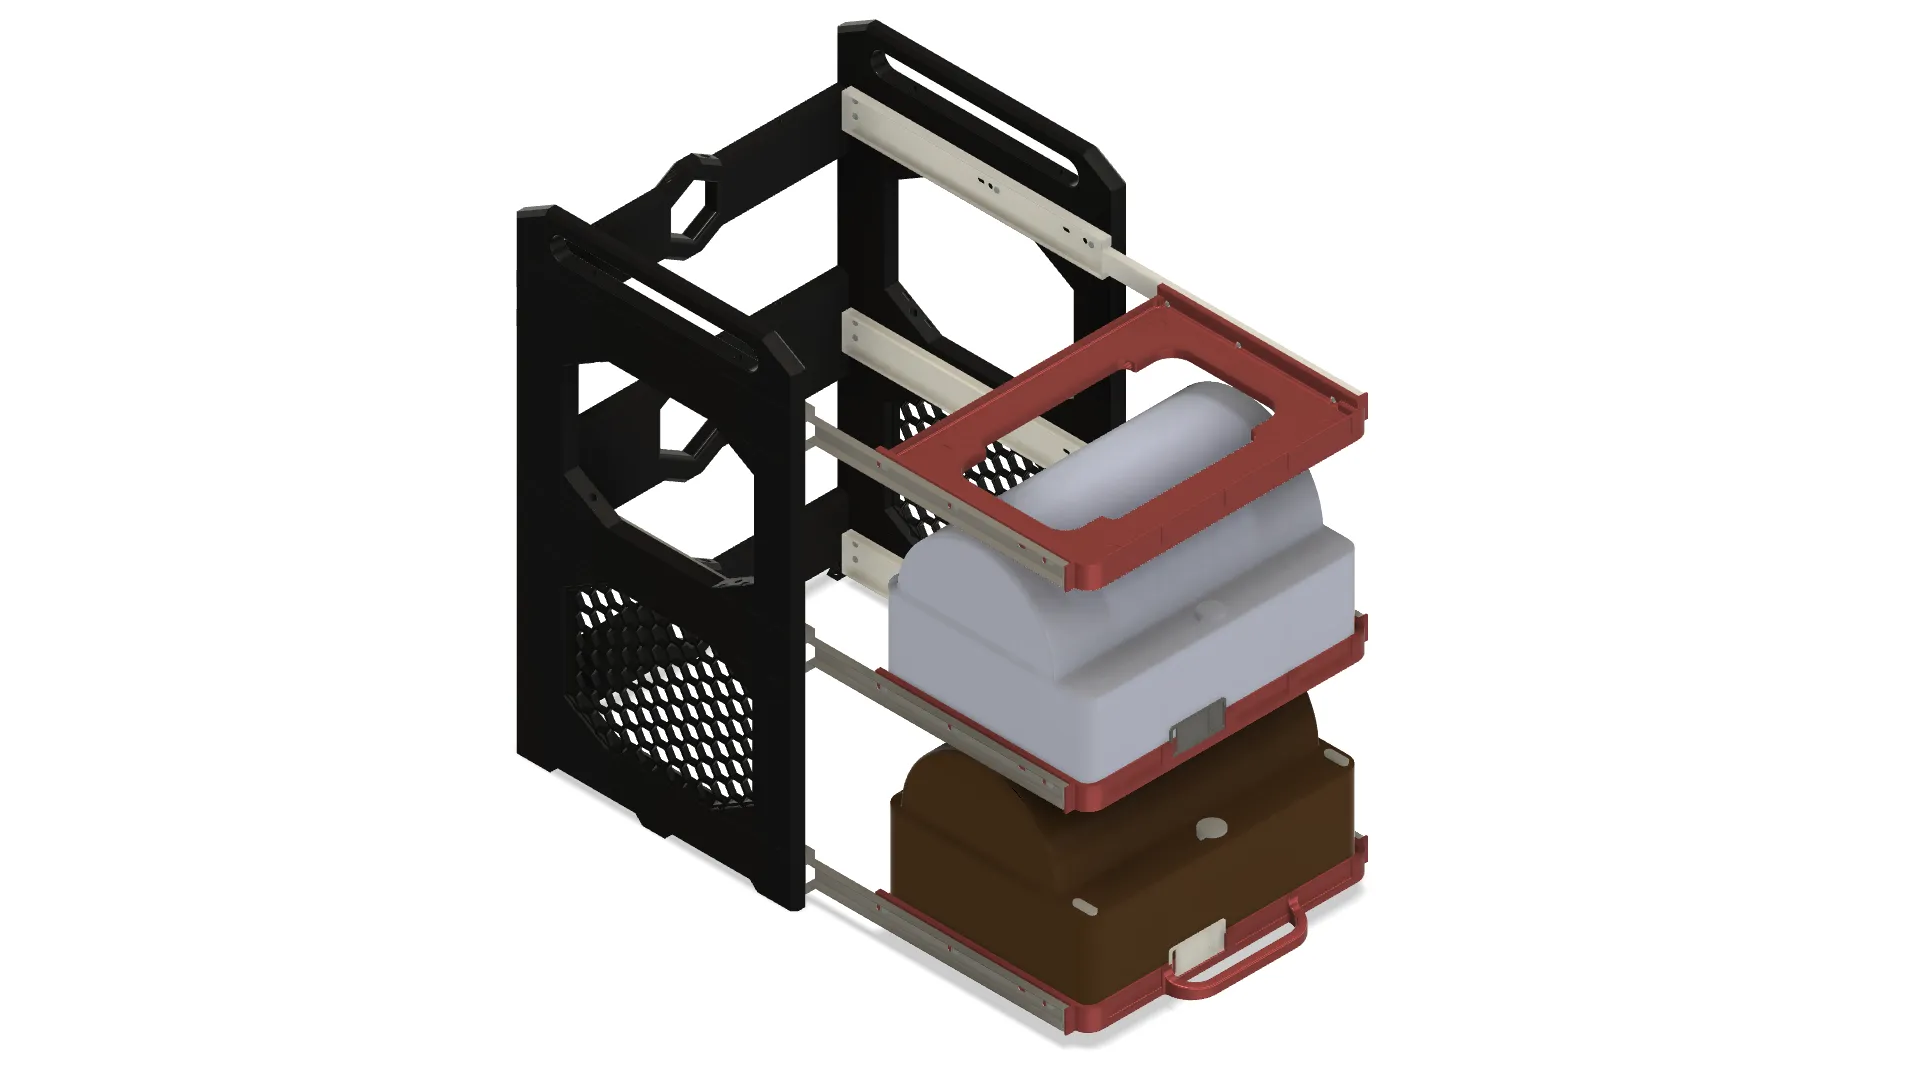
Using a 3-layer stacking configuration as an example, please refer to the illustration for a visual reference of the completed AMS sliding rack system. The modular design allows flexible vertical expansion, making it easy to scale the setup for your multi-material printing needs.
AMS 1&2 Tray Assembly
AMS 1&2 Tray for H2D Printer Profile
AMS 1&2 Tray for X1/P1/A1 Printer Profile
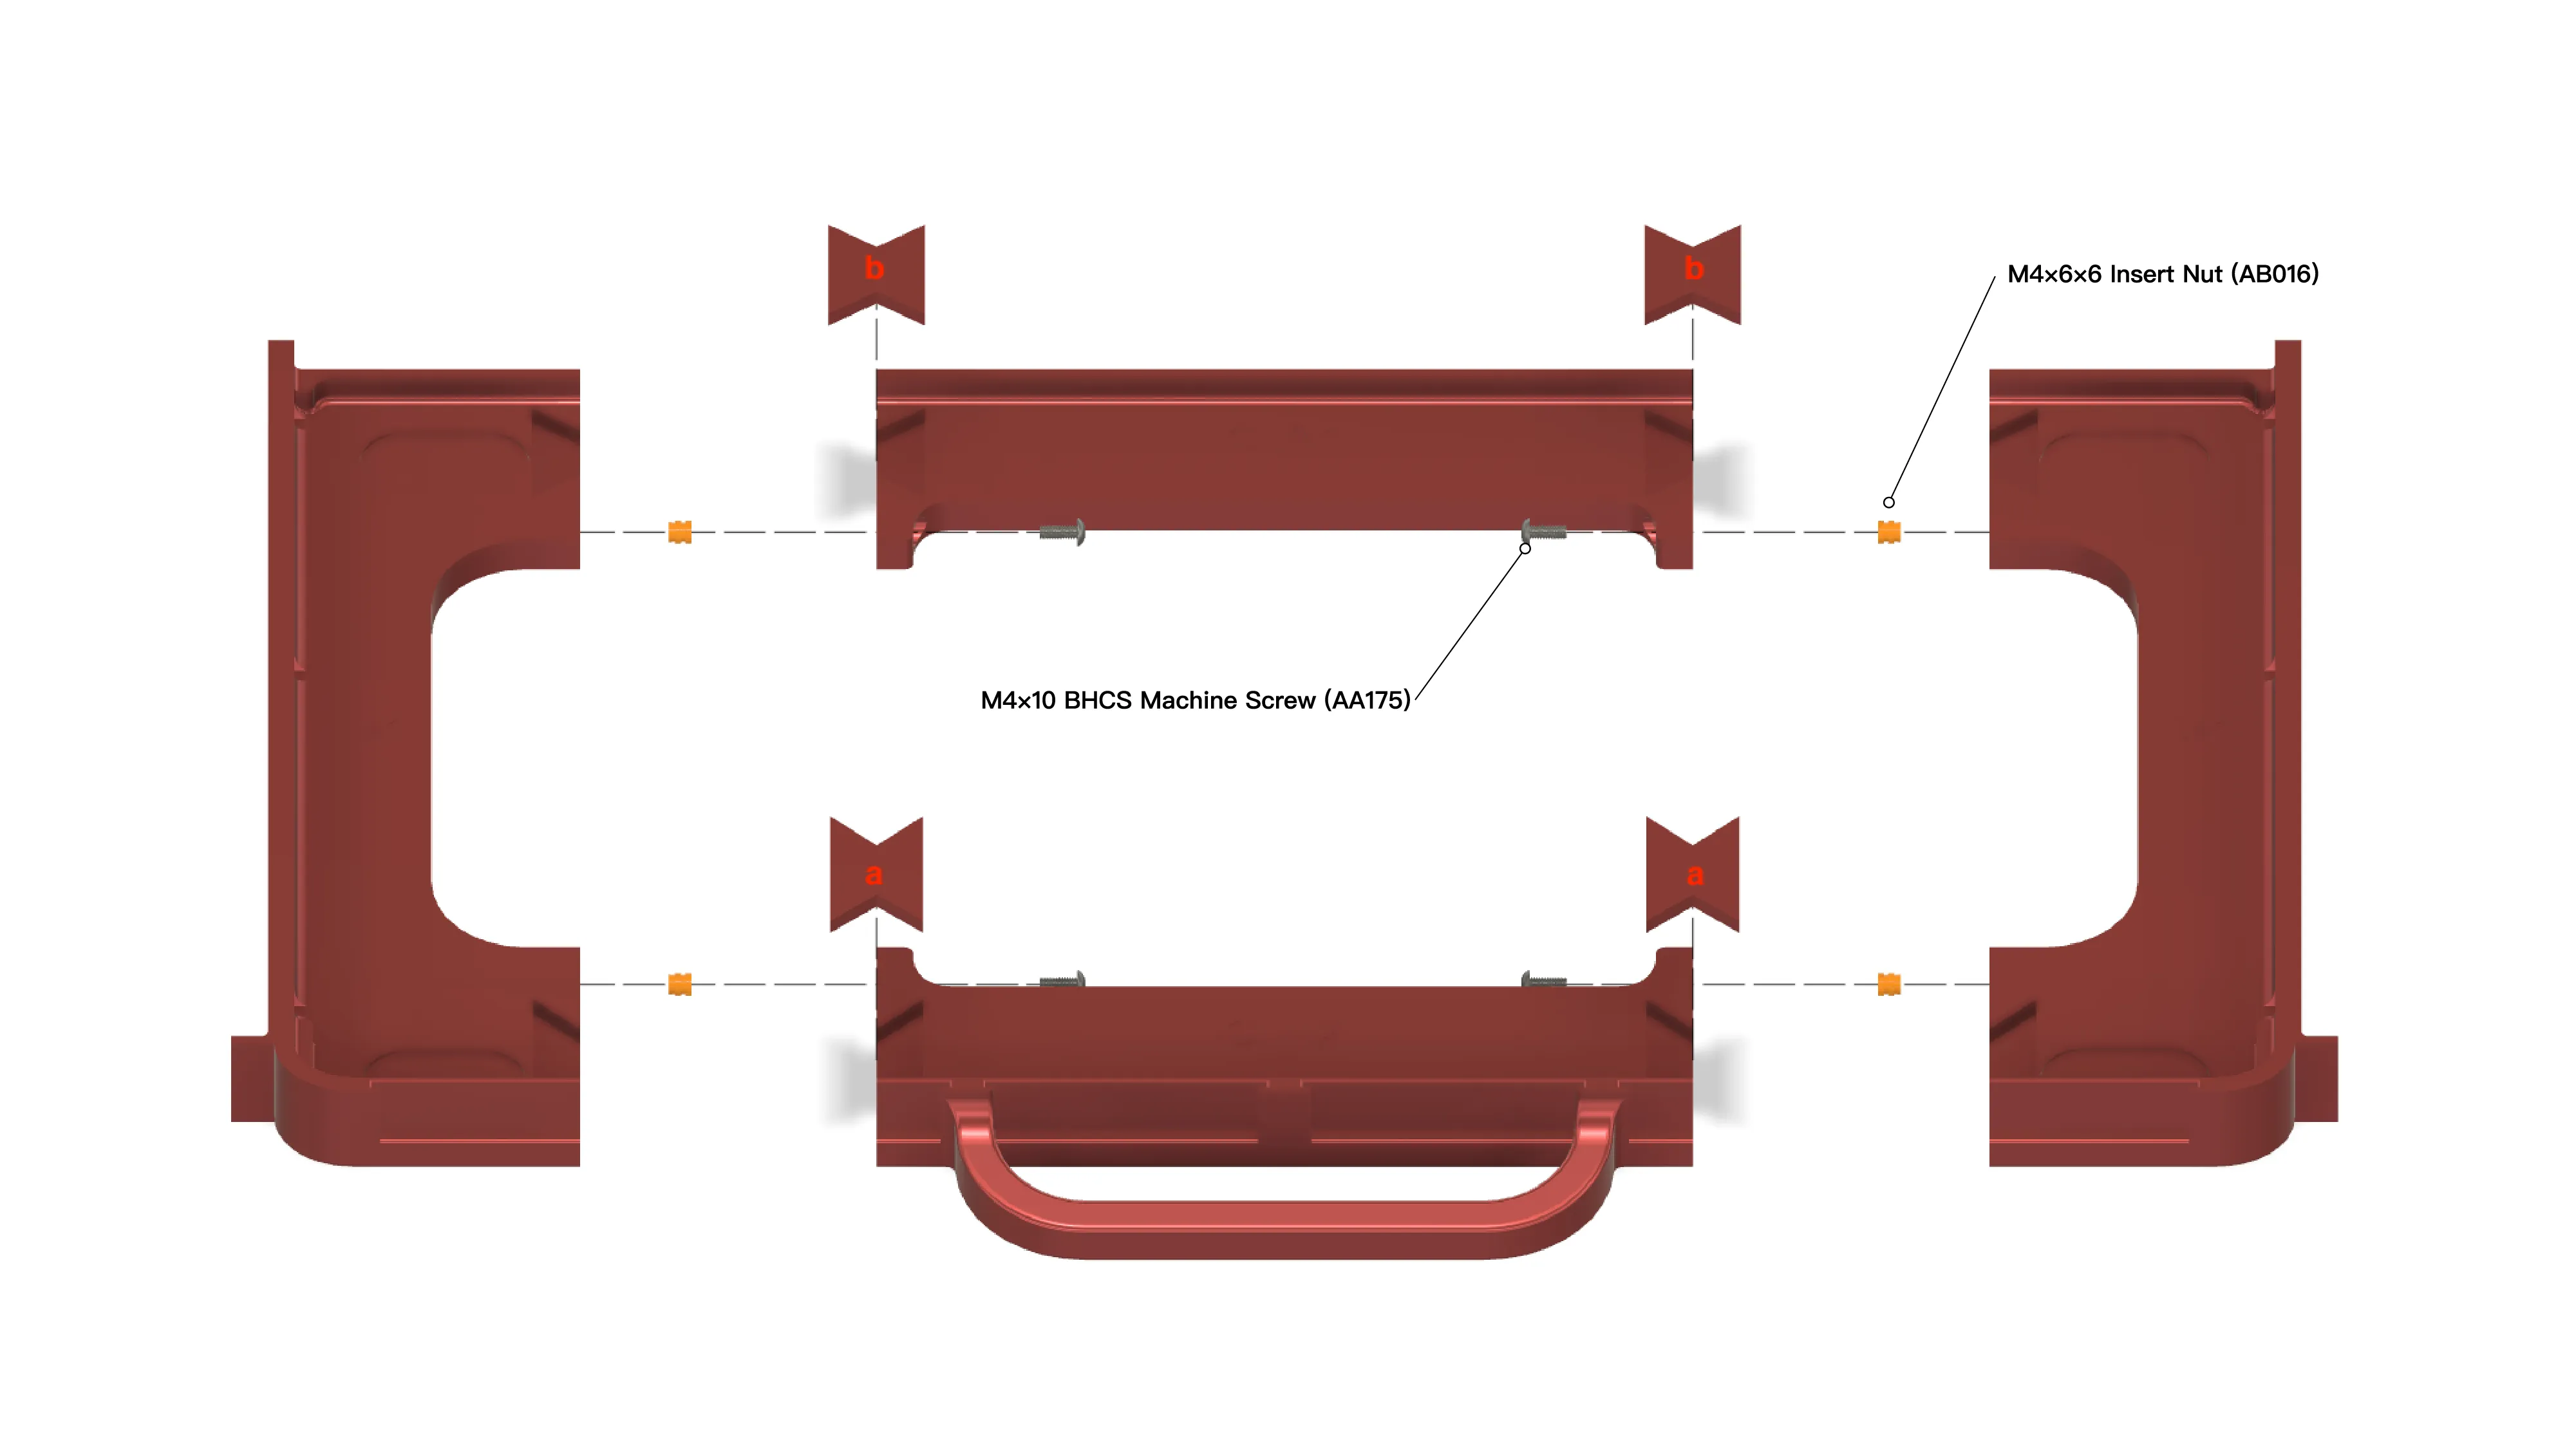
Tray Assembly
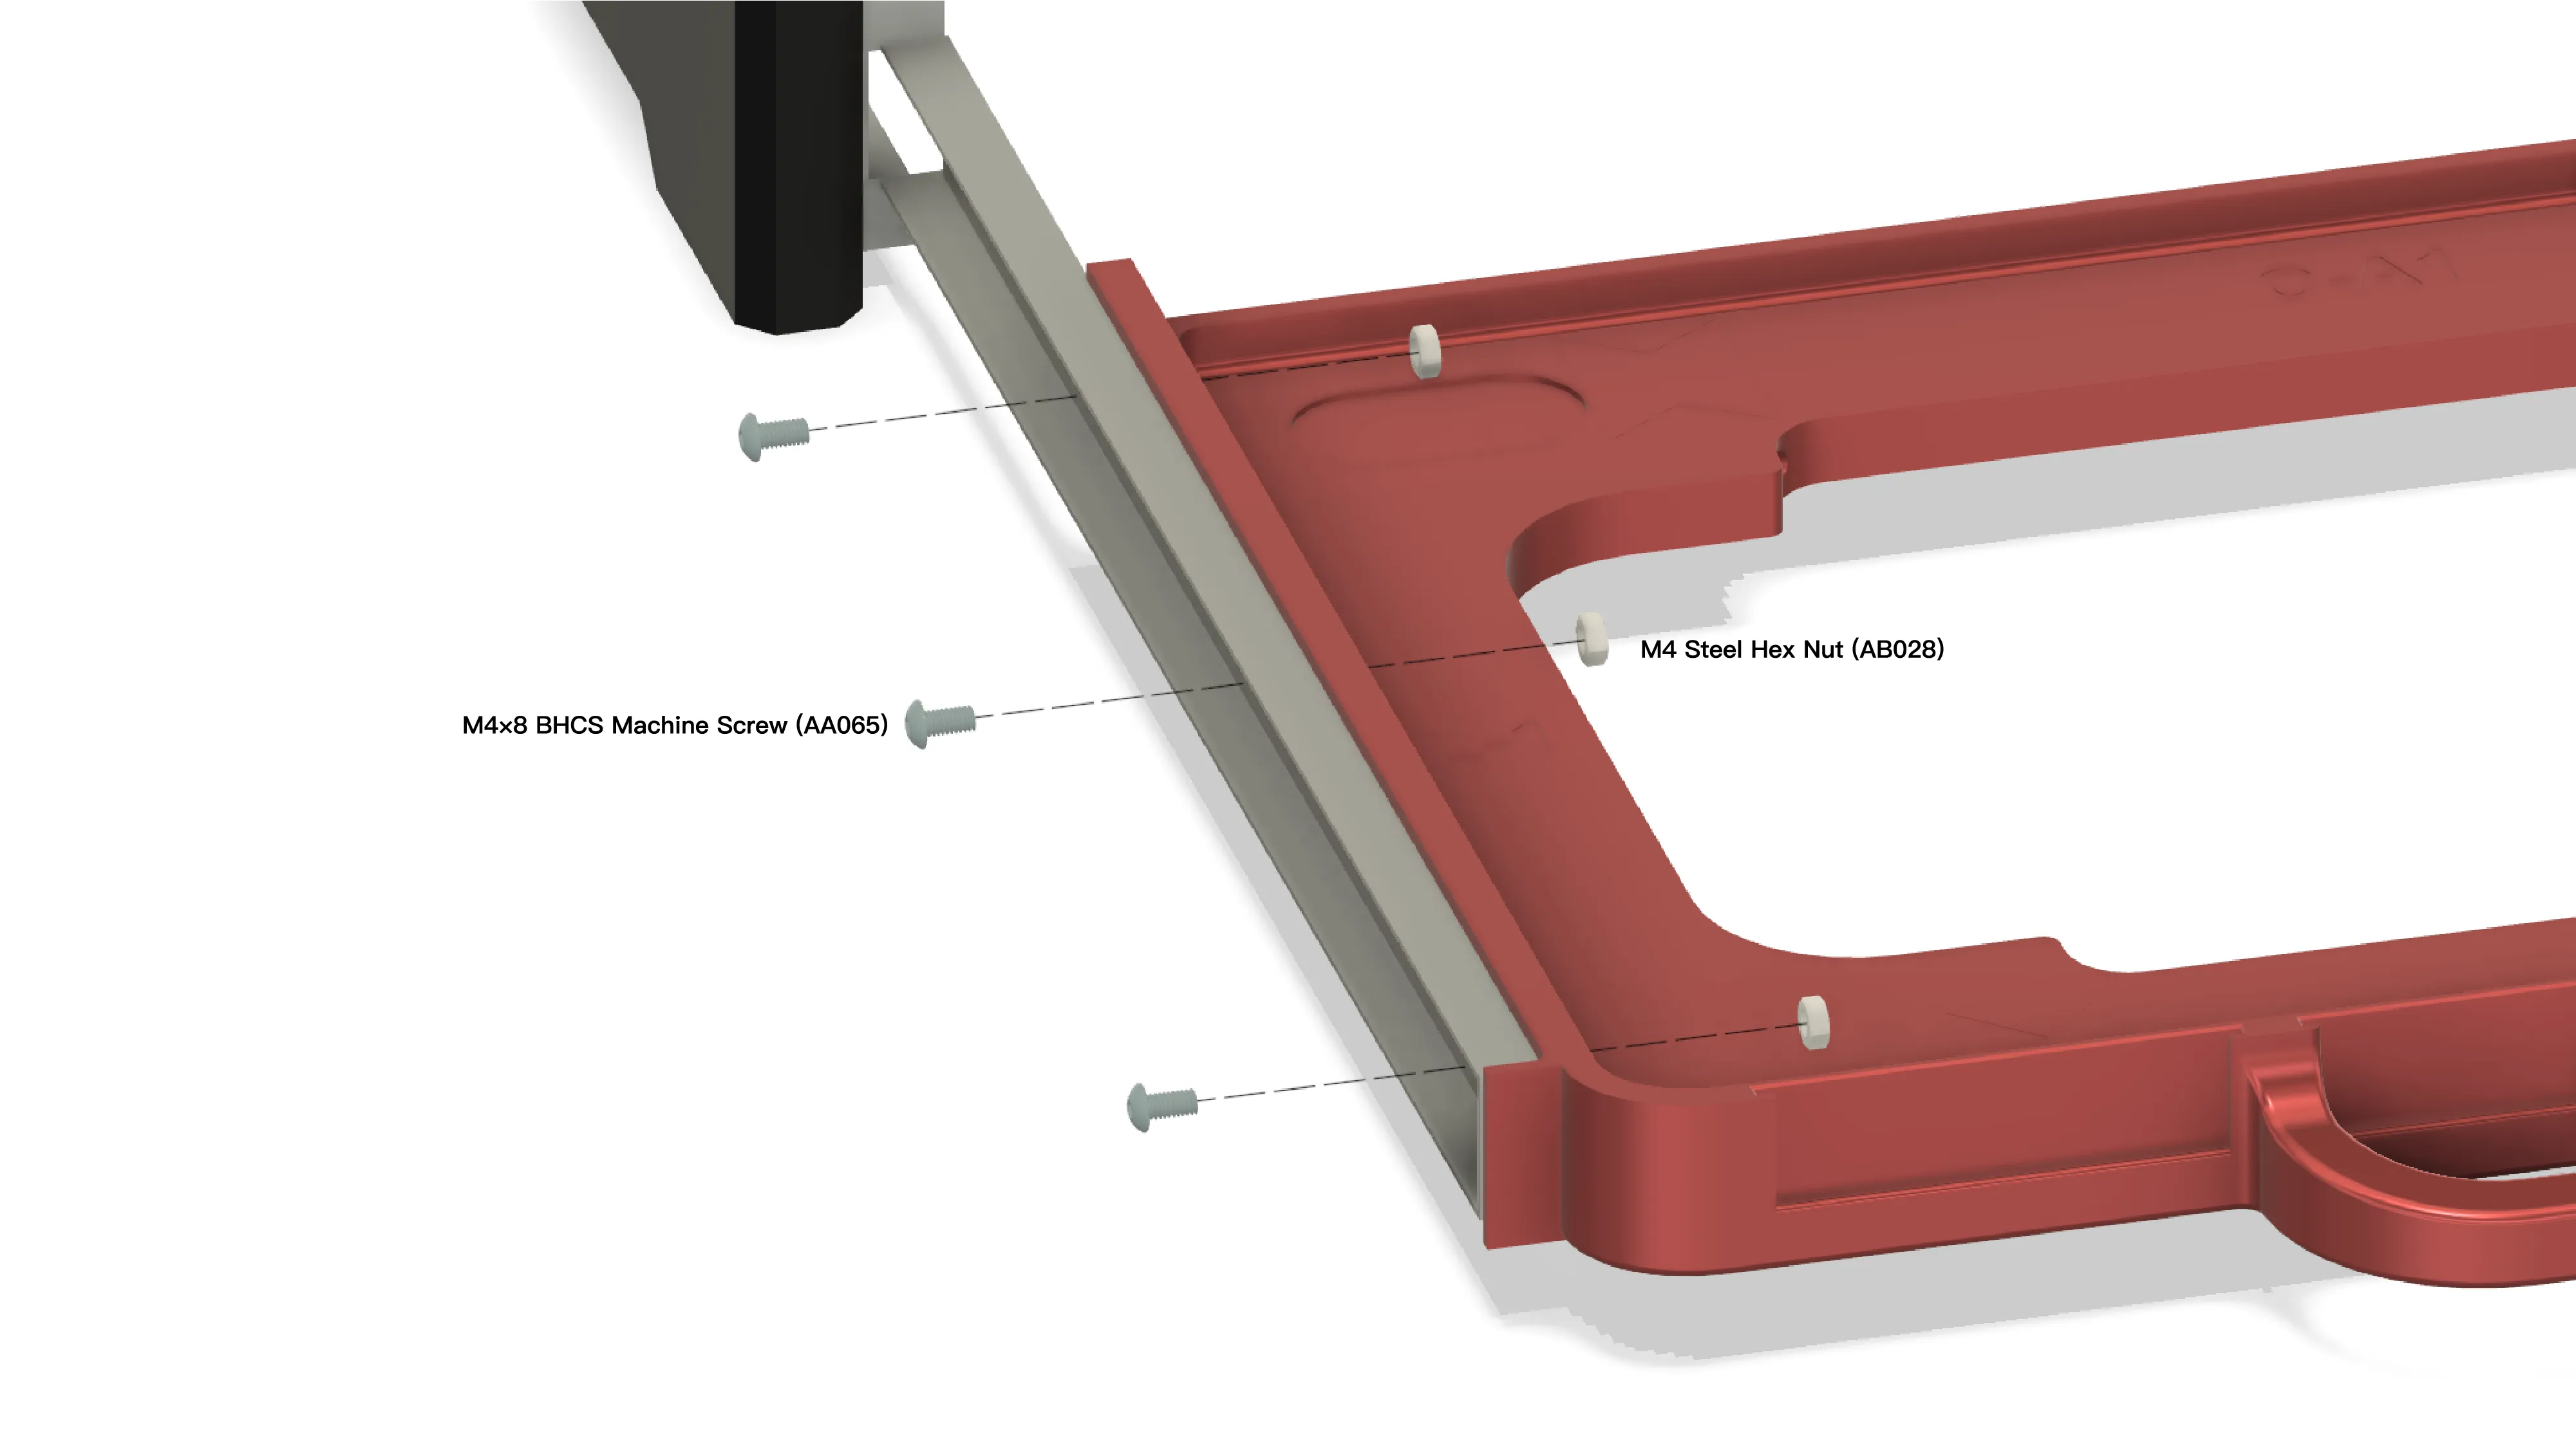
Special Thanks to
- @Will_lliW_Will for the idea that inspired me to rethink my design.
- @Richard for sharing the purchase link to compatible rails in Australia.
Changelog
All notable changes to this project will be documented in this file.
This changelog adheres to the Keep a Changelog format.
[v3] - 2025-07-09
Fixed
- Optimized the guide slot design of the HSW outer frame bracket
- Refined local structural details of the frame (e.g., lead-in chamfer for heat-set inserts)
[v2] - 2025-07-01
Added
- Added Weighted Beam module
[v1] - 2025-06-27
Added
- Initial release
☕ Enjoying the design?
If you found this design helpful and would like to support my work, feel free to buy me a coffee!
👉 https://buymeacoffee.com/shuwn
License

You shall not share, sub-license, sell, rent, host, transfer, or distribute in any way the digital or 3D printed versions of this object, nor any other derivative work of this object in its digital or physical format (including - but not limited to - remixes of this object, and hosting on other digital platforms). The objects may not be used without permission in any way whatsoever in which you charge money, or collect fees.


Comment & Rating (550)