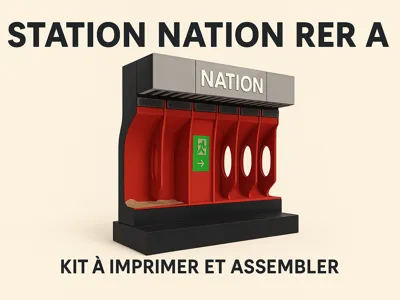
Diorama Nation RER A Paris Station


Print Profile(1)

Description
This model of the Nation RER A station in Paris should delight diorama enthusiasts like myself.
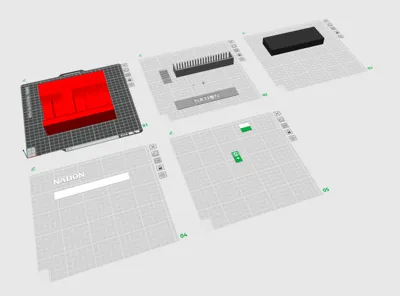
I have modeled this diorama in several parts. You will thus have the pleasure of assembling this model with these 5 construction plates.
Illustration of the station in Paris:

For printing and assembly I give you the following advice:
Necessary tools:
- Strong glue
- A model maker's blade or cutter
- Model maker's tweezers to facilitate the placement of the letters (optional)
- To avoid painting: red, white, gray (or silver), green and black filaments.
- Paint (black + others depending on the filament colors you have)
1 - Start by printing the seats (with your red filament) and once this part is printed you can paint the sides and the bottom of the seats black:

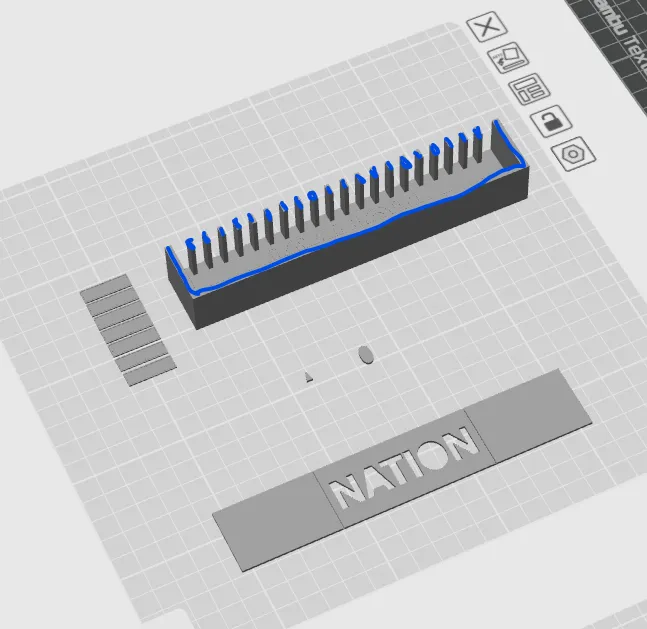
- 2 - Print plate 2 (in silver otherwise you will have to paint it) and plate 4 (in white). You can glue the rectangular plate (which I colored green in the image below) onto the small crosspieces:

3 - You can then glue the block (by putting glue on the blue parts below):
and by gluing onto the red piece:

- Then you will have to embed and glue the letters one by one (pay attention to the very small parts that correspond to the inside of the “a” and the “o”):

- Glue the small silver plates (note that the plate at the far right must be cut):

- You can now print plate 5 in two colors (green and white) then glue the exit sign:

- Print plate 3 in black and glue it with the print of the 1st plate:

- You have finished the bulk of the work! Now it's time for your imagination to add some details and increase realism. For my part, I glued a piece of cardboard onto one of the seats. I also dirtied the metro platform and the silver plates with a brush and diluted paint.
I hope you enjoy this creation! I have made several other metro stations and you can find all my creations on my Insta “imi atelier 3D”.


Happy printing!
License
You shall not share, sub-license, sell, rent, host, transfer, or distribute in any way the digital or 3D printed versions of this object, nor any other derivative work of this object in its digital or physical format (including - but not limited to - remixes of this object, and hosting on other digital platforms). The objects may not be used without permission in any way whatsoever in which you charge money, or collect fees.
Comment & Rating (0)