


Print Profile(1)

Bill of Materials


- Ear Pads x 1: https://a.co/d/iwXCANG
Description
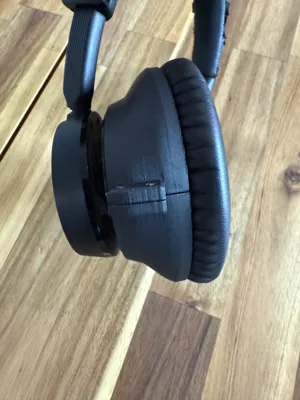
Upgrade your Plantronics Voyager 4220 headset with this comfortable over-the-ear adapter. Designed for users who prefer a wrap-around style rather than the default on-ear configuration. This mod enhances stability and wearability, especially during extended use.
Features:
- Custom-fit for Plantronics Voyager 4220
- Designed for easy print and custom fit install
- Ergonomic curve for secure, comfortable over-ear support
- Tested in PLA
Includes:
- Left and right adapters
External Supplies:
- 6 - M2x8 w/ M2 nut
- Bose QC 35 compatible ear pads. I used these from Amazon (non-affiliate link)
Boost Me (for free)
A boost a day keeps the print fails away (okay not really, but it helps me a lot).
🔒 License Notice:
This file is free for personal use only.
If you'd like to sell prints of this model (Etsy, fairs, websites, etc.), please purchase a commercial license via my Patreon page.
Your support keeps these projects alive and helps me keep releasing more designs.
🧡 Thanks for checking out my work! Tag me if you post your prints — I’d love to see them.
Assembly Instructions
- Remove the existing ear pads from your Voyager 4220 headset (See attached images for reference)
- Make not of which side is Left and Right - this will matter later
- Insert the six (6) M2 nuts into the bottom half of each adapter piece
- Use pliers to press them in firmly if needed- they should sit flush
- Slide the printed adapters on the exposed headset speakers.
- The prints are designed to fit snugly into the existing slots
- Secure the adapters using M2 screws
- Tight until the adapters are firmly clamped to the earpieces
- Do not add the L/R screen yet
- First, insure the ear pads into the adapters to test the ergonomics
- Test the fit on your head
- If the angle or position feels off, unscrew the adapters before rotating them
- ❗DO NOT FORCE ROTATION while screwed in - this could damage the headset
- Adjust as needed until the fit is comfortable and irritation-free
- Once satisfied, remove the ear pads again and insert the L and R mesh screens into the adapers.
- See images fro placement guidance
- Press the ear pads back into place over the screens
- Use the included tool with the ear pads to tuck the pads securely under each tab
You are all set - enjoy the upgraded comfort of your “new” over-the-ear Voyager 4220
License
You shall not share, sub-license, sell, rent, host, transfer, or distribute in any way the digital or 3D printed versions of this object, nor any other derivative work of this object in its digital or physical format (including - but not limited to - remixes of this object, and hosting on other digital platforms). The objects may not be used without permission in any way whatsoever in which you charge money, or collect fees.
Comment & Rating (4)