TPU Headphone Holder (POV)


Print Profile(4)


Description
Boost Me (for free)
Thank you for stopping by! If you enjoyed this, please give me a boost so I can publish more projects
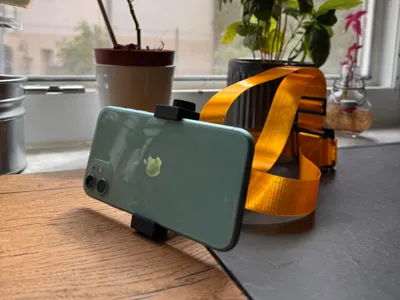
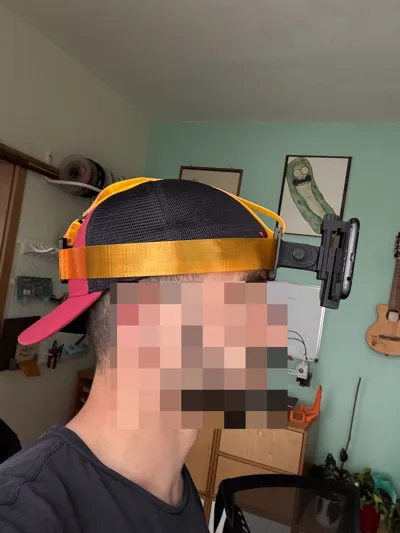
I have developed a flexible smartphone mount worn via a headband—perfect for filming from your own perspective (POV)!
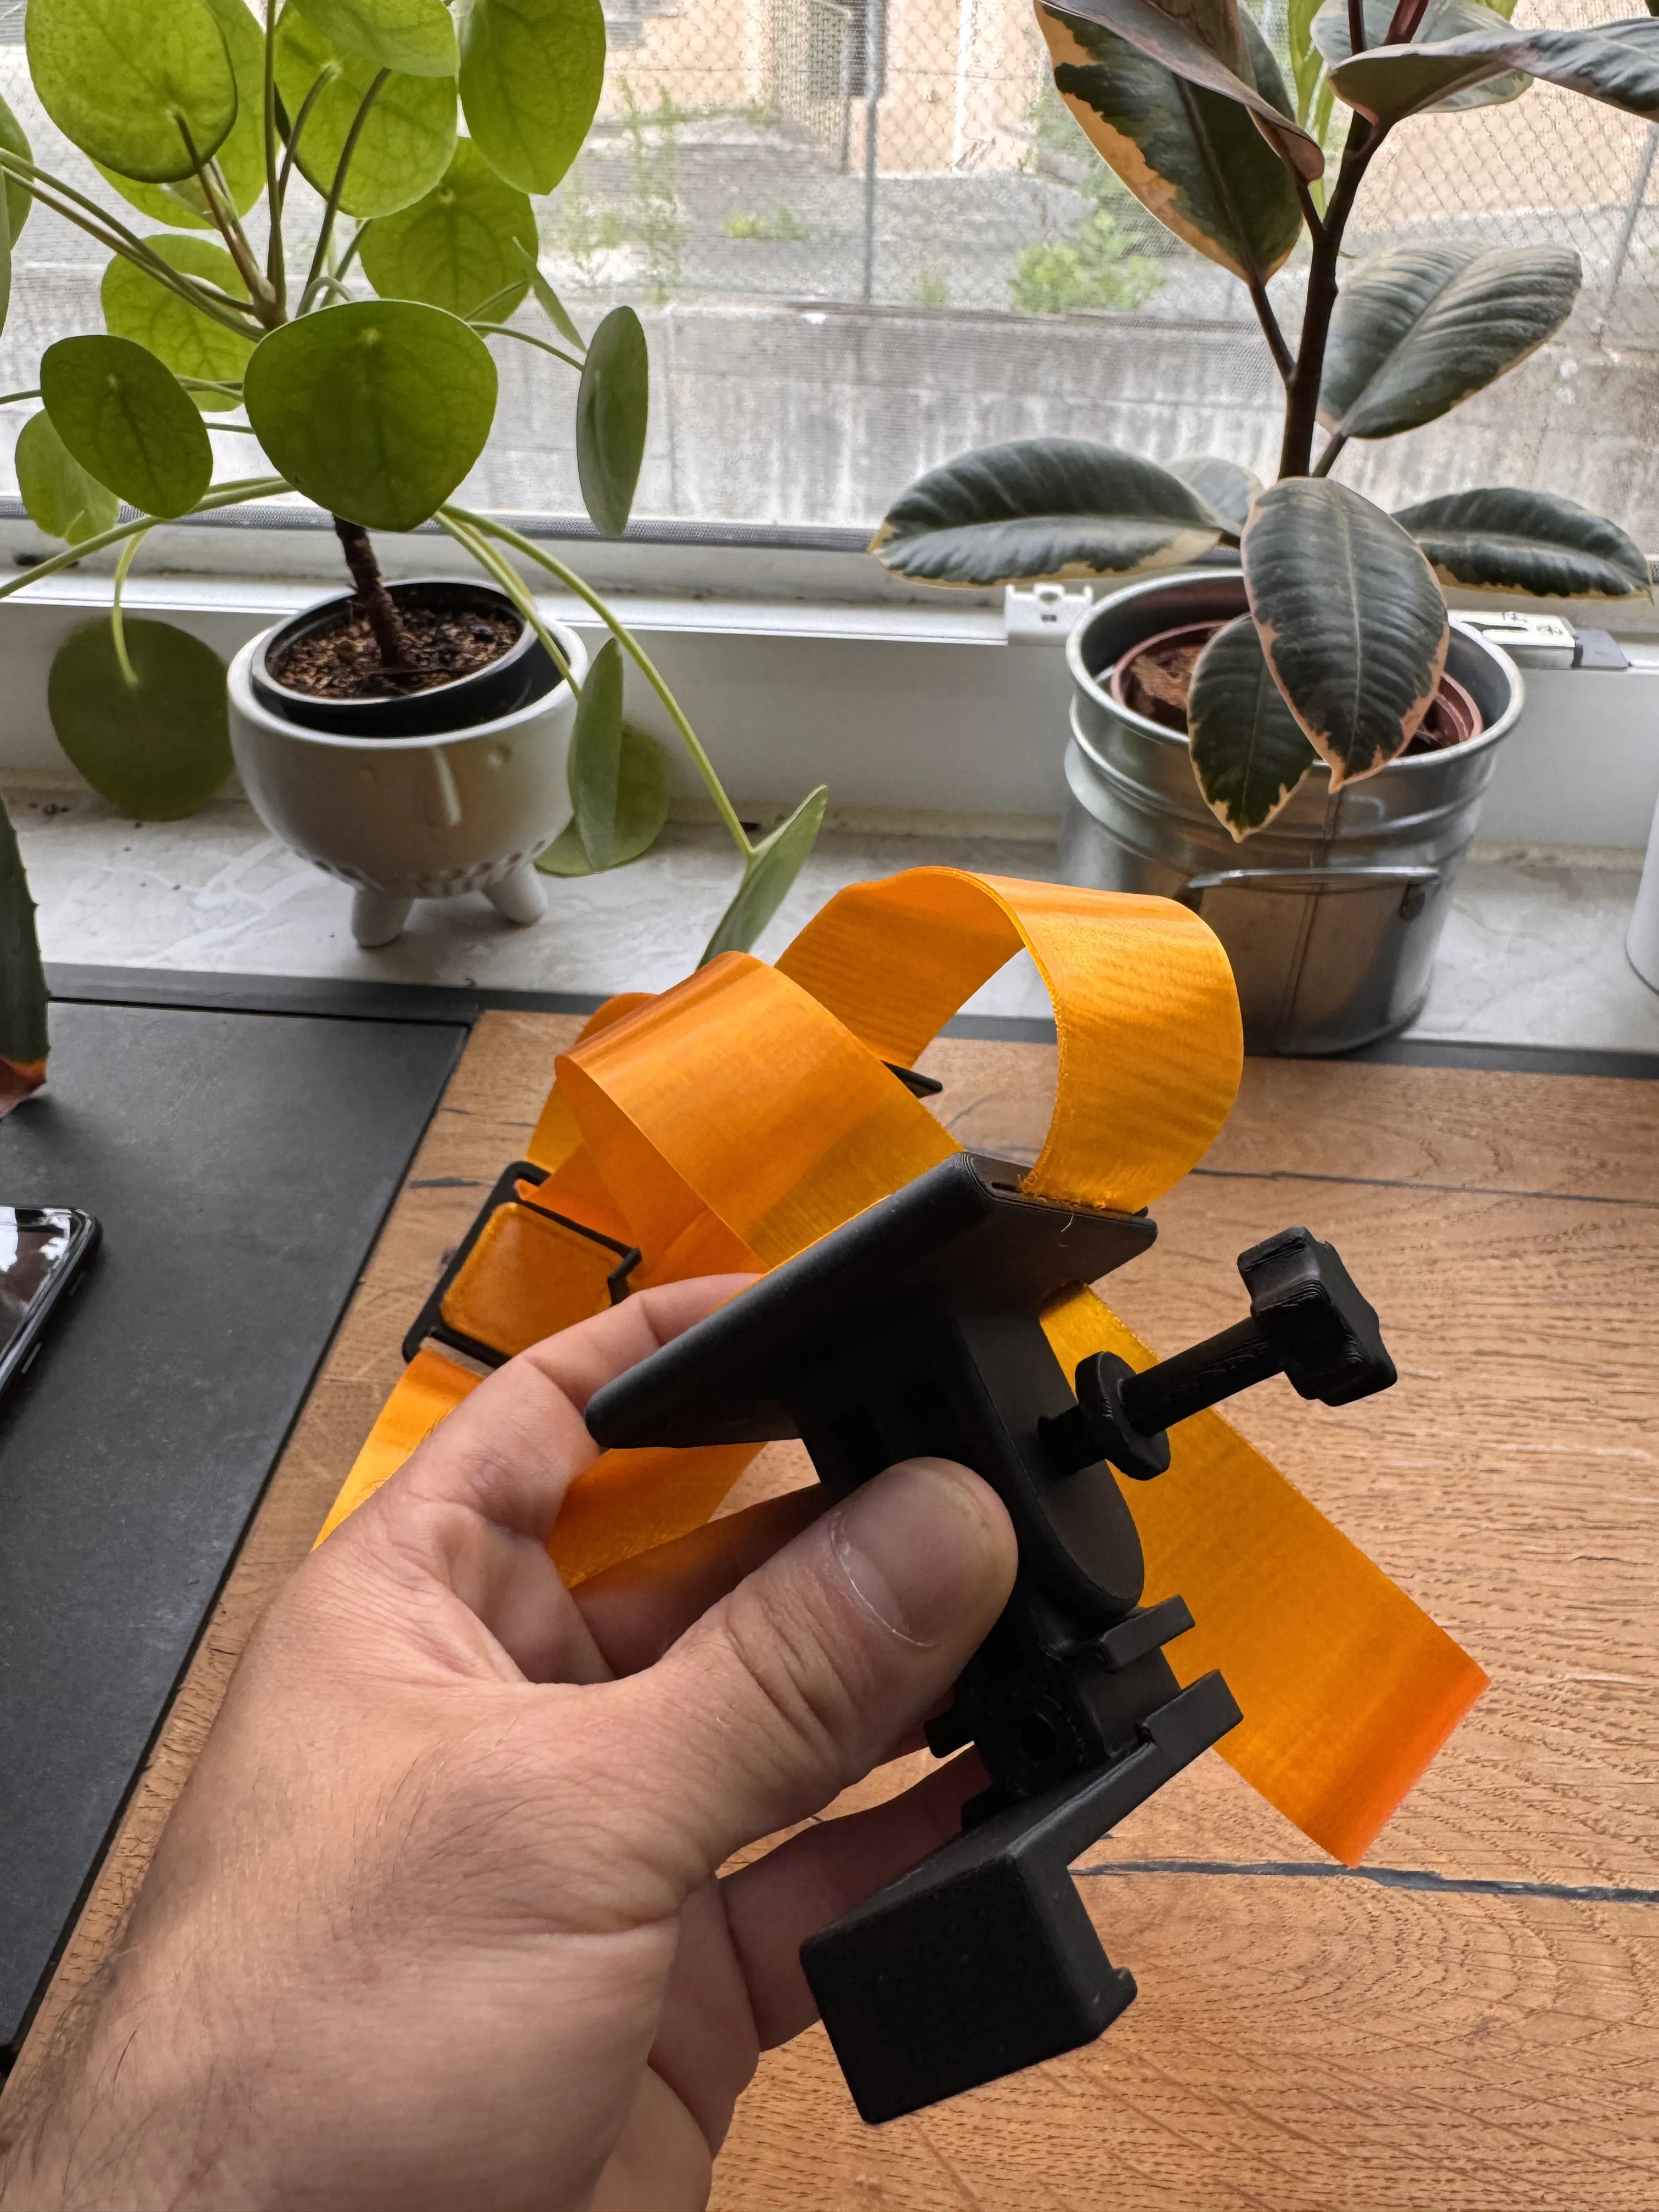
🧡 The straps are made from TPU and can be individually adjusted with two buckles
📱 The phone is clamped in horizontally at the front—ideal for DIY videos, tutorials, or vlogs
🔩 The mount is connected to the base plate via a joint
The screw is used to tighten the joint Loosening it allows you to adjust the angle—then tighten it again, and everything remains stable
Please Note!!
The straps are made of TPU; this will not work with PLA or PETG
And if you have the old version of Bambu Studio, please remember to activate support structures
Type: Normal (auto)
Style: Seamless
Since the screws are very thin, I had to print them lengthwise
💡 No TPU on hand? No problem!
Instead, you can also use elastic bands, such as those found on luggage or shoulder bags—simply pull them through the side guides, adhere them in an arc, and start filming
Printed, worn, filmed—both hands remain free!
I am participating in the Bambu Lab MakerWorld competition “Photo Accessories” with this project
If you like the project, I would appreciate a like or some feedback! 🙌
Instructions
Step 1: Adhere the TPU pads to the mount


Step 2: Attach the straps to both hooks
Small tip: Bend the straps slightly
Step 3: Take the buckles and slide them into the straps
Please ensure that the hooks point outwards


Step 4: Slide the strap into the slot of the
front mount until it is at the very bottom

Step 5: Slide the strap through
the slot to the other side of the mount so that it encircles the mount
Step 6: Pull the strap up to the buckle

Step 7: Attach the upper strap in the same way


Step 8: Almost done!!!
Insert the joint, to which the phone will later be attached, into the mount and add the screw

Step 9:
Final step!!!
Slide the rail from the top onto the mount and insert the screw You can turn the screw in or out to adjust the height


License
You shall not share, sub-license, sell, rent, host, transfer, or distribute in any way the digital or 3D printed versions of this object, nor any other derivative work of this object in its digital or physical format (including - but not limited to - remixes of this object, and hosting on other digital platforms). The objects may not be used without permission in any way whatsoever in which you charge money, or collect fees.
Comment & Rating (7)