EDC Dragon Fidget Slider 4x2


Print Profile(5)


Bill of Materials


Description
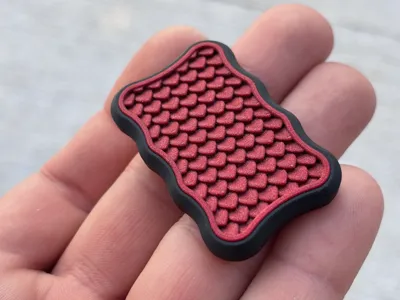
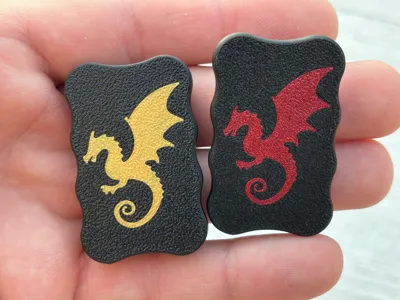
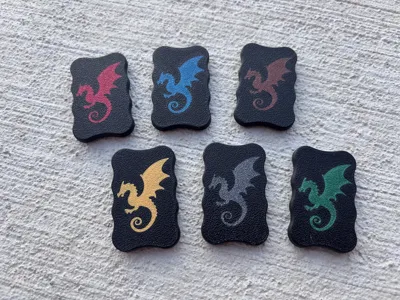
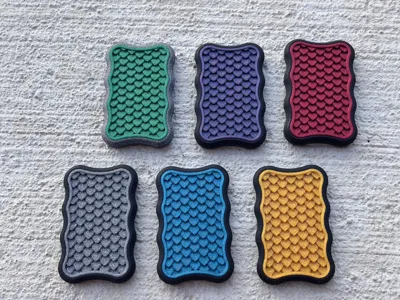
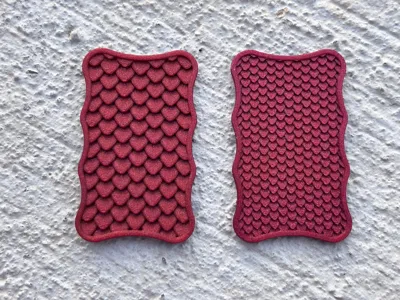
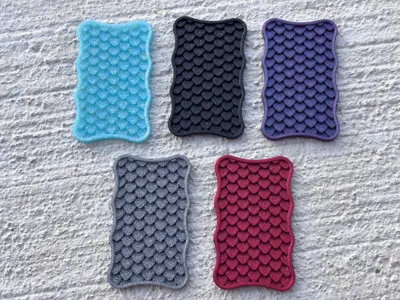
This is my dragon scale EDC fidget slider named the Wyvern Relic. It uses 8 magnets per side for a satisfying 3 click feel. It looks really cool when you use sparkly colors for the top scales. There are a few things that are critical to printing this successfully, so please read the directions below before printing. I know a lot of people like to slice their own prints, but please at least try my settings before doing it yourself. It took some effort to figure out how to get this to print out perfectly every time, so if you change something in the slicer settings, there’s a pretty decent chance the print will fail or come out looking bad. This is printed with the standard .4mm nozzle. There is also a plain bottom with no dragon if your printer isn't up to the challenge. :)
If you like this type of fidget and would like some more designs comment below.
Printer:
I genuinely don’t know if this can be printed on a budget brand printer using Temu filament. But if you try it and it works, please post a picture. I’m really curious to see how it looks. Make sure your printer is calibrated to your filament. The dragon has very small details and your machine needs to be performing perfectly for an optimal looking print. I have printed these out on the A1 series, P1S and X1C printers And they all print this equally well using this print profile.
Build plate:
I’ve found that using the regular gold PEI build plate that comes standard on Bambu printers works well for the bottom surface texture. Please clean your build plate before starting this print! I use Dawn dish soap, a rag and hot water. If there is any grease or crap on your plate, the dragon will not stick and look like a deformed blob.
Filament:
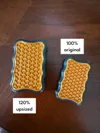
Make sure it’s dry and a printing cleanly. During testing I ran across a few filaments that were very finicky and required some extra work to get them to print properly. If you are having a lot of issues and you know everything on your end is good, try a different filament. If you try printing the top scales with damp filament, you are going to end up with a very stringy top. Also. Make sure your filament is calibrated! If you are over or under extruding, you will end up with something that doesn't look like a dragon on the bottom. This dragon tail is extremely small. I would recommend using a good quality filament for this.
Printing:
Now that we got that out of the way, it’s on to printing and assembly. Print the dragon first, this is critical if you want it to look sharp and defined like in my photos! You can assign filament print order by clicking on the hexagon underneath the lock button on the right side of the build plate in the Bambu slicer. Printing the top is pretty straight forward and as long as your filament is dry, and printing at .08mm layer height you should be ok.
Assembly:
Once everything is printed and you are happy with the results, its time to put it together. I use 6mm x 3mm and 6mm x 2mm magnets. I found that the Bambu magnets are a good middle ground magnet to start off with. Amazon magnets are too weak in my opinion. I use a metal ruler for the first side. This keeps the magnets from flipping out. Once the magnets are in place, make 100% sure they are all facing the same way! Use a few small drops of your favorite glue and press on the top. I have had good luck with Arka Kraftprotz which you can get from Amazon. Then set the other side of the slider on the one you glued up, both dragon sides should be touching each other. Put in the magnets for the second side. The magnets will be attracted to the ones on the other side, so you can ensure they are all facing the correct way and they also wont fly out. Glue that side and that’s it! You can clamp them to gather for a few minutes if you like while the glue sets up.


Commercial license available on Patreon as well:
https://www.patreon.com/c/JBCustomDesigns
Membership
Interested in selling these models? Sign up for the commercial license.
License
You shall not share, sub-license, sell, rent, host, transfer, or distribute in any way the digital or 3D printed versions of this object, nor any other derivative work of this object in its digital or physical format (including - but not limited to - remixes of this object, and hosting on other digital platforms). The objects may not be used without permission in any way whatsoever in which you charge money, or collect fees.
Comment & Rating (16)