Full Automatic Air Freshener Spray - ESPHome


Print Profile(3)


Description
✨ Automatic Smart Air Freshener (Airwick-compatible) – DIY Project
🛠️ Project Overview
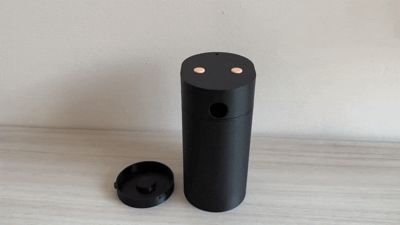
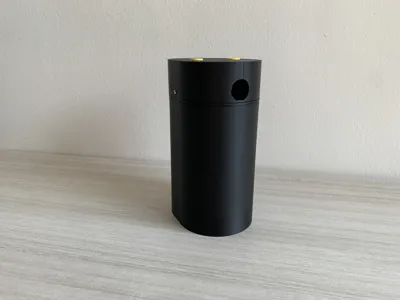
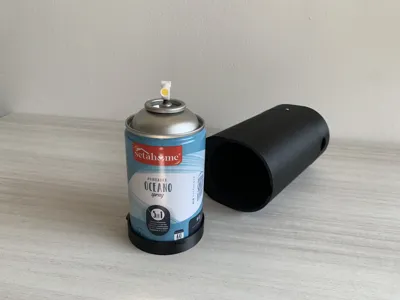
This is a fully 3D-printable automatic spray air freshener, compatible with standard Airwick™ refill cans. Designed as an open-source smart project, it allows both standalone operation and full Home Assistant integration via ESPHome.
It is ideal for hobbyists looking to automate scent dispersion with custom timing, local buttons, and Wi-Fi control.
🧩 Main Features
- Compatible with Airwick spray refills
- Based on ESP8266 / ESP32 / D1 Mini
- Fully integrated with Home Assistant via ESPHome
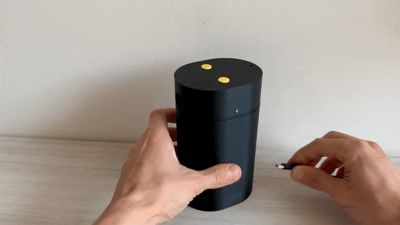
- Two physical buttons for spray and configuration
- Customizable spray duration and interval
- Built-in LED feedback
- All components are easily sourced online for under €8
🧰 Required Components
- 1x 9g Micro Servo (SG90, 180°) (Amazon)
- 2x Basic Push Buttons (e.g., from Arduino kits) (Amazon)
- 1x ESP8266 / ESP32 / D1 Mini (Amazon)
- 1x 220Ω or 230Ω resistor (for LED) (Amazon)
- 1x Female USB-C port (Amazon)
- 2x Paperclips (used as mechanical pins to actuate and lock the spray lever)
- Various M2 screws for assembly (Amazon)
🧱 Assembly Instructions
- Fix the spray lever in position using a bent paperclip to keep it straight and aligned.
- Mount the servo motor in its dedicated holder with M2 screws.
- Use another paperclip to link the servo arm to the spray lever.
- Attach the servo holder to the main body with M2 screws.
- Solder the electronics (resistor, LED, buttons) to the microcontroller.
- Route the wires neatly through the internal cable channels.
- Glue the USB-C female port to its mount using super glue and fine tweezers.
- Close the electronics compartment with a single M2 screw.
- Insert the two push buttons and lock them using the dedicated screw-in holders.
- Insert the LED into its slot.
- Carefully close the top cover, ensuring that wires do not obstruct the servo movement.
How to fold paperclips:

🧠 Firmware
The device runs ESPHome firmware, which can be flashed using the ESPHome Web Tool or any other compatible uploader.
The YAML configuration is available here.
Home Assistant Integration:
- Full support for spray control and automation
- Tracks:
- Total spray time
- Total spray count
- Customizable auto-spray duration
Physical Button Functions:
- Spray Button:
- Short press → 250ms spray
- Long press → 500ms spray
- Setting Button:
- Short press → Toggle auto-spray ON/OFF
- Long press (>10s) → Reset spray timer and spray count (for new refill can)
Default behavior:
- Automatic spray every 30 minutes with 250ms spray duration
📦 Notes
- The model is in its first revision, and future updates are planned.
- This project is open source, but:
- Commercial use is prohibited
- Redistribution under different versions is not allowed
- All parts can be found on AliExpress or Amazon (for a slightly higher price)
🔍 Final Notes
This is a unique DIY smart scent diffuser project. At the time of publishing, no similar projects were found online.
It's designed to be both functional and easily reproducible with standard maker tools and electronics.
If you build or modify this design, feel free to share feedback and suggestions!
🟠 Circuit Schema:

🟢 HA Device:

🔧 Flashing the Firmware (ESPHome)
This project uses ESPHome. You will flash the device using the provided .yaml file.
📝 Steps:
- Open web.esphome.io using Google Chrome
- Connect your ESP8266 / ESP32 via USB cable
- Click “Connect” and select your board
- Now you need to compile the firmware from the .yaml file:
- Option 1: Use Home Assistant → ESPHome → Create a new device → Upload the .yaml → Click Install
- Option 2: Use ESPHome CLI on your PC:
🔵 Button ad Led Support:

🟡 USB-C and ESP Board:


⚪️ Mechanism Details:


🟤 Other:


License
You shall not share, sub-license, sell, rent, host, transfer, or distribute in any way the digital or 3D printed versions of this object, nor any other derivative work of this object in its digital or physical format (including - but not limited to - remixes of this object, and hosting on other digital platforms). The objects may not be used without permission in any way whatsoever in which you charge money, or collect fees.
Comment & Rating (25)