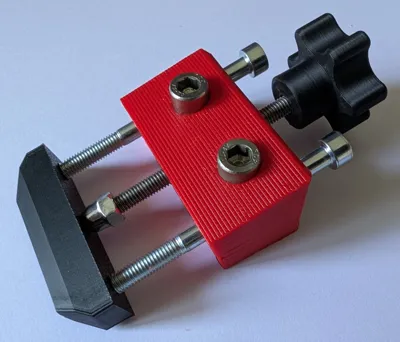
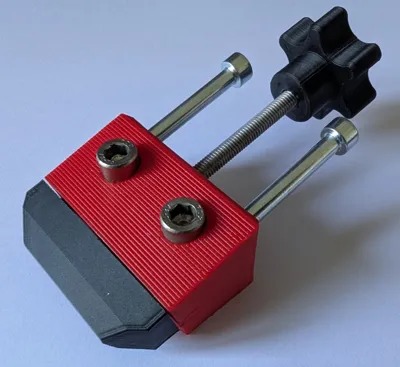
CNC Toe Clamp/Push Block Clamp


Print Profile(2)

Bill of Materials
- M5x65mm partially threaded cap head bolts x 2:
- M5x70mm fully threaded hex head bolt x 1:
- M5 nut x 1:
- M5 domed nut x 1:
Description
This clamp is based off a couple of other designs I've seen which I really liked but I felt were too big for my small 3018 hobby CNC.
My 3018 CNC machine has a spoil board with M6 threaded inserts installed in a 24mm grid pattern, so the fixing holes in this clamp are M6 holes, 24mm apart (48mm for the 75mm version).
I've included the FreeCAD file which has a spreadsheet where you can change the parameters of the clamp and export the STL files if you would like to make one that fits your machine. The spreadsheet allows you to change the clamp width, fixing hole spacing, fixing hole diameter, and fixing holes recess diameter (Make the recess diameter the same as the hole diameter if you don't require a recess). If changing, please be careful not to have the fixing holes interfering with the guide holes.
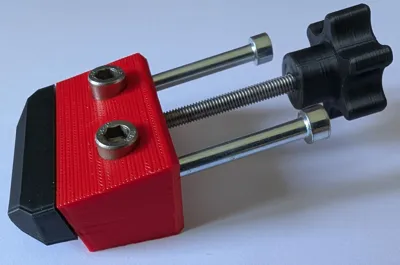
The clamp has an approximate travel distance of 30mm when fully extended.
Prints OK without supports.
Hardware Requirements
2 x M5x65mm partially threaded cap head bolts
1 x M5x70mm fully threaded hex head bolt
1 x M5 nut
1 x M5 domed nut
1 x Star Knob -> https://makerworld.com/en/models/184527-knob-for-bolt-m5#profileId-203689
2 x M6x30mm cap head bolts (depends on how you want to fix it to your spoil board)
Assembly
Hopefully the assembly is fairly obvious from the pictures but I'll add some instructions here for completeness.
1. Insert the M5x70mm bolt into the Star Knob.
2. Insert the M5x70mm bolt into the centre hole of the clamp through the small opening on the back.
3. Screw the M5 nut onto the M5x70mm bolt, align the M5 bolt with its recess hole and then tighten the bolt using the Star Knob to set the M5 nut fully into its recess.
4. Insert the M5x65mm partially threaded cap head bolts in the outer holes of the clamp and screw then directly into the recess holes of the jaw.
5. Screw the M5 domed nut onto the M5x70mm fully threaded bolt (optionally glue on the bolt for a permanent fixture).
Comment & Rating (2)