
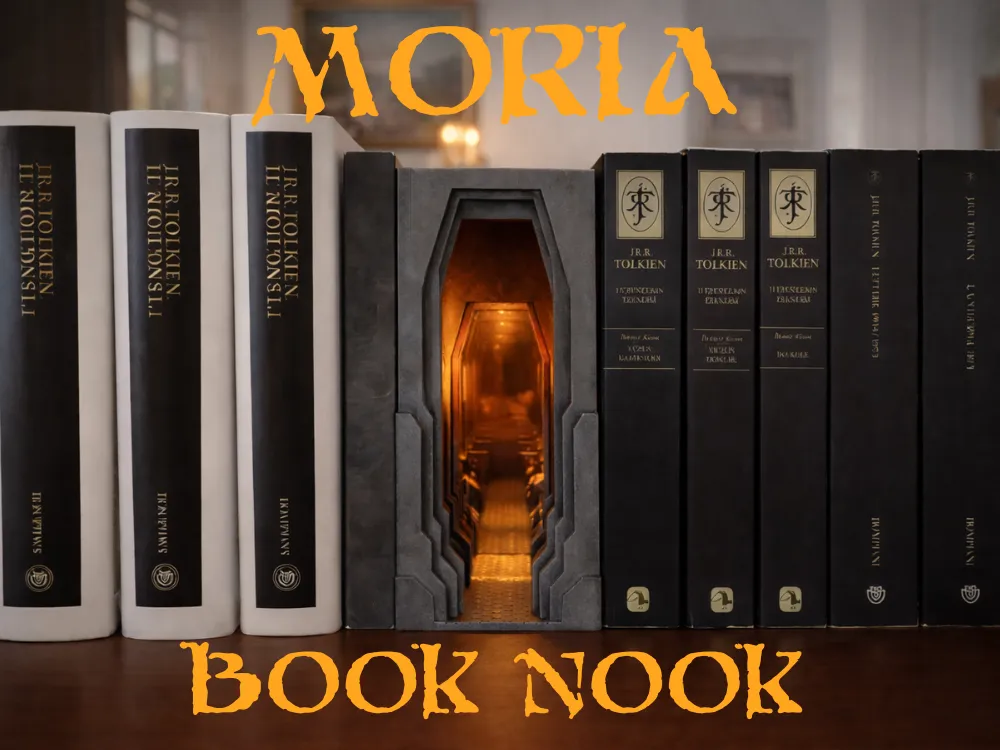
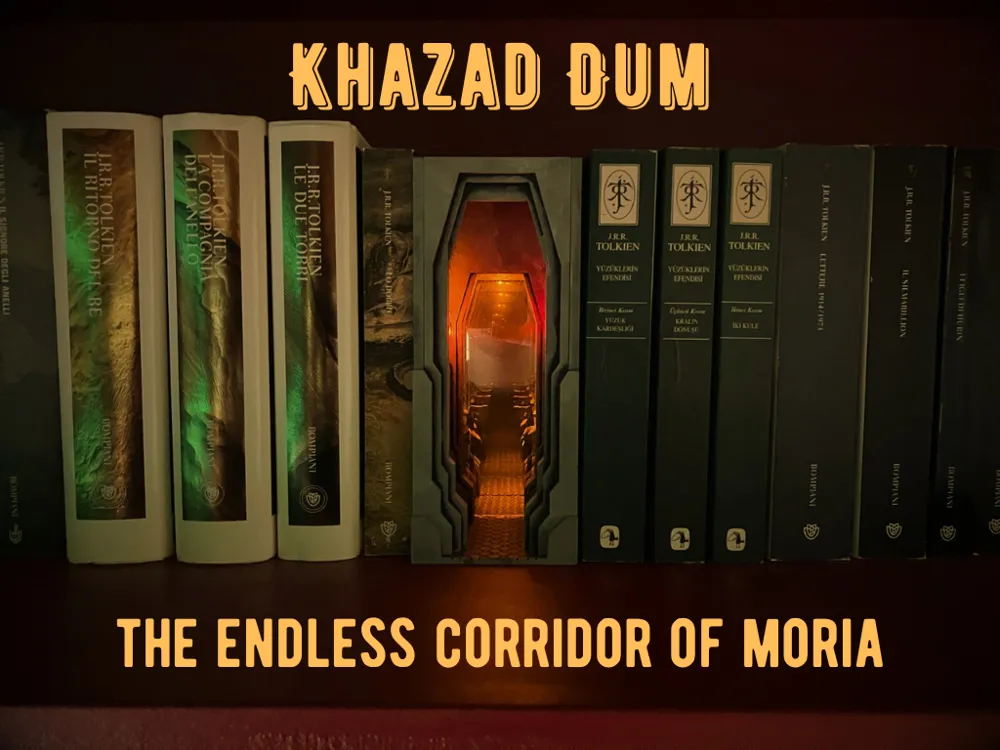
Khazad-Dum Book Nook, Moria Diorama


Print Profile(2)

Bill of Materials

- LED flickering effect Yellow x 1: https://www.amazon.it/dp/B09MDF91S1?ref_=ppx_hzsearch_conn_dt_b_fed_asin_title_12
- LED flickering effect Red x 1: https://www.amazon.it/dp/B09H5GDLTZ?ref_=ppx_hzsearch_conn_dt_b_fed_asin_title_12
- 9V Battery holder x 1: https://amzn.eu/d/86m6MzE
- Swich x 1: https://amzn.eu/d/3Gh66e0
- Mirror film x 1: https://amzn.eu/d/dK8z9Lp
- Plexiglass 3mm x 1: https://amzn.eu/d/7fSBx2P
- Mirror 20*20cm x 1: https://www.amazon.it/dp/B0CSSKVCZL?ref=ppx_yo2ov_dt_b_fed_asin_title&th=1
Description
🧭 GENERAL INFORMATION
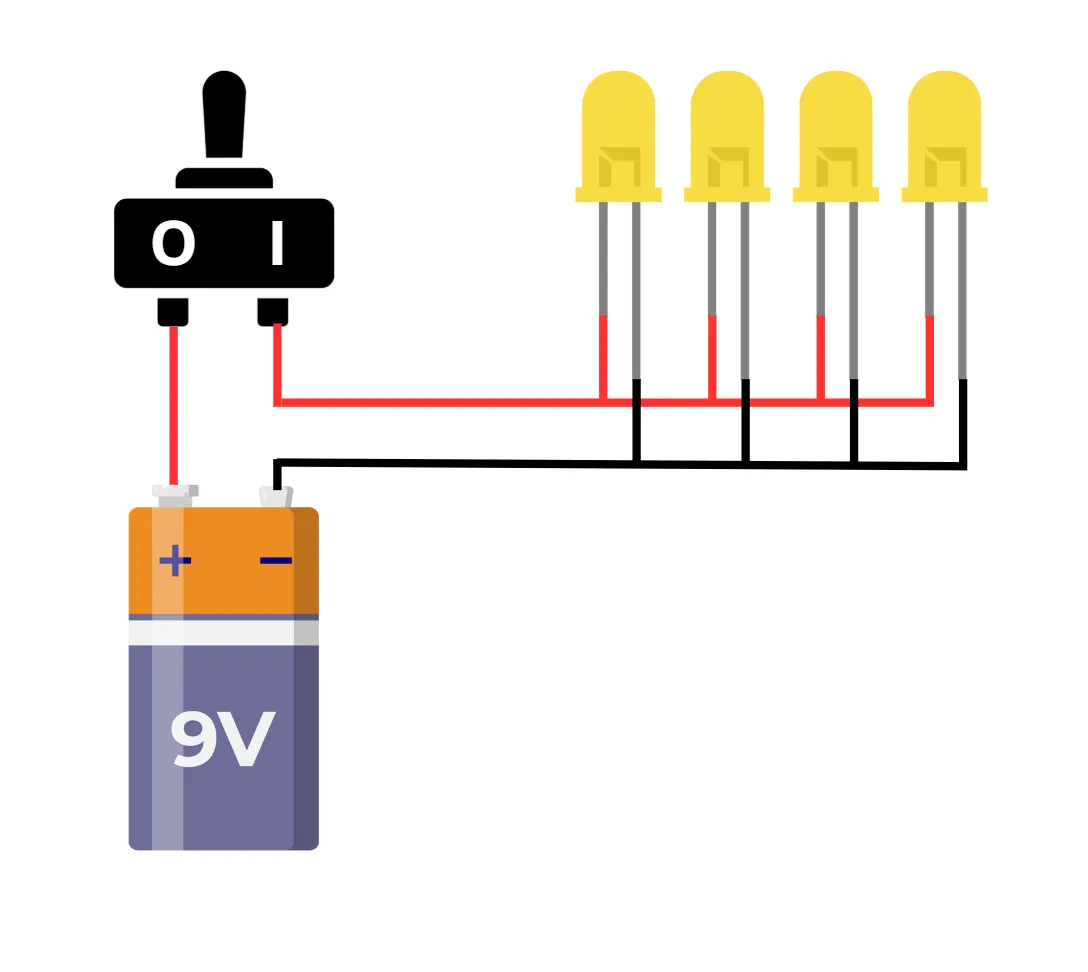
🔌 About the wiring
The wiring setup is simple and user-friendly:
- The side walls feature 5 mm-wide cable channels, suitable for most electronic wires.
- At the top of the diorama, there's a technical compartment designed to hold:
- a battery
- a switch
- an optional external power connector
- and all the internal wiring.
The side walls include two holes each for installing LEDs:
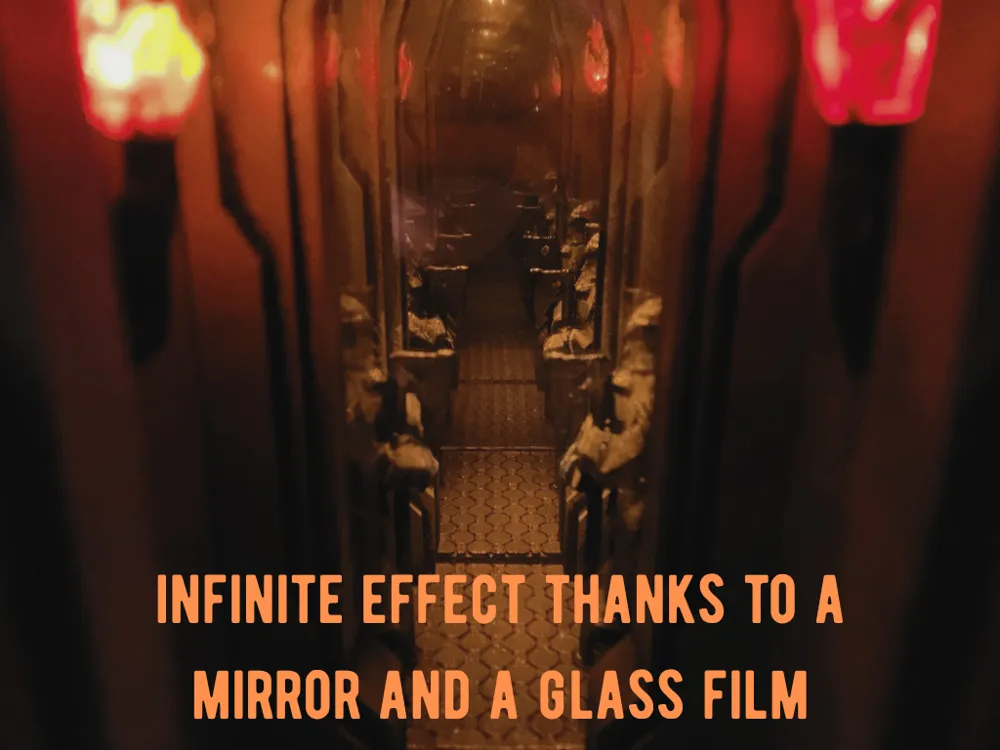
- I used candle-effect LEDs to create a flickering, immersive atmosphere.
🪞 About the infinity mirror
To achieve the iconic infinity tunnel effect:
- A mirror from AMAZON is glued to the back of the model.
- In front of it, a piece of plexiglass is inserted, cut to size, and covered with a one-way reflective film — transparent on one side and mirrored on the other.
- This creates the visual illusion of infinite depth in the corridor.
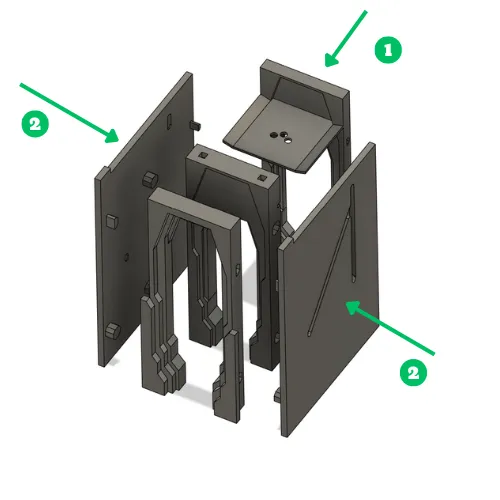
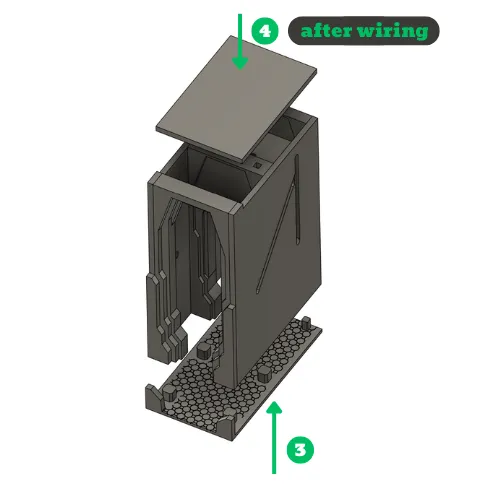
🧱 About the assembly
- The model is designed to be fully snap-fit.
- However, depending on the filament used, tolerances may vary. Therefore, using glue is recommended for a more solid result.
🔧 ELECTRONIC COMPONENTS
💡 LEDs and layout
- As mentioned above, the side panels include two LED holes each for 5 mm LEDs.
- Additionally, the top compartment includes 3 holes to illuminate the mirrored corridor.
- Proper internal lighting is essential to achieve the infinity effect.
- I recommend using warm yellow LEDs to match the atmosphere of Moria’s ancient halls.
🕹️ Switches and customization
- I included a hole for a toggle switch with a threaded part diameter of 7 mm.
- You can easily customize the size and position of the hole using Bambu Studio.
🔗 How to Add Holes in Bambu Studio Slicer
⚡ Power connector (optional)
- I didn’t include an external power connector to avoid unwanted bulk behind books and for aesthetic reasons.
- However, you can always add one by designing a custom hole.
- The model works perfectly even without the infinity mirror effect — simply close the back wall.
🗿 STATUES AND DECORATIVE ELEMENTS
👑 Statues
- The statues are existing 3D models (not included), and I’ll provide the link to the original files.
- I modified them in Bambu Studio by flattening the base, so they adhere better to the walls without adding too much thickness.
🔗 Dwarf Statue
🔥 Torches
- The wooden part of the torches is made from heat-shrink tubing painted brown.
- The flame is a 3D printed element from a separate file.
🔗 Flame Insert
🎥 TUTORIALS & RESOURCES
🖨️ BAMBU LAB A1 MINI COMPATIBILITY
An optimized, pre-scaled print profile for the Bambu Lab A1 Mini is included, allowing you to print the entire model without any manual adjustments.


Boost Me (for free)
🚀 Thank you for downloading my model! If you enjoyed it and would like to support me even more, you can use the Boost.me feature: every contribution helps me keep creating new projects.
License

You shall not share, sub-license, sell, rent, host, transfer, or distribute in any way the digital or 3D printed versions of this object, nor any other derivative work of this object in its digital or physical format (including - but not limited to - remixes of this object, and hosting on other digital platforms). The objects may not be used without permission in any way whatsoever in which you charge money, or collect fees.


Comment & Rating (19)