Autodarts Dart camera setup V2 / WITH USER MANUAL


Print Profile(3)


Description
!!! V2 IS LIVE !!!
Contact
If anything doesn't fit or you have a problem, feel free to write a comment, send me a private message, or contact me via WhatsApp at +49 163 8036832 or E-Mail at info@groni3d.com :)
Want to see more setups as an example: https://www.instagram.com/gromech3d/
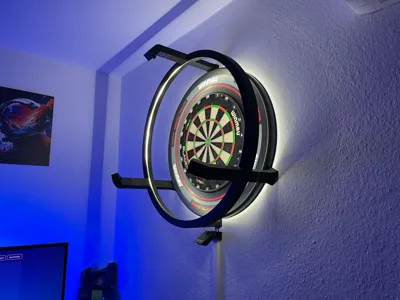
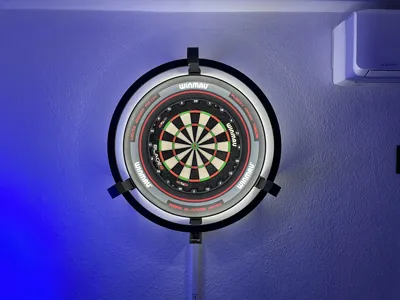
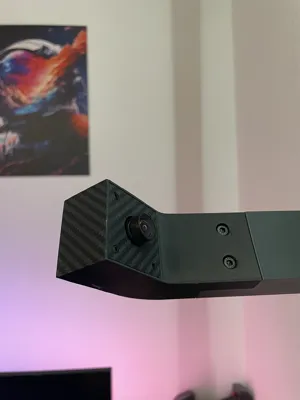
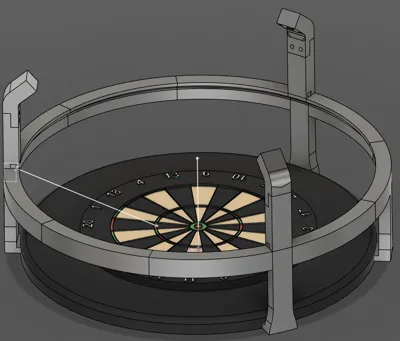
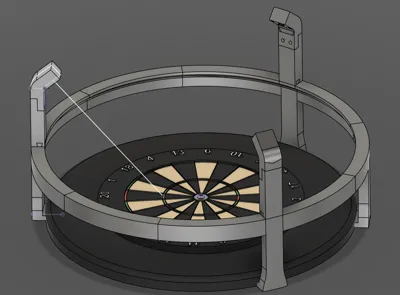
This is my own designed Dart camera setup with a light ring included. I have printed the whole setup on a Bambu Lab A1. The problem with the other setups is that I hit the camera on top if I wanted to throw a double 20.
Here is a user manual in form of a PDF. It will explain every step you need to make:
https://drive.google.com/file/d/1_NeeH9ANbzFeiIryqcCuTR89yE18H9xM/view?usp=drive_link
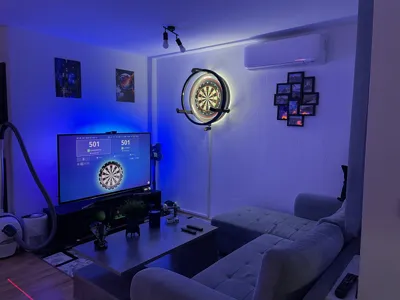
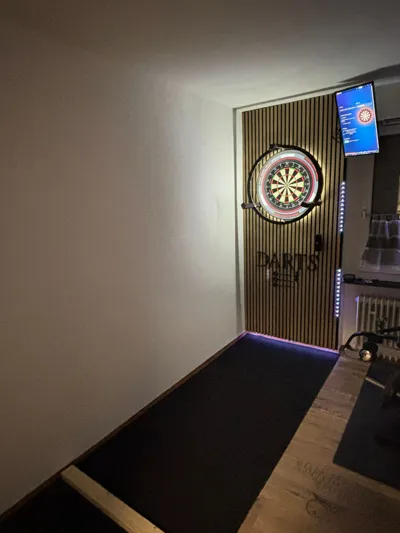
If you enjoy the setup I would kindly ask you to upload a picture of your setup with a small feedback and rate the setup.
Boost Me (for free)
If you like this model, I would appreciate it if you would boost it :)
⬇⬇⬇ Print settings and dimensions below ⬇⬇⬇
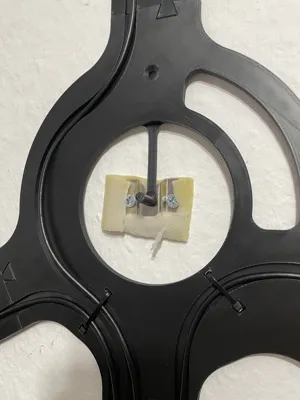
In the middle is a small bridge which height is 0,2mm. You can use it to centre the whole setup and mark the drilling holes. If you dont need it anymore you can break it away. It is also very stable thanks to the bracing on the back. So if you bump into the cameras, nothing will happen.
If anything doesnt fit or you have a problem with something, you can write a comment or text me a private message :)
If you want only the light ring without the cameras check this out. Its the same as this one:
https://makerworld.com/de/models/1535117-dart-ring-light-mount#profileId-1610340
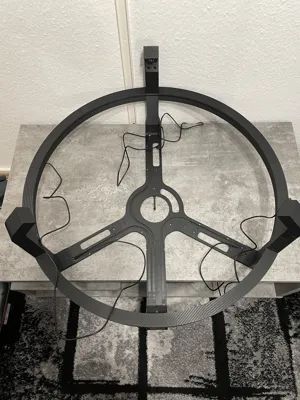
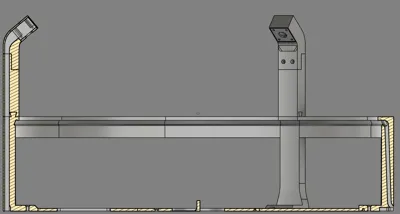
Dimensions of the setup:
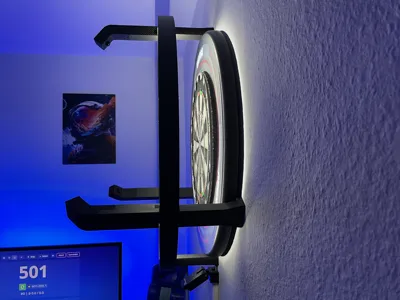
- Outer ring diameter: 745mm = 74,5cm
- farthest point from the wall: 375mm = 37,5cm
The whole print requires:
- ca. 36h or 1d 12h print time
- 1.370g filament
- Printer bed size: 256x256 (lenght, width) tallest object: 190mm
- Cylinder head screws:
- 12x DIN ISO 4762 M2x8 or M2x10
- 6x DIN ISO 4762 M4x18 or shorter
- 6x M4 Thread inserts
- LED Strip 6000K 3 meter width 8mm (https://www.amazon.de/dp/B0DGXDN1ZT?ref=ppx_yo2ov_dt_b_fed_asin_title&th=1)
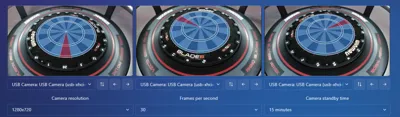
- Ov9732 Camera (https://de.aliexpress.com/item/1005007097058564.html?spm=a2g0o.order_list.order_list_main.5.4d9a1802WX7V5L&gatewayAdapt=glo2deu)
Print settings:
- Layer height: 0.2mm (or smaller if you want more detail)
- Support: Feet / Light feet / Case / Ring light left & right
- Support settings: Tree auto / Threshold angle 30° / ✔ "Remove small overhangs"
- Wall loops: min. 3
- Infill: 7% to 10% with Grid or Gyroid (depends what you like more)
- Seam position: back
License
You shall not share, sub-license, sell, rent, host, transfer, or distribute in any way the digital or 3D printed versions of this object, nor any other derivative work of this object in its digital or physical format (including - but not limited to - remixes of this object, and hosting on other digital platforms). The objects may not be used without permission in any way whatsoever in which you charge money, or collect fees.
Comment & Rating (33)