Ultimate Bee CNC Inductive Limit Switch Conversion


Print Profile(0)
Description
If you have a Bulkman3D Ultimate Bee and want to upgrade from mechanical limit switches to significantly more reliable and accurate induction proximity limit switches, here are mounts that I designed to use factory bolt locations.
Using the awesome 3D model from Matt Davey made this SIGNIFICANTLY easier! Dude, you're a legend!
https://grabcad.com/library/ultimate-bee-cnc-milling-machine-1000x1500-mechanical-kit-1
A lot of time and effort went into this, so I would be eternally thankful for you Liking and sharing my designs. Post your make when you are finished to - I love seeing my designs in the wild.
I recommend printing the parts in PETG, ASA, ABS or PC or a CF of glass filled version of these. I do not recommend TPU or PLA.
Recommended print settings:
0.4 nozzle:
- 6 perimeters
- 0.2 layer height
- 8 top and bottom layers
- 10% infill
- 25% infill/perimeter overlap
0.6 nozzle:
- 4 perimeters
- 0.2 layer height
- 8 top and bottom layers
- 10% infill
- 25% infill/perimeter overlap
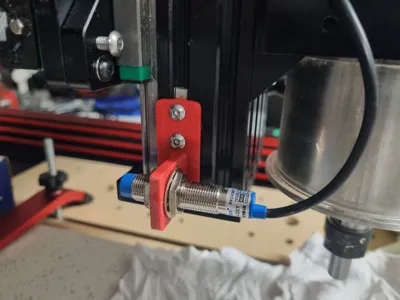
Setting probe distances:
There is a spacer you can print for setting the distance between the face of the sensors and the surface they are detecting. Whether or not you print it with the text in it as multicolour is up to you. There is also one that is single colour with the text embossed instead.
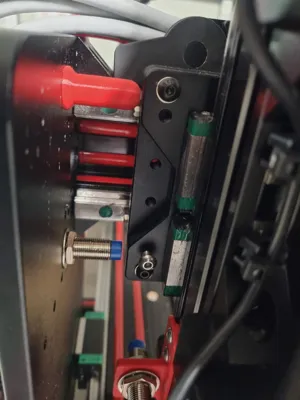
Setting the height for the Z Axis probe to detect the bolt at the bottom of the Z Axis plate is up to you on how close you want the Z Axis to get to it's absolute travel limit.
Once you have it set up, in your controller software you can set your home stand-offs to 1mm instead of the 3-5mm required for mechanical limit switches.
Sensors required:
This is entirely dependant on your controller. READ YOUR CONTROLLER DOCUMENTATION.
You need 4 probes in total for dual Y axis homing.
If you have the awesome Nighthawk controller from CNC3D, then you will need PNP NO+NC sensors. LJ12A3-4-Z-CY
https://www.cnc3d.com.au/nighthawkcnc-controller
If you have an xPro V5 or similar, then you will likely need NPN NO+NC sensors. LJ12A3-4-Z-CX
Again, READ YOUR CONTROLLER DUCMENTATION. I accept no responsibility for you ordering or installing the wrong type of sensor for your controller.
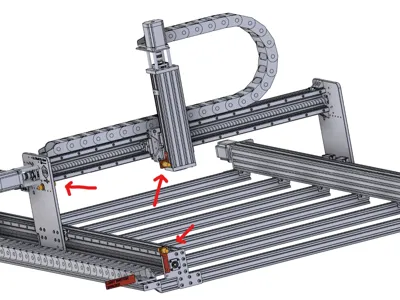
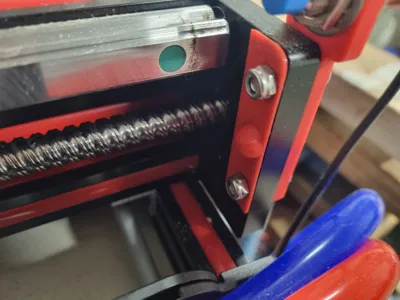
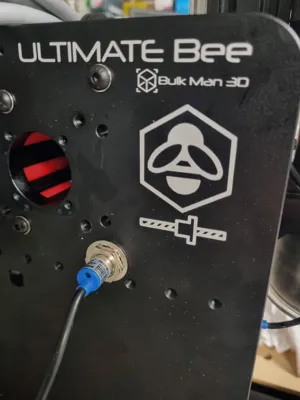
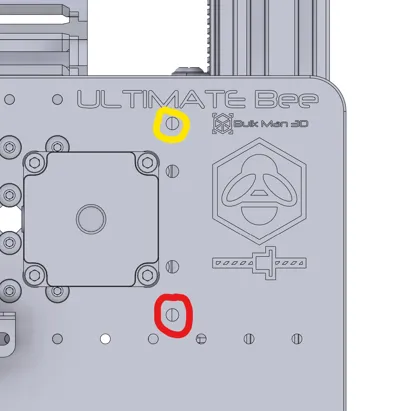
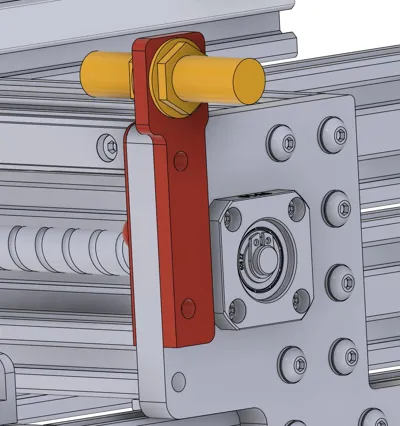
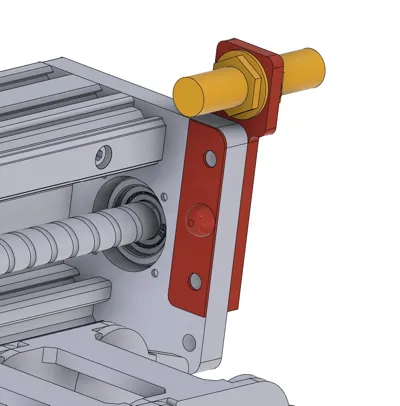
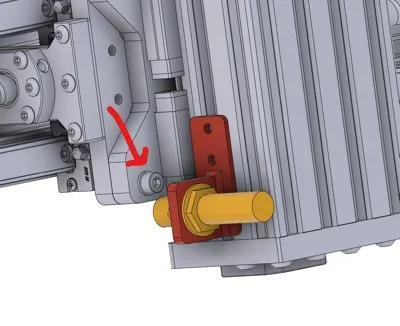
Locations for the sensors:
See the photos for the locations.
For the X Axis probe, you will need to drill out an existing, unused hole (circled in red) in the left Y Axis plate to 12.5mm. The bump stop will use the hole circled in yellow.

BOM:
- 4 x inductive proximity probes
X Axis
- 1 x M5xD7.5xL6.0 heat set
- 1 x M5x16 or M5x20 machine screw - you should have some spares in your kit
- 1 x M5 washer - you'll have tons of spare 5mm shims in your kit
Y Axis
- 4 x M5x20 machine screws
- 4 x M5 nylock nuts
Z Axis
- 2 x M4x8 machine screws
- 2 x 2020 M4 T slot nuts
Proximity sensors:
https://www.aliexpress.com/item/1005002932053626.html
Machine screws:
https://www.aliexpress.com/item/1005002370514090.html
Nylock Nuts:
https://www.aliexpress.com/item/1005005601544960.html
Heat sets:
https://www.aliexpress.com/item/4000232990523.html
I recommend these T slot nuts as they stay in place:
https://www.aliexpress.com/item/33023772052.html
Comment & Rating (0)