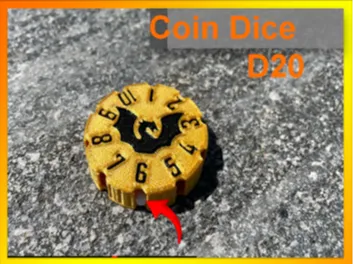
D20 Coin Dice - Fate of the Flameborn


Print Profile(1)

Description
“Adventurer, you've braved dungeons, slain beasts, and looted far more than the goblins can count... but now, the final challenge stands before you. You reach into your pouch, not for sword or spell, but for... the Coin of Fate.”
Behold! This is no ordinary coin. This ancient relic (okay, freshly 3D printed) serves both as a dramatic decider in the heat of battle and a fully functional D20 for when your regular dice just don't roll with enough flair.
Why summon the Coin of Fate?
- 🌀 Dual-purpose magic – It's a coin! It's a die! It's the shapeshifter of gaming accessories.
- 🎲 Perfect for boss fights – Flip or roll when the stakes are highest. Fate decides!
- 🔥 Dramatic tension guaranteed – Slamming a coin instead of rolling dice? Chef’s kiss.
- 🧙 Fits in any pocket dimension – Compact and mighty, ready for any quest.
- 🛠️ Easy to print – Designed with tabletop warriors and home forges (3D printers) in mind.
So, brave one – will you flip the coin, or will the coin flip you?
Assembly Guide:
🛠️ Assembly Guide – Dragon’s Fate Coin 🐉
Congratulations, brave adventurer! You’ve secured the Dragon’s Fate Coin. But before you can flip it in the heat of battle, there’s just a small quest to complete: assembly! Fear not, for this task is far less perilous than your usual encounters. Even a Level 1 adventurer can handle it with ease. Here’s your guide to constructing your very own Coin of Destiny.
What You’ll Need:
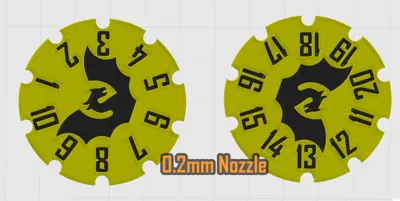
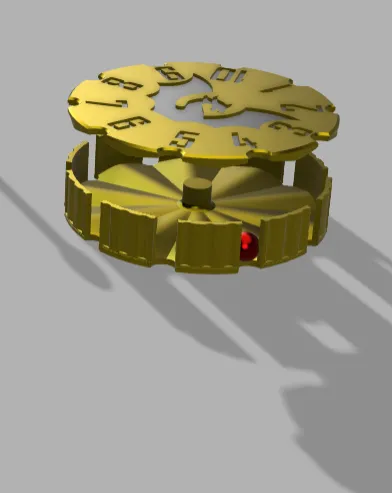
- Two 3D-printed parts: The main coin body and the small sphere.
- A small amount of superglue (to bind the coin's magic together).
- A craft knife or scalpel (for minor adjustments, in case of any imperfections).
- Patience, young adventurer.
Step-by-Step Instructions:
- Prepare the Prints
Print both halves of the coin with a very low layer height (0.1mm or less) to ensure that the surfaces are smooth and flawless. A clean, seamless print will give your coin the majestic finish it deserves! - Print the Sphere
The small ball that sits atop the coin pedestal can be printed easily in place. Simply print it directly on the base, and once completed, gently break it off. Be cautious—some light trimming with a scalpel might be needed to smooth the edges where the sphere meets the pedestal. - Attach the Two Coin Parts
Once your prints are ready, align the two parts of the coin. You can apply a small drop of superglue to one side or the fitting area, then carefully press the two parts together, but it also has a nice snap fit. The bond should be instant! Don’t worry, this part is easier than dodging a dragon’s flame!
obviously the ball should be inside the coin — else every roll counts as a 1… - Final Touches
After the glue has dried, check the edges and the smoothness of the coin. If any little imperfections remain, just gently sand or trim them away with the scalpel to get a nice, polished finish. Your coin should now be as smooth as a freshly-rested adventurer after a long night's sleep.
And that’s it! You’re now ready to flip the Dragon’s Fate Coin and let the dice of destiny decide your fate. Whether you’re facing a fearsome boss or claiming a legendary treasure, this coin will serve you well. With this simple assembly, you’ll have completed a quest more easily than crossing a kobold’s lair!
May your rolls be high and your loot plentiful, adventurer! 🎲🪙
Documentation (2)

License
You shall not share, sub-license, sell, rent, host, transfer, or distribute in any way the digital or 3D printed versions of this object, nor any other derivative work of this object in its digital or physical format (including - but not limited to - remixes of this object, and hosting on other digital platforms). The objects may not be used without permission in any way whatsoever in which you charge money, or collect fees.
Comment & Rating (3)