Search models, users, collections, and posts
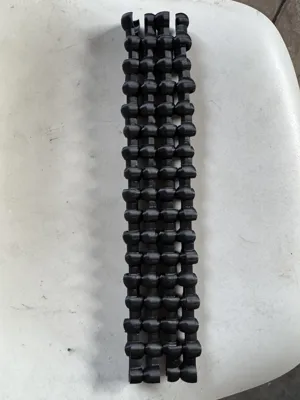
Tubular cable chain
Remixed by
IP Report


Print Profile(1)

0.2mm layer, 6 walls, 25% infill
Designer
20.7 h
2 plates
Open in Bambu Studio
Boost
3
7
0
0
9
5
Released
Description
Content has been automatically translated.
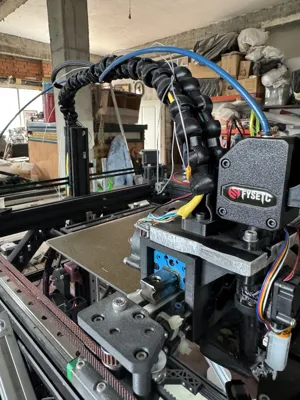
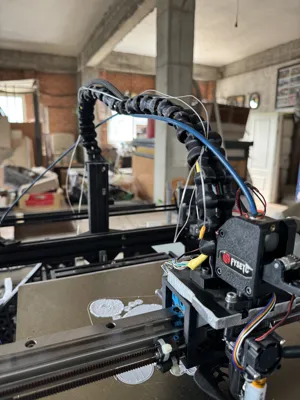
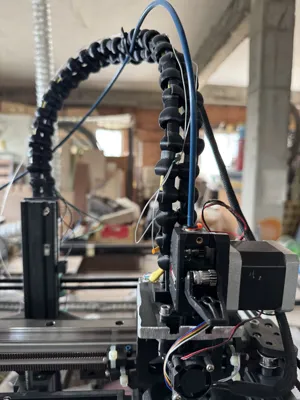
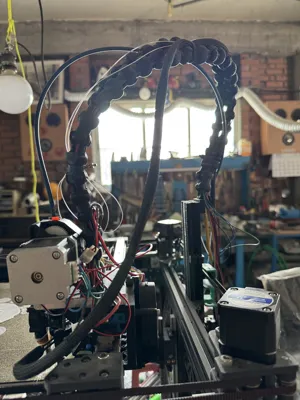
Modular cable chain for CoreXY printers and DIY projects
Optimize cable and hose management in your 3D printer or CNC with this 3D printable cable chain. Its design combines high flexibility, simple assembly, and remarkable ease of printing.
Key Features
| 🔄 Wide bending radius | The slender profile along with the self-articulating links allows for smooth movements on the X, Y, and Z axes, ideal for CoreXY kinematics or similar gantry systems. |
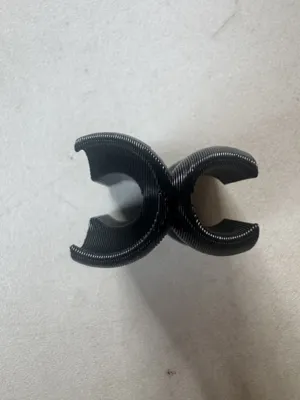
| 🧳 Large interior space | Each link comfortably accommodates several signal and power cables (or a Ø 4 mm Bowden tube) without forcing them. |
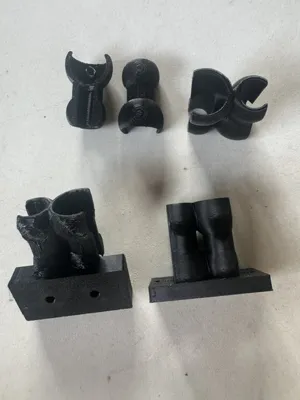
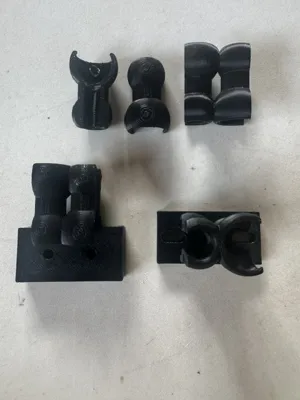
| 🧩 3-piece link | A core + 2 side caps (see photos) facilitate easy cable loading/unloading without tools. Additionally, if a cap breaks, you only need to reprint that piece. |
| 🛠 Universal mounting | The ends have Ø 4 mm holes that fit M3 screws or cable ties, so you can attach it to existing housings, carriages, or chain guides. |
| 🖨 Easy to print | Designed so that all parts print flat, without supports, with tested tolerances for a clean press-fit. |
Recommended printing parameters
- Material: PLA or PETG (better thermal resistance)
- Layer height: 0.2 mm (0.16 mm if you're looking for a premium finish)
- Infill: 20 - 30% cubic
- Nozzle: ≥ 0.4 mm
- Supports: Not needed
- Adhesion: A skirt or thin brim is sufficient
Each link measures ~18 × 15 × 11 mm and connects via a clip; print as many as you need to cover your travel distance.
Step-by-step assembly
- Print the desired number of cores and caps (use the arrangement shown in the first image to optimize time).
- Thread the cables inside the already assembled cores.
- Close each link by pressing the two side caps until you hear a click.
- Attach the ends with M3 screws or cable ties to the printer. Ready to move!
With this cable chain, you'll have professional, modular, and customized cable management. Share your "makes" on MakerWorld and tell us how you integrated it into your machine!
This remix is based on

License
This user content is licensed under a
Creative Commons Attribution-Noncommercial-Share Alike
Comment & Rating (0)