


Print Profile(1)
![[PETG+TPU] 0.2mm layer, 3 walls, 50% infill](https://makerworld.bblmw.com/makerworld/model/USd886d195c5524d/329461022/instance/2025-06-17_b2103ee07eff98.jpeg?x-oss-process=image%2Fresize%2Cw_100%2Fformat%2Cwebp)
Bill of Materials


Description
Membership
Love my designs? Join the 3D KIMBA subscription for exclusive content and to help me keep creating new projects!
Solar Breeze – Solar Powered Portable Fan
Harness the power of the sun with Solar Breeze, a compact, battery-free fan system powered entirely by solar energy. Designed for outdoor use, workshops, or any sunlit space, this project is ideal for eco-conscious makers looking for a simple cooling solution. No batteries, no switches, just plug into the sun and enjoy a natural solar breeze.
🔧 Key Features:
Solar-Only Operation: Powered directly by a 5.5V solar panel, no batteries required.
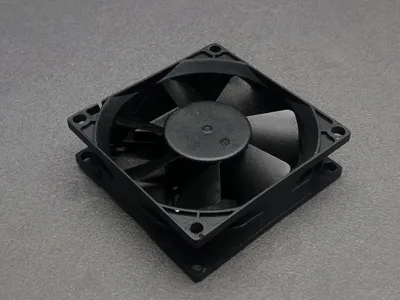
Fan Compatibility: Designed for standard 80×80 mm PC fans operating at 5V.
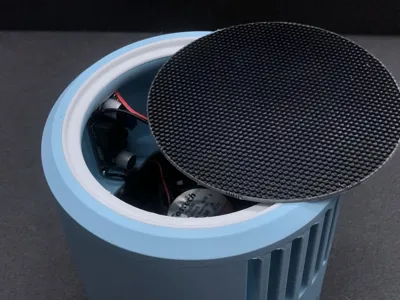
Boost Converter Support: A dedicated slot is included for installing a step-up converter, allowing you to power 12V fans from the 5.5V solar output.
Tool-Free Assembly: Snap-fit design for quick and easy assembly, no screws required (except for the fan).
⚠ Warning! It’s important to use a fan with low power consumption, otherwise the solar panel won’t be able to deliver enough power to run the fan at full speed.
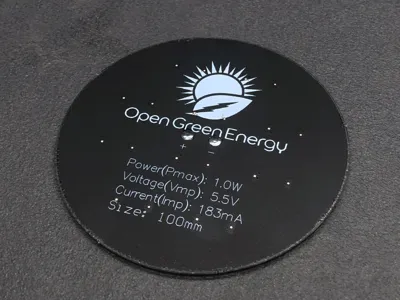
Solar Panel max power 1W
⚙ Fan Mounting Options:
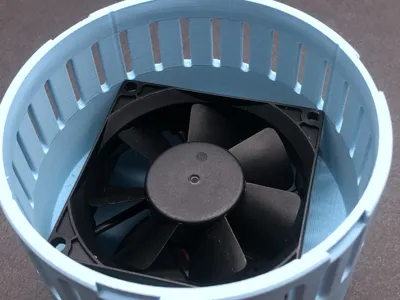
Use standard PC fan screws.
Or install M4 threaded inserts directly on your fan and secure with M4x10 countersunk screws.
✨ Optional Upgrade – Boost Converter Slot:
If you’re using a 12V fan, simply install a step-up (boost) converter in the dedicated slot. Make sure to pre-calibrate the output voltage to 12V before final assembly.

🛠 Project Development with PCBWay’s Support
A massive thank you to PCBWay for helping bring this project to life.
PCBWay specializes in PCB, PCBA, CNC, and 3D Printing, and has (in my experience) the best support & the widest amount of options for manufacturing. 


They also have a PCBWay+ Store where I purchased everything needed for this project, including the Solar Panel and the Boost Converter
In addition to the essential components for this build, range of electronic parts and accessories at great prices, with an easy checkout process and fast, well-packaged shipping.
Check out this project on PCBWay+ Community.
🧩 Future Development:
The Solar Breeze includes STEP files for those wanting to modify or remix the project. Possible extensions include:
Battery Pack Integration: With the right electronics, you could add rechargeable batteries to make the fan work even when the sun goes down.
🖨 Print Files & Quantities:
1× Main Body
1× Bottom Cap
1× Solar Panel Ring
6× Feet
🔩 Hardware Required:
1× Open Green Energy 1W 5.5V Solar Panel (diameter 100mm)
1× 80×80 mm PC fan (5V or 12V)
4× M4 Threaded Inserts (optional)
4× M4x10 mm Countersunk Screws (optional)
1× Boost Converter (optional for 12V fans)
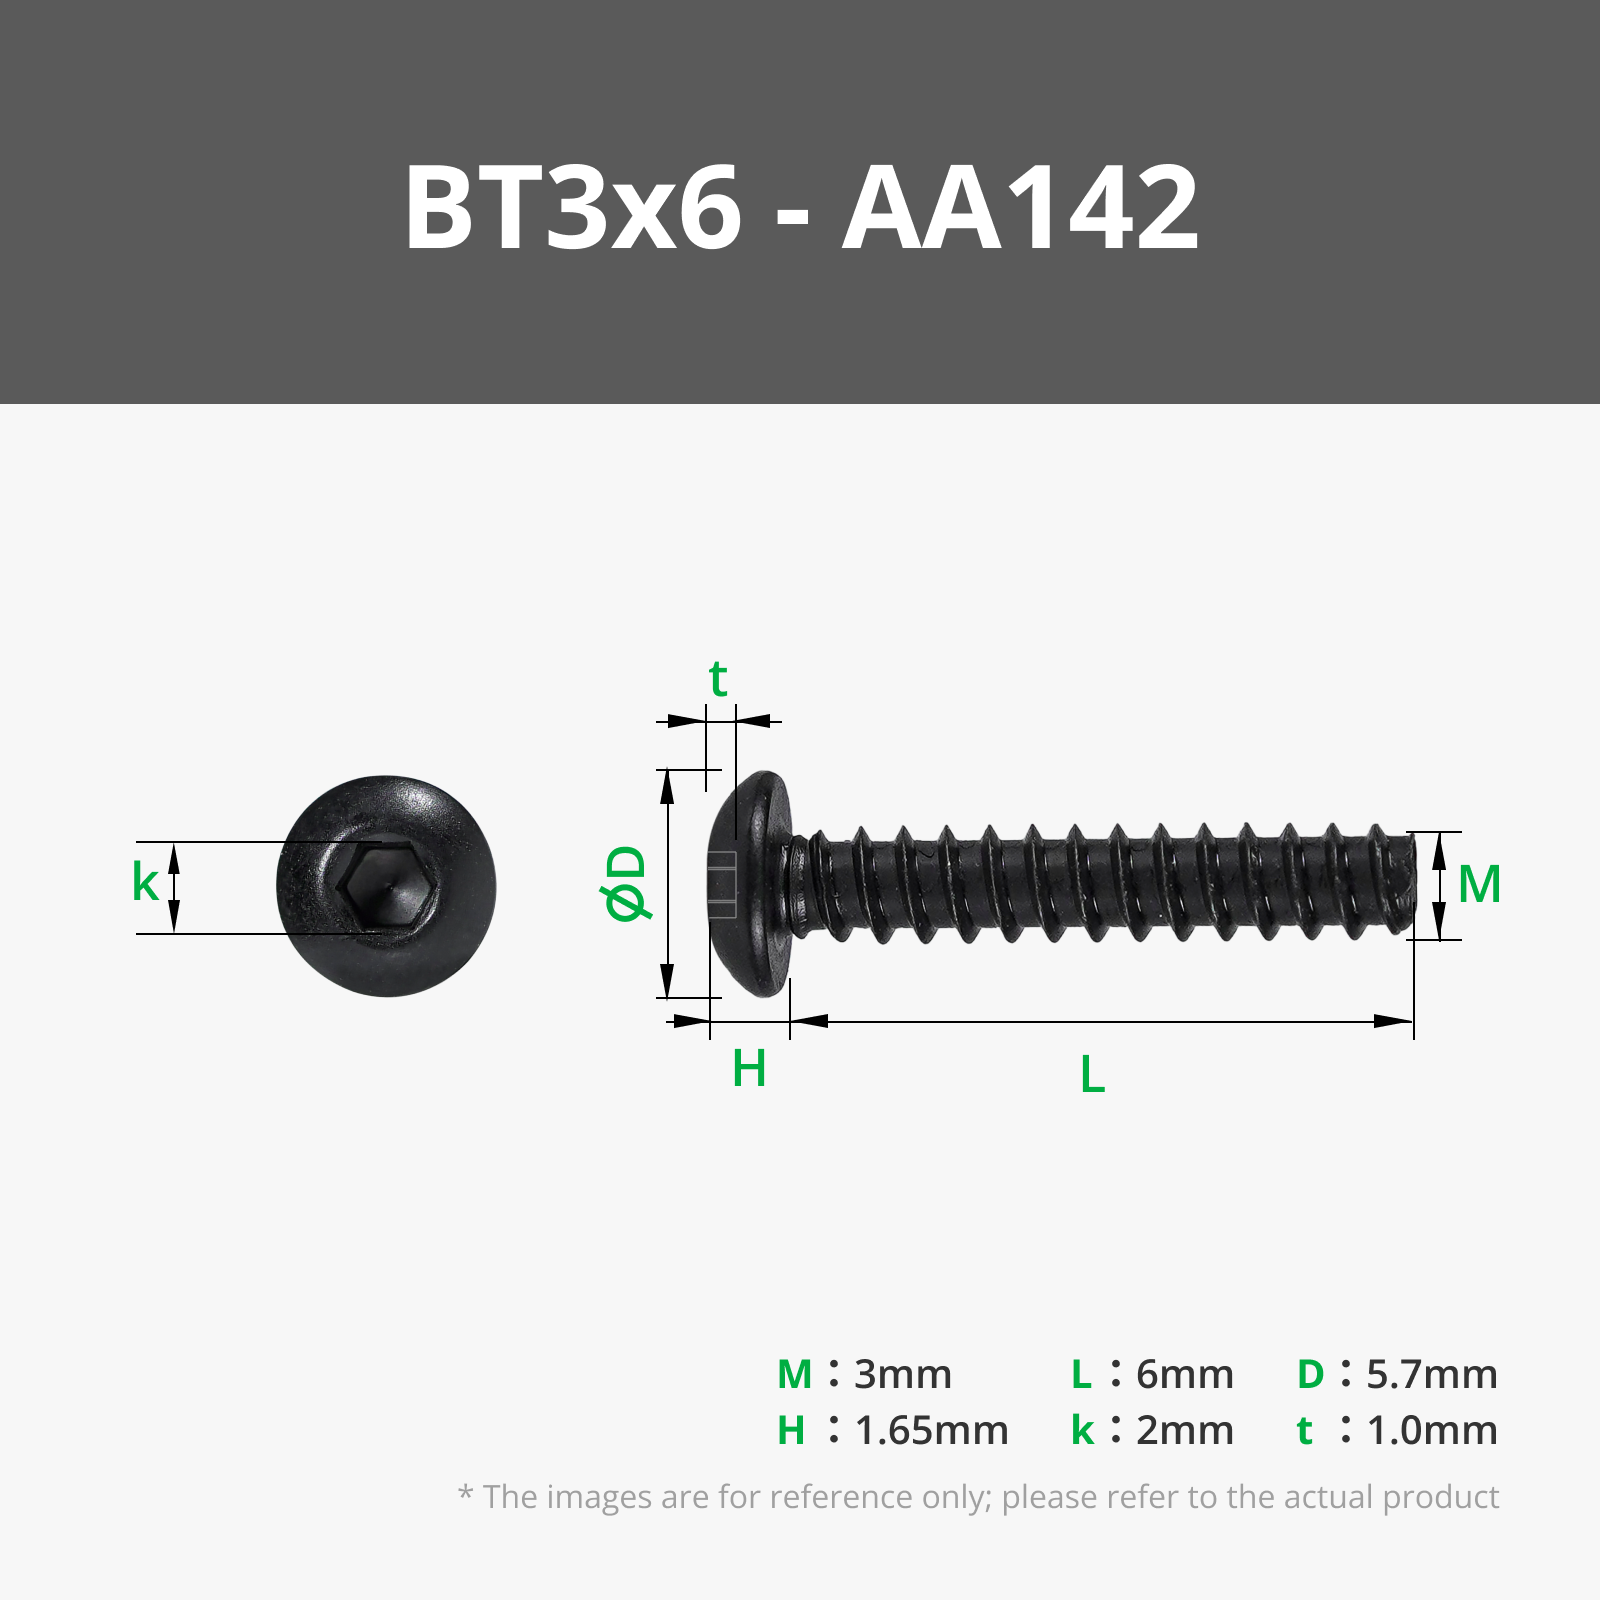
1× 3x6 Screw (optional for Boost Converter)
⚙ Slicer Settings:
Material:
Main Body + Bottom Cap - PETG recommended; PLA HT also works
Solar Panel Ring + Feet - TPU
Layer Height: 0.2 mm
Infill: 25–50% for strength
Supports: Yes, only for the Main Body
🛠 Assembly Guide:
Install the Fan: Mount the fan to the main body using fan screws or M4 screws + inserts.
If you’re using a 12V fan like I did, connect the fan to the output of the boost converter first.


Connect Wiring: Connect the solar panel to the fan or converter (Use a 3x6 screw or Glue to secure the converter).


Solar Panel Installation: Insert the solar panel into the TPU ring, then place the ring into the dedicated slot at the top of the main body, and finally press-fit the panel into place.


Assembly and Installation of the Bottom Cap: Insert all the feet into the bottom cap with a press-fit, then align the assembly with the dedicated slots on the main body and push it in until it is fully seated.


🔁 Share Your Make & Remix!
Your feedback, builds, and remixes are incredibly appreciated. Help improve the Solar Breeze project by sharing your versions and tagging your builds.
🐾 Follow for More
Follow 3D KIMBA for more designs, practical tools, and maker-friendly projects!
Comment & Rating (20)