Search models, users, collections, and posts

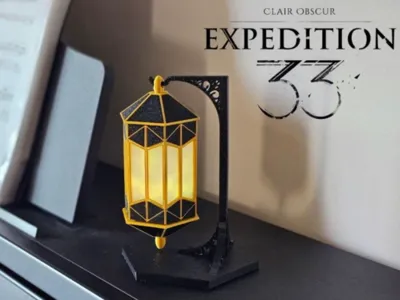
Clair Obscur: Expedition 33 - Lumina converter

Print Profile(5)

All
A1 mini
A1
X1
P1P
X1 Carbon
H2D
X1E
P1S
H2D Pro
H2S
P2S
H2C
X2D
A2L

Display holder - 0.2mm layer
Designer
2.2 h
1 plate
5.0(14)

Light diffuser - Vase mode
Designer
43 min
1 plate
4.9(12)

Lumina Converter - Magnets Ø6x2 - 0.12mm layer height
Designer
6.9 h
3 plates
5.0(9)

Lumina Converter - Magnets Ø5x3 - 0.12mm layers
Designer
6.9 h
3 plates
5.0(8)
Click to see more

Open in Bambu Studio
Boost
375
1103
65
43
428
168
Released 

Description

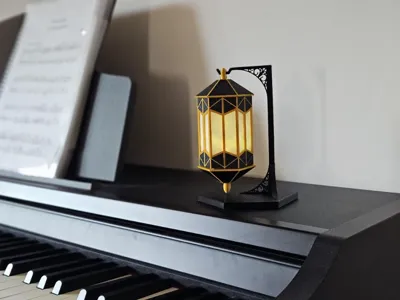
After playing this awesome game by Sandfall studio, Clair Obscur: Expedition 33, I wanted to recreate the Lumina converter as a decorative lamp, nightstand or just a cool decorative prop for your gaming room ! 


This design went through many iterations before I landed on something that truly works well. I tested dozens of other designs, trying to bring down print and assembly time but went back to the original version for the better finish. I've also focused on improving robustness and ensuring more consistent print results compared to the previous version I published.


Also be informed that the main main core requires supports, be careful while removing them as the Z distance for support/part is 0.12 mm (layer height). This creates a better looking overhang surfaces but requires a bit more work. If you want easier assembly please set the distance to 0.24mm but it will impact slighly the finish as some steps might appear on the supported surfaces.


Boost Me (for free)

Want to support me ? If you love my designs and appreciate the effort behind them, please share and boost to help me keep creating ! 🔥

Bill of material

  • 6 magnets size Ø6x2mm or Ø5x3mm, choose the print profile accordingly.


  • LED pods that can be bought from AliExpress (2€ approx.).  Ø29mm.

Assembly

  • First you need to remove the support on the main core. 


  • The assembly requires glue to fix all the black panels to the core and the 2 side covers.

    For a consistent surface finish, make sure all small panels are glued with the same orientation (build plate side facing up). As you remove them from the build plate, try to sort them by type and orientation to make it easier to place them correctly on the main core.

    Info: using CA glue might leaves whites spot after curing, you can use degreasing or WD40 to remove them.


  • Then glue to top cover.


  • Insert the magnets into the pockets, be mindfull of the polarity.


  • The LED pod is fitting tighlty into it's pocket, no need to glue it.


  • The diffuser bends and slides into the main core and is securely held in place by the mechanical stops, no need to glue it.

Enjoy !


Comment & Rating (65)

(0/1000)

Great model, I made some modifications to the base to enhance the thematic elements
Show original
3
Reply
How did you put the game's name on the print????
Show original
0
Reply
Replying to @EmmanuelFelix95 :
It came from another model, I just cleverly integrated them
Show original
1
Reply
Boosted
Print Profile
Lumina Converter - Magnets Ø5x3 - 0.12mm layers
Beautiful!! Everything slots together nicely Scaled it up, to fit the 30mm mini lights Bambulab sells. (Increased by 4.27% to be specific, if anyone else has 30mm lights. But the fit will be very tight)
profile
2
Reply
Boosted
My wife really loves the finished lamp - and I already have friends asking for their own lumina converters. For my first print I found similar puck LEDs on Amazon, but had to sand the circular slot to get them to fit as they were 30mm. Next time I print I'll enlarge the hole ever so slightly. Fantastic realization of the design, fantastic use of the texture build plate, and a beautiful finished product. A bit of work to get together but extremely satisfying. (Note: I do in this photo see that I had some super glue spray residue on the top I need to wipe away - that isn't a print quality issue / file issue)
The designer has replied
designer
1
Reply
Thank you very much for your feedback and the boost ! I really appreciate it ! I also get the white bloom from the CA glue, I use WD40 or any degreaser to remove it, it's very effective !
1
Reply
Great Model, Very easy to make.
The designer has replied
designer
1
Reply
Thank you, glad you like it 😊
1
Reply
Print Profile
Light diffuser - Vase mode
Thank you so much for this print.Just be careful some parts are fragile and can break easily.Looks awesome
(Edited)
profile
1
Reply
Boosted
Print Profile
Display holder - 0.2mm layer
this was a gift for a friend, printed easily. a little harder to assemble if you use CA glue on silk filament.
profile
1
Reply
Print Profile
Display holder - 0.2mm layer
I love it, It printed great ant the assembly was easy!
0
Reply
Boosted
Print Profile
Lumina Converter - Magnets Ø6x2 - 0.12mm layer height
magnifico
0
Reply
Thanks for this Lumina! It's a very straightforward print. I scaled it up by 4.3% to better fit my magnets. The diffuser was the trickiest part, so here’s a tip: I cut it along one of the edges to fold it onto itself without breaking it. Once in place, you just release it and it snaps back into shape. Since the cut is hidden behind one of the uprights, it’s completely invisible!
0
Reply
Print Profile
Lumina Converter - Magnets Ø5x3 - 0.12mm layers
Great Print !
0
Reply

License

This user content is licensed under a Standard Digital File License.

You shall not share, sub-license, sell, rent, host, transfer, or distribute in any way the digital or 3D printed versions of this object, nor any other derivative work of this object in its digital or physical format (including - but not limited to - remixes of this object, and hosting on other digital platforms). The objects may not be used without permission in any way whatsoever in which you charge money, or collect fees.