Elegoo PHECDA - Sculpfun CAM500 Holder


Print Profile(2)


Description
Here I have developed a camera holder for the CAM500 from Sculpfun,
which not only holds the camera perfectly, but also allows the camera to be retracted when you want to clean up the printer.
I made it so that my laser is stored upright on the end plate and the camera was too far away with the original holder.
In an earlier version I used the original mounting brackets from Sculpfun, but this was very impractical because the camera was simply much further away and static, if you want this holder, please contact me,
but I will not share it directly because it is far too impractical for me.
In this version, a proper cable guide is integrated so that the USB cable does not get in the way.
I use my USB hub Mod and a small cable clip Mod that fits into the original Y-axis mounting hole on the left and right of the laser.
To lay the Camera USB cable neatly to the Hub.
Step 1 - Assembly:
First you have to prepare your laser for camera mounting. To do this, you will of course need my print parts.
In addition, a few M4 screws. I use countersunk heads for the holder and the originals from Sculpfun for the rest.
I also use these melt-in brass nuts on the mod, which I got as a set from Ali. brass Nuts
I bought the 600pcs set and use the long M4 inserts. You need 5pcs


Step 2.
In the next step, I mounted the camera in the holder, but did NOT yet screw it to the laser.
I aligned the CAM500 with the printer according to the manufacturer's instructions.
I used the “Camera” program of WIN10/11 to calibrate the center and height of the camera.
To do this, I first attached the holder to the laser with clamps, aligned it with the laser center and only then set the drill markings.
By marking the center and from there 35mm to the left and right, if you want to use the lower screw holes like me, I have included the thickness of the profile back wall in my measurement so that you can drill the holes in the middle.
DO NOT TIGHTEN IT YET!

Step 3.
Before you screw it in place, we need to lay the cable. If you want to lay it out as normal, as the manufacturer does, you can screw in the holder. But if you want to tidy it up a bit, we now have to insert it BEFORE mounting.
Screw the “cable holder” to the “main holder” on the side where you want to route the USB cable, in my case on the right.
The cable tie cut-outs should be facing backwards.
Remove the lower small aluminum end cap from the aluminum profile, we replace it with the new one with stop after installation.
Remove the plastic insert from the aluminum profile and place the cable inside.
Then thread the USB cable from above through the holder where the profile is inserted and then lay it in an approx. 10 cm loop to the left behind the holder in the existing socket.
Then screw in the holder, you can then lay the cable as you need it.
Step 4.
Now fit the new end cap to the lower part so that the opening points to the rear. You then have a stop that always brings your camera back to the same position.

You can now replace the top two screws of the universal joint with 8mm Allen screws and no longer need a Rendel screw at the top,
which we will now use at the bottom part of the holder. Of course, you now have to readjust the camera using the screws, but that's it.

You can now set your cable length so that it is sufficient when the camera is fully lowered and back in the end position. For me this is a circle of about 8cm.
In addition, I shortened my aluminum profiles a little because they protruded very far after installation.
Z approx. 12cm
X approx. 5cm
!!!!ATTENTION HEIGHT ADDON!!!
I have created a height modification kit here.
If you adjust the camera according to the manufacturer's instructions,
they say you should set it to approx 325-335mm to the laser object.
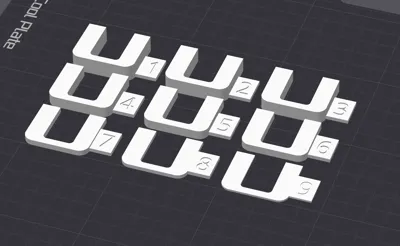
However, if you set it to +10mm to your Honey Comp, i.e. 340-345mm, and place a 10mm board on it during calibration, you can use this kit to adjust your height difference for other materials very easily afterwards.

The numbers on the adapters then correspond to the material thickness 1-9mm (10 is the default setting) if you need them thicker, you should take this into account in your calibration. You can simply clamp these adapters between the lower stop for height adjustment.
There will be some more addons for the PHECDA coming soon so please follow me.
And if you think what I'm doing is great, please give me a boost to encourage me to create more content.
Boost Me (for free)
Comment & Rating (10)