Crane (no supports, no hardware needed)


Print Profile(4)


Description
Boost Me (for free)
Your likes and boosts are my motivation to update!!! Thank you~
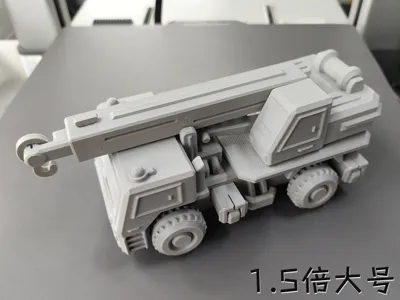
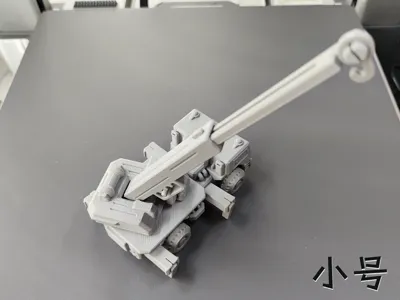
This is a crane truck using 3rd generation optimized print springs, no hardware needed, with multiple articulated components Some friends said they like models with many parts to assemble, and another wanted a crane truck, so I combined them The parts are numerous, but the overall assembly is not complicated, and requires a bit of patience during installation Although the small arm is hollow in the middle, this part has 6 walls The body supports have 2 small protrusions for easy pulling out with a fingernail, some parts require a bit of force during installation, print with caution if strength is required (Small size LWH approx: 99.5*45.6*41mm, arm extended forward approx: 147*59*41mm)
(Due to the 1.5x large size requiring more force to install, those who mind should print with caution)
2025.12.10 Update: Strengthened the snap connection between the body and the turntable base, see the image below, and the installation difficulty is also relatively lower (To keep the description concise, previous updates have been deleted)

The GIF below is the wheel assembly diagram:
Tilt the wheel onto one side of the axle snap, then press with your thumb on the red circled area, and apply force with your index finger on the side of the wheel to push it in (using the lever principle) The installation method for the other wheel is the same

The GIF below is the body assembly diagram: Note: Because there are many parts, it has been split into 3 GIFs for easier viewing Install the red part first, then the green one
Body assembly diagram:
1.Install the red part first, then the green one Install the red part first, then the green one
2.For the crane arm cab turntable base, when installing, you need to press the 4 snaps evenly little by little Do not try to press them all at once, as excessive twisting may cause breakage

The GIF below is the crane arm cab assembly diagram: Note: Because the 1.5x large size has more walls, the snaps are difficult to bend, and installing the hook requires a lot of force
1.Install the red part first, then the green one Install the red part first, then the green one
2.The green small snap on the crane arm is not easy to install by hand due to its small contact area It is recommended to find a hard stone surface or similar to push it in
3.If the small arm is too tight when stretched, it needs to be pushed and pulled a few times to loosen (tolerance is 0.12mm)

The GIF below is the body and crane arm cab assembly diagram:
1.Align the crane arm cab with the snaps and press it in, then it's done

Note: 1. Both PLA and PETG can be printed. It's best to understand the characteristics of these two materials before printing to avoid printing failures!! For example, PLA can become brittle if left for a long time or at low temperatures, while PETG has good toughness. Please choose the filament that suits you!!
2. If it's for younger children, and the parts are small and easy to disassemble, it's better to glue them firmly with 502 or other adhesives to prevent them from being swallowed!!
3. If there are no special requirements, please do not use your own advanced process settings for printing~ to avoid printing failures!!
If your printd part has local spaghetti, or the filament doesn't stick to the build plate, please recall if you touched that area (hands secrete sweat and oil, touching it has a very high chance of causing spaghetti) or if the build plate is dirty. The solution is to search online for how to clean a 3D print plate!! If other problems occur, please describe it in the comments section and add pictures, so it's easier for us to solve it~ Otherwise, I can't imagine the situation = =!!
License
You shall not share, sub-license, sell, rent, host, transfer, or distribute in any way the digital or 3D printed versions of this object, nor any other derivative work of this object in its digital or physical format (including - but not limited to - remixes of this object, and hosting on other digital platforms). The objects may not be used without permission in any way whatsoever in which you charge money, or collect fees.
Comment & Rating (232)