Skid HPI Savage flux hp


Print Profile(4)


Description
-English
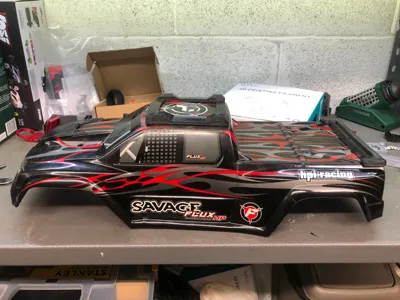
Well-integrated body protection for your HPI Savage Flux HP, increasing durability and strength in critical areas.
Here is a detailed description of the parts:
🔧 1. Upper roof protection
• Location: Centrally mounted on the roof.
• Function: Protects the upper body from impacts during roll-overs, an area often subject to scratches and cracks.
• Fixing: Bolted with through-hole screws, also visible from the inside.
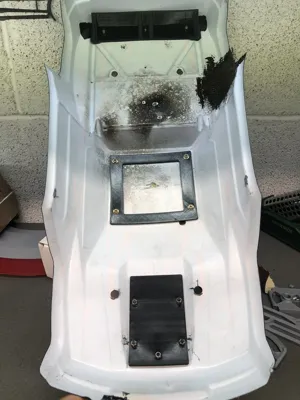
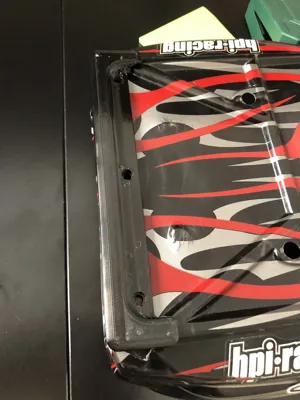
🔧 2. Front bonnet reinforcement
• Location: Central front of the bonnet.
• Function: Protects the bonnet area from bending or frontal impacts and also serves as a structural reinforcement of the body.
• Shape: Rectangular with screw holes at the fixing points.
• Mounting: Internally fixed with bolts and nuts, good for load distribution.
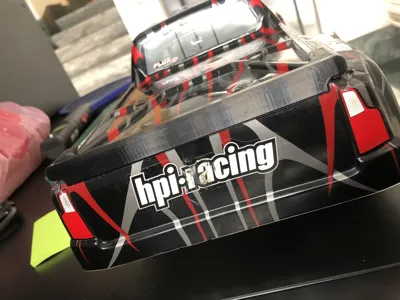
🔧3. Rear roof reinforcement/spoiler
• Location: At the rear of the roof.
• Function: Rear impact and rollover protection, protects a delicate area that often breaks in crashes.
• Design: It has a “bridge” shape that adapts to the curvature of the body.
4. Internal rear reinforcement
• Position: In correspondence with the rear spoiler.
• Function: Better distributes the stress received from impacts to the upper part of the rear (especially in roof landings or rear impacts).
• Works in conjunction with the external reinforcement to stiffen the area, preventing cracks in the lexan.
• Adds structural strength without increasing the weight too much.
• Assembly: Through screws with self-locking nuts or recessed into the material.
• Fixing with through screws and bolts ensures durability and easy removal for replacement.
-ITALIANO
Protezioni ben integrate per la carrozzeria del tuo HPI Savage Flux HP, aumentano la durata e la resistenza nei punti critici.
Ecco una descrizione dettagliata dei pezzi: 1. Protezione superiore del tetto
• Posizione: Montata centralmente sul tetto.
• Funzione: Protegge la parte superiore della carrozzeria da impatti durante i ribaltamenti (roll-over), una zona spesso soggetta a graffi e crepe.
• Fissaggio: Avvitata tramite viti passanti, visibili anche dall’interno. 2. Rinforzo anteriore cofano
• Posizione: Parte anteriore centrale del cofano.
• Funzione: Protegge la zona del cofano da flessioni o urti frontali e serve anche come rinforzo strutturale della carrozzeria.
• Forma: Rettangolare con fori per viti in corrispondenza dei punti di fissaggio.
• Montaggio: Fissato internamente con bulloni e dadi, ottimo per la distribuzione del carico.
3. Rinforzo posteriore tetto/spoiler
• Posizione: Nella parte posteriore del tetto.
• Funzione: Protezione da impatti posteriori e da ribaltamenti, protegge una zona delicata che spesso si rompe nei crash.
• Design: Ha una forma che si adatta alla curvatura della carrozzeria.
4.Rinforzo interno posteriore
• Posizione: In corrispondenza dello spoiler posteriore.
• Funzione: Distribuisce meglio le sollecitazioni ricevute dai colpi alla parte alta del retro (soprattutto in atterraggi su tetto o urti posteriori).
• Lavora in coppia con il rinforzo esterno per irrigidire la zona, evitando crepe nel lexan.
• Aggiunge resistenza strutturale senza aumentare troppo il peso.
• Montaggio: Viti passanti con dadi autobloccanti o incassati nel materiale.
• Il fissaggio con viti e bulloni passanti assicura durabilità e facilità di rimozione per eventuali sostituzioni.
Boost Me (for free)
https://makerworld.com/it/@Alex89rm
License
You shall not share, sub-license, sell, rent, host, transfer, or distribute in any way the digital or 3D printed versions of this object, nor any other derivative work of this object in its digital or physical format (including - but not limited to - remixes of this object, and hosting on other digital platforms). The objects may not be used without permission in any way whatsoever in which you charge money, or collect fees.
Comment & Rating (5)