Gromit Toilet Roll - A Wolf in Sheep's Clothing


Print Profile(2)

Bill of Materials

- Bambu Textured PEI Plate x 1:
Description
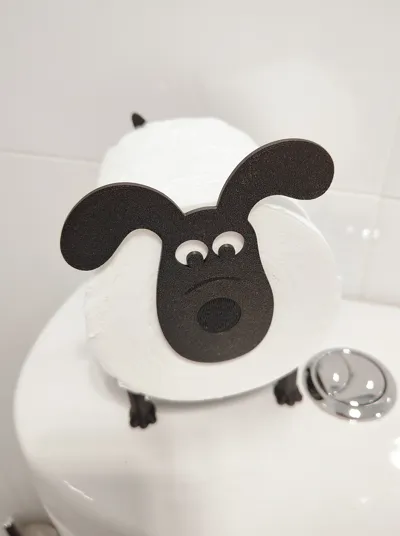
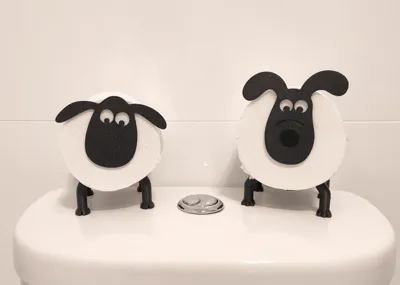
Perhaps you have a flock of sheep scattered around your bathroom cabinets or sitting on your cistern. I was looking to get a dog I can trust to keep the sheep in line … Gromit.
Design considerations
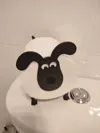
I started on this project 3 months ago and for a long time, I struggled how to add a nose to the face without introducing multiple colors. Then inspiration struck. I realized that unsupported overhangs naturally produce a stringy texture, a subtle surface variation that could be enough to define the nose without additional colors.
I experimented by raising the nose 0.1 mm higher than the build plate, and the result was a subtle texture that catches the light just right. I added a curved line to highlight the nose and shadows under the ears with the same technique - I’m super happy with how it turned out. This technique could also be a great way to add low-contrast text to surfaces in contact with the build plate without the need to use multi-filament prints.
While its hard to photograph well, it does easily show to the eye under normal lighting.
Toilet Roll Cardboard Tube Dimensions ( measure twice, print once! )
So, it has come to this - you find yourself reading about the interior diameter of toilet rolls with great interest! Surprisingly, cardboard tube sizes are not standardized, either within or across countries. Toilet roll holder designers avoid this problem by making the spindle diameter much smaller than the smallest tube size. However, in this case, a snug fit - or at least some friction - is preferable. Of course, it’s always better to err on the side of being a little loose rather than too tight.
Most rolls fall between 37 mm and 41 mm. To help others, it would be great if you can post your country and successful size/brand of rolls in the comments. For an optimal fit, the plug size should be around 0.5 mm smaller than the internal diameter of your rolls. The head and tail roll plugs of my model are 37.8 mm ( which work for most rolls in Australia ), you will likely need to adjust their size to match the rolls available in your country. The dimensions listed below correspond to the inside diameter of the cardboard tube.
How to scale the Head and Tail
- Select the head OR tail not both at the same time.
- Select Scaling and deselect ‘uniform scale’
- Enter the desired scaling percentage to both X and Y but not Z - see below the image for how to calculate that.

Calculations for an example 40 mm plug size
(Desired size / 37.8 ) x 100 = Scaling factor in percent.
40/37.8 = 105.82
Printing
This model is perfect for PLA. Most things we print are perfect in PLA. No fancy high temperature carbon fibre reinforcement filaments needed. I recommend the Textured PEI Plate as it leaves a nice finish on the face that glistens and catches the light.
No supports needed as the legs are printed separately from the body and glued on afterward. The body does use a Brim.
Assembly
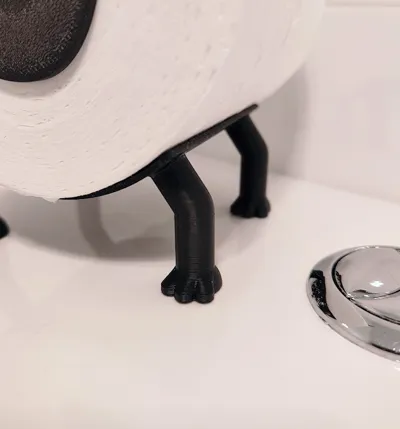
Unlike the sheep I have seen in this series - this model has dog-feet and so there are left and right side versions, make sure to:
- Dry fit the feet before gluing - The tolerances are tighter than other models I have printed in this genre. So work the feet into the respective sockets. Then remove, add your glue and work them back into place.
- Pay attention to orientation - Are all the feet pointing in the right direction? Lay things out before you glue.
- Use super glue / cyanoacrylate - Hold the foot with the shoulder-peg level and apply a bead of glue so it forms a meniscus. Then work the leg into the socket with the base of the leg making full contact all the way around with the body pad and the feet facing straight ahead. Hold the leg in place for about 5 seconds without movement and you should be good to go.
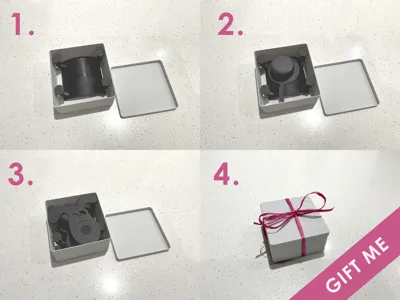
Bonus Content
There's a gift box on the second plate. NOTE: If you +scale X/Y on the head and tail, make sure to do the same to the box.

String not included!
Enjoy!
License
You shall not share, sub-license, sell, rent, host, transfer, or distribute in any way the digital or 3D printed versions of this object, nor any other derivative work of this object in its digital or physical format (including - but not limited to - remixes of this object, and hosting on other digital platforms). The objects may not be used without permission in any way whatsoever in which you charge money, or collect fees.
Comment & Rating (15)