Cocoa Dusting Tool for drinks + Stencil Set


Print Profile(2)


Description
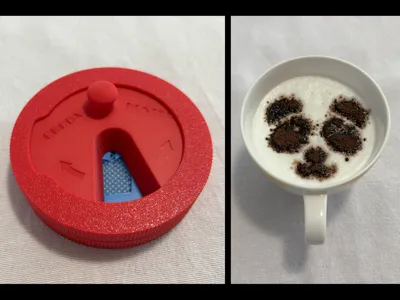
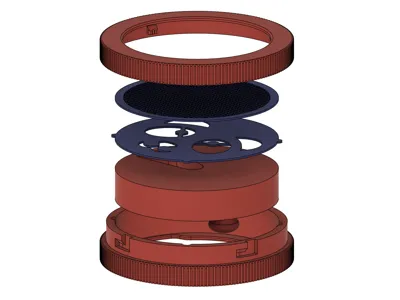
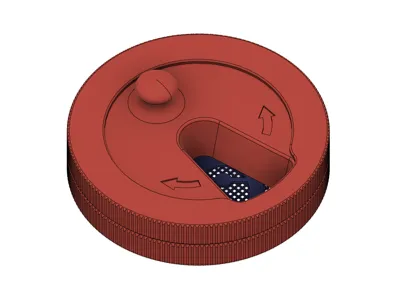
This handy tool lets you make perfect, shaped cocoa powder toppings on cappuccinos, hot chocolates & co., without requiring you to have a dedicated shaker duster like they use in coffeeshops. Just assemble it with your stencil of choice like in the GIF below, fill in some cocoa powder, hold over your drink and turn! ☕

Here you can see the tool in action:
Make sure to put in the stencil FIRST, before the sieve, as shown in the GIF and video above, so that cocoa first reaches the stencil and then the sieve when filled in. In my experience this makes for a much better topping and it requires a lot less cocoa when used, as the powder would otherwise get stuck in every hole of the sieve where the stencil is solid.
– – Features – –
- All in One cocoa powder topping maker.
- Swappable stencils for different topping shapes.
- Comes with a set of 8 cool stencils (separate print profile).
- Make your own stencil by following the simple instructions below!
- Super compact and portable.
- Built-In sieve for fine cocoa dusting.
- Easily cleanable.
– – Included Stencils – –
- Panda Face
- simply adorable
- Bambu Lab logo
- of course
- Flower Pot
- pretty, and doesn't need to be watered
- Batman
- BECAUSE I'M BATMAN !!!
- OutIn logo
- a tribute to the sponsor of the competition that inspired this tool
- Penguin
- yet again, simply adorable
- Yoshi on Bike
- your favorite green dinosaur, zooming around
- Creeper Face
- WARNING: might explode
– – How to make your own stencil – –
Prepare your stencil design as a vector graphics (.svg) file. Should you only have a rasterized image, for example a .png, you can use a free online converter to obtain a .svg file (google e.g. “png to svg converter”).
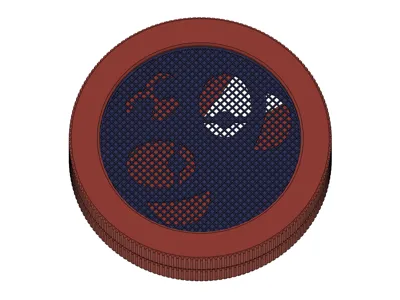
Open up the print profile containing the single template stencil, which is an assembly of an inner disk (blue) and a ring (black). The inner disk shows the maximum area that cocoa can be sieved through, therefore your stencil design must be fully inside it.
Follow the below steps.
In the Objects tab on the left, right-click on the assembly, choose Add negative part → SVG. and select your .svg stencil file.

Resize and position the inserted graphic to fit inside the blue area.

Change the color of the stencil ring to match the disk by right-clicking the Stencil Ring in the Objects tab and choose Change Filament → Blue Bambu PLA Basic (you can change the whole stencil to whatever color you like afterwards, or leave it two-color if you fancy).

- Slice and print!
– – Notes – –
Model is designed to be printed in 0.16mm layer height.
If you slice yourself, make sure to use Arachne Wall Generator for the sieve, as the fine meshing may not be sliced otherwise.
If you decide to print this model, I'd love to hear about your experience with it, so please consider leaving a comment and maybe even a picture of your print (and of your cocoa-powdered drink, of course 😁 ).
Boost Me (for free)
License
You shall not share, sub-license, sell, rent, host, transfer, or distribute in any way the digital or 3D printed versions of this object, nor any other derivative work of this object in its digital or physical format (including - but not limited to - remixes of this object, and hosting on other digital platforms). The objects may not be used without permission in any way whatsoever in which you charge money, or collect fees.
Comment & Rating (6)