City Bike kit card - Bike-01


Print Profile(2)


Description
Boost Me (for free)
Feels good to know people appreciating my work
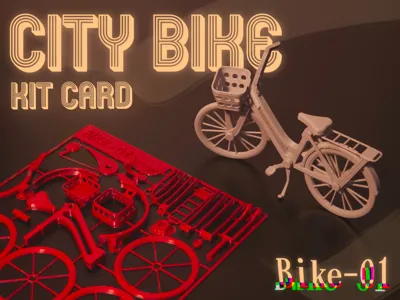
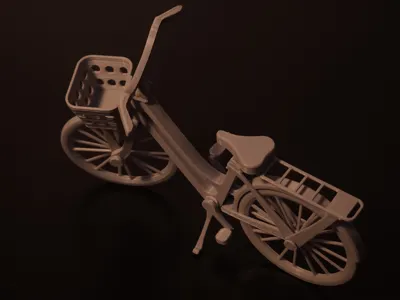
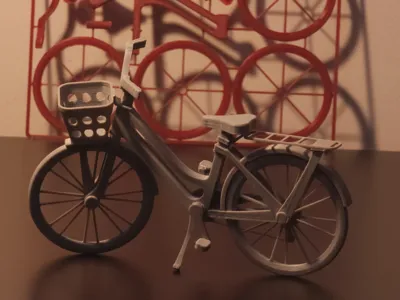
I’m thrilled to share my first-ever kitcard design—a miniature city bike that you can print and assemble yourself! The entire bike (including its small front basket) fits within a 10 mm height footprint—well, almost perfectly: one tiny basket piece measures just slightly over 10 mm, while every other part stays under the limit. After printing, all you need is a few drops of super glue, and in about 30–40 minutes, you’ll have a complete city bike model that looks adorable on a shelf.
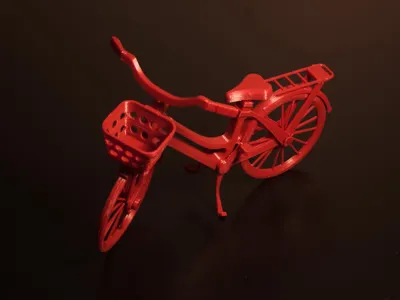
Even at this tiny scale, I wanted the bike to read clearly as a classic city model—complete with upright handlebars, a rear rack, and a little front basket. Balancing detail with printability was a fun challenge.
Assembly Process
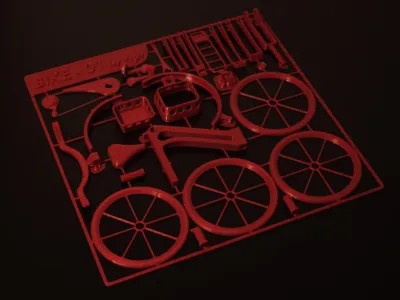
- Removing parts from the build plate: Once printing finishes, carefully peel or cut the bike pieces free. Some of the “sprue” connectors (the tiny tabs holding each piece in place) leave little nubs. A quick pass with a fine file or sandpaper will remove those nubs cleanly.
- Test-fitting before gluing: Arrange all the pieces in their relative positions—frame, wheels, handlebars, seat, rack, and basket—to get a sense of how they slot together. This helps you identify any tight fits or spots that need a tiny bit more sanding.
- Applying super glue: Use a toothpick or a fine applicator to drop a little glue on each mating surface—especially at the frame joints and wheel axles. Work one section at a time, pressing pieces together until the glue sets. Because the parts are so small and thin, give each joint at least 10–15 seconds to hold before moving on.
- Final touches: Once every joint is bonded, inspect the model. If any tiny glue seams or leftover sprue marks are visible, gently sand or file those areas. Overall, the assembly takes around 30–40 minutes, including glue-drying time.
Printing Tips
- Bed adhesion is crucial: Because the bike’s parts are extremely thin—especially the wheels and handlebars—a solid first layer is a must. Use a good-quality adhesive method (glue stick, blue painter’s tape, or a PEI sheet), and double-check your nozzle height so the filament squishes just right.
- Watch the first few layers: Keep an eye on your printer as the first layers go down. If you see any lifting or a part that’s not sticking, pause and adjust. It’s better to stop early than let a part detach halfway through.
User-Friendly Improvements (Next Iteration Ideas)
- Cleaner connection tabs: Right now, the sprue tabs leave small marks that need filing. I’d like to refine the tab shapes so they snap off more cleanly—saving you a bit of post-processing.
- Alternative styles: This version is the classic city bike, but I’m already sketching out a commuter bike with fenders or a vintage-style frame. Let me know which style you’d like to see next!
Share Your Prints & Feedback
I’ve already gifted a few of these city bike kits to friends and family, and they love how they look displayed on a bookshelf or desk. If you print one yourself, please leave a feedback about your experience with the assembly, or just share your ideas about adding or removing something.
Assembly Video
I recorded the entire build from start to finish (no cuts, just sped up some sections)—so you can see exactly how everything slots together. Check it out here:
License
You shall not share, sub-license, sell, rent, host, transfer, or distribute in any way the digital or 3D printed versions of this object, nor any other derivative work of this object in its digital or physical format (including - but not limited to - remixes of this object, and hosting on other digital platforms). The objects may not be used without permission in any way whatsoever in which you charge money, or collect fees.
Comment & Rating (22)