Over-Engineered Slow Treater


Print Profile(1)

Bill of Materials


Description
Boost Me (for free)
Boosts are never required but always appreciated. Thank you for printing!
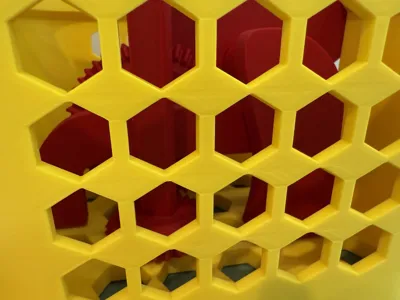
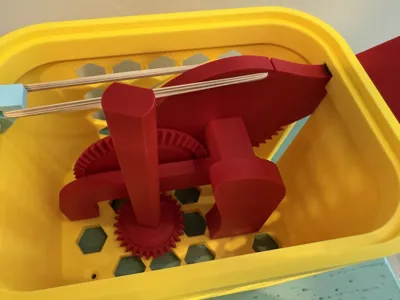
I started this project thinking I would do something simple and the execution went way beyond what I had initially planned. This is my version of a treat dispenser that has fun mechanics, hexagons, physics and most of all lots of filament. I didn't have enough orange filament for this project so we will just have to imagine the mix between the yellow and red. Orange and black would be the perfect color for this project. Stale gummy bears are a great treat to load up in this project and what I used for my gif.

The main assembly contains a spur gear with a lever that drives another spur gear connected to a bevel gear assembly that turns the treat wheel on the top of the lid. I tried to make this as compact as I could but also retain as much strength as possible as my original intention was to fill this with dog treats and let my “Cavapoo” play with it. The added strength built into the design has also helped make this a fun dispenser for my 2 kids as well (No cross contamination here as we only use wrapped candy for them!)

With the gears out of the way we can see the slots for bearings and the bearing inserts, there are also spacers to ensure that the gears are properly aligned and give the machine a nice fit once assembled.

Heat-insert nuts are to secure the 3 pieces in the picture above:
Bearing Beam 1 - Located on Plate 1 (Gear Assembly 1)
Bearing Brace 2 - Located on Plate 2 (Gear Assembly 2)
Rubber Band Hook - Located on Plate 4 (Lid and Hook)
NOTE: Dome was printed with a 0.8 mm nozzle! To ensure the best results print this part slowly with the largest nozzle you have, you should also check supports on this part to ensure the top of the dome is properly supported. Enable: View → Show Overhang and paint on supports to ensure this part comes out looking its best.
-----------------------------------Assembly Guide----------------------------------
NOTE! All plates have been divided into logical assemblies, I have numbered each part that goes with each assembly in hopes that will make the assembly process easier and more clear.
Step 1

Place Heat Insert Nuts into Bearing Beam 1, Bearing Brace 2 and Rubber Band Hook. This step is highly recommended as it will add structure to the part. Ensure that you place them as close to even with the holes as possible as any alignment issues will lead to you being unable to insert screws. For reference here are the 2 parts in the case same as pictured above.

Step 2
Place bearings into the highlighted holes in the Treat Tosser Case

Step 3
Place the Gear Spacer 3 (green) on Gear Rod 3 (yellow) on the end with the Gear Rod Peg and insert it into the case as shown.

Step 4
Place Bevel Gear 3 (green) on Gear Rod 3 and slide it until it is flush with the spacer.

Step 5
Complete the Gear Assembly 1 as shown, the order should be Gear Spacer 1 → Spur Gear 1 → Bevel Gear 1. Insert the Peg into the bearing and slowly rotate Gear Rod 3 so that Bevel Gear 3 and Bevel Gear 1 interlock.

Step 6
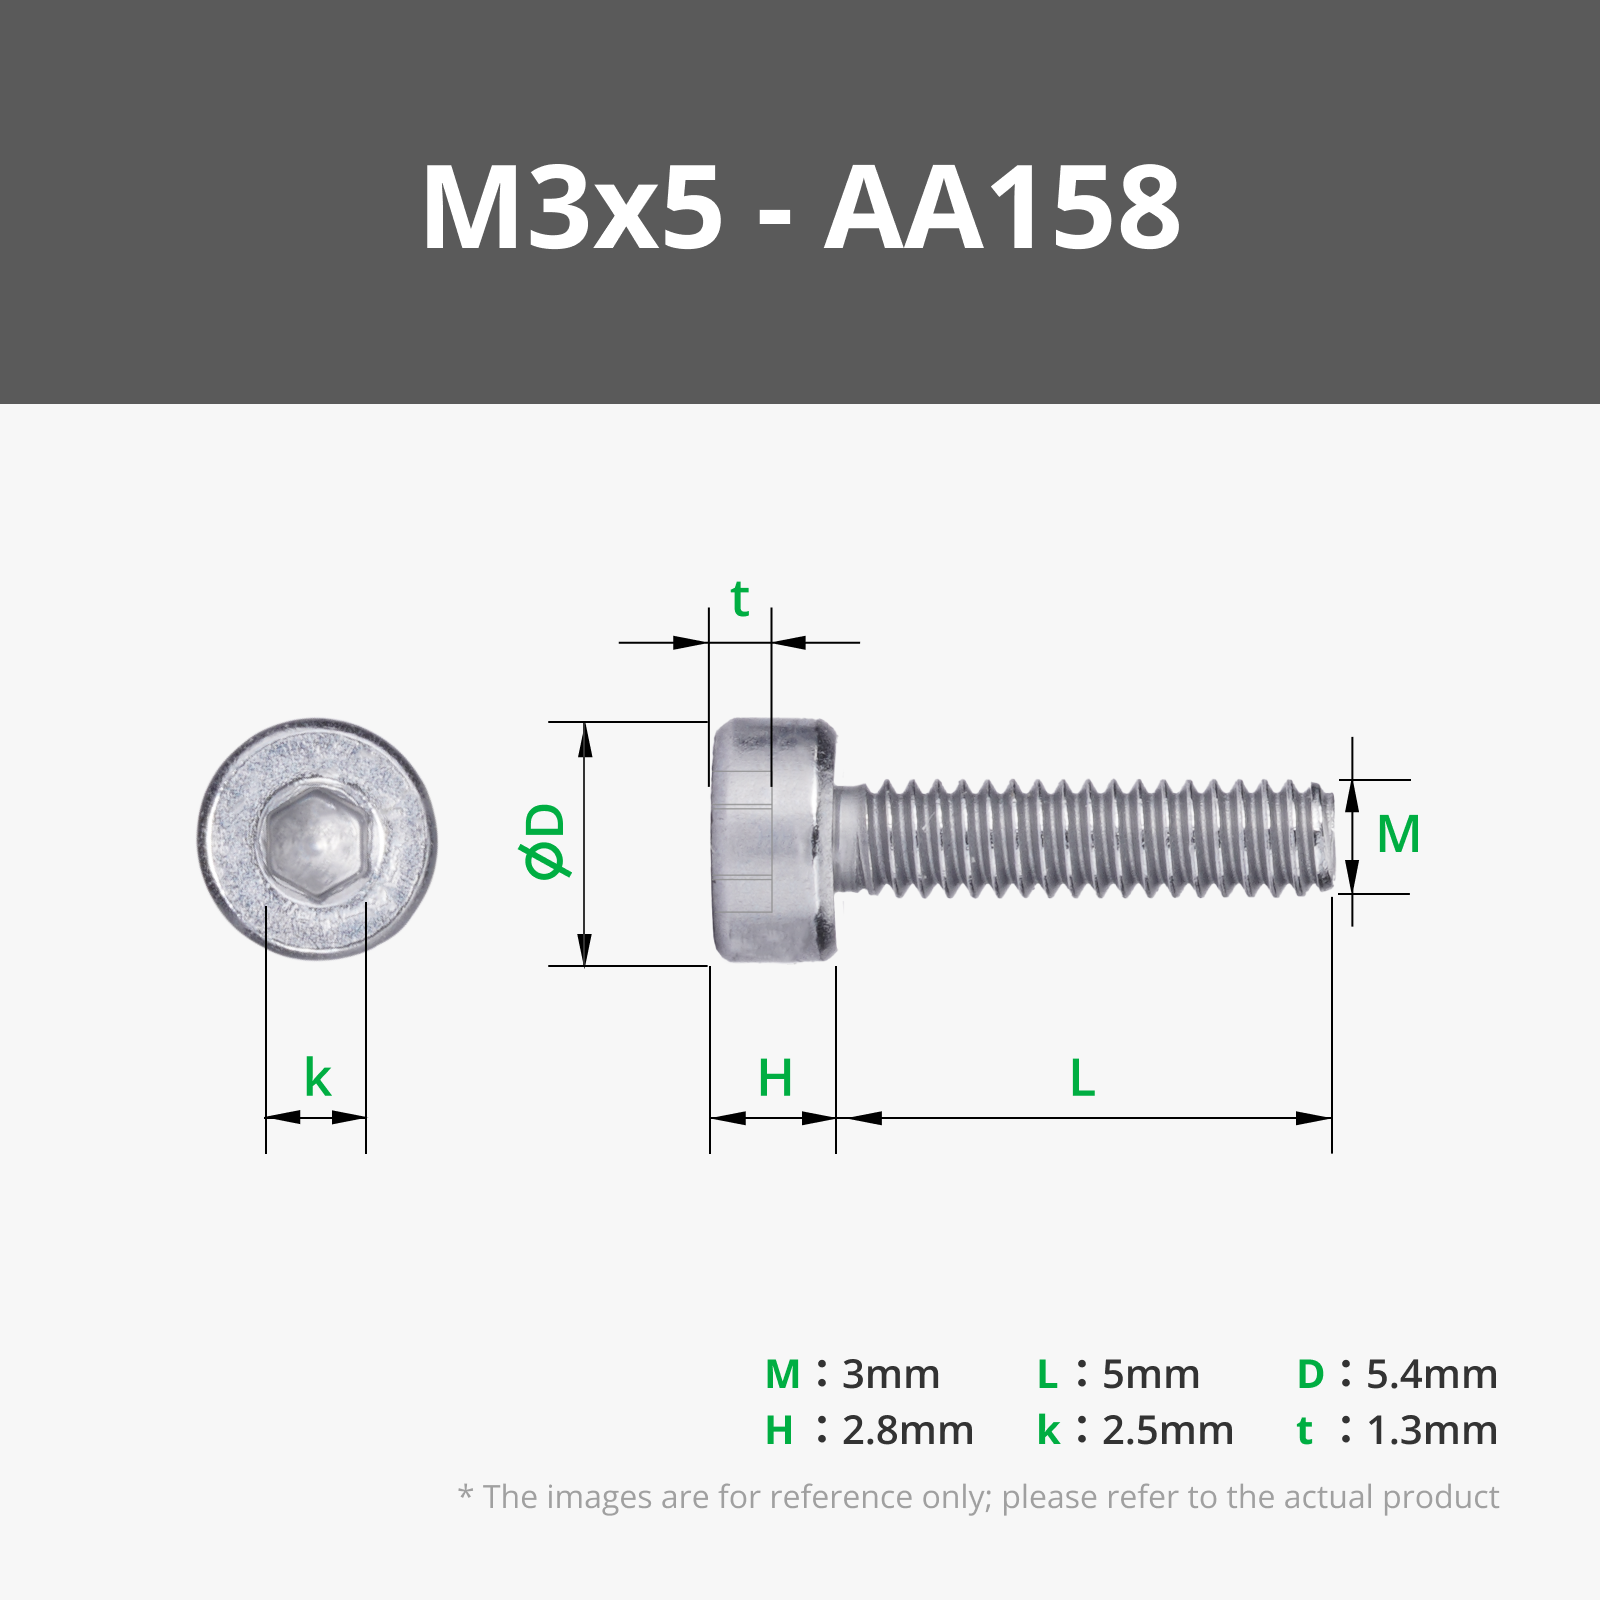
Insert a bearing into Bearing Beam 1 (yellow), rotate Gear Rod 3 so that you can slide Bearing Beam 1 into place and seat the Gear Rod Peg for Gear Rod 1 into Bearing Beam 1. Align Bearing Beam 1 with the bottom of the case and secure with 4 - M3X8 screws.


Step 7
Slide the gear handle through the hole in the case with the teeth facing downward. Align the teeth of the Spur Gear Handle 2 with Spur Gear 1 then insert Gear Rod 2 and Gear Spacer 2 and secure them with Bearing Brace 2.


Step 8
Secure the Bearing Brace 2 from the previous step with 4 - M3X8 screws.

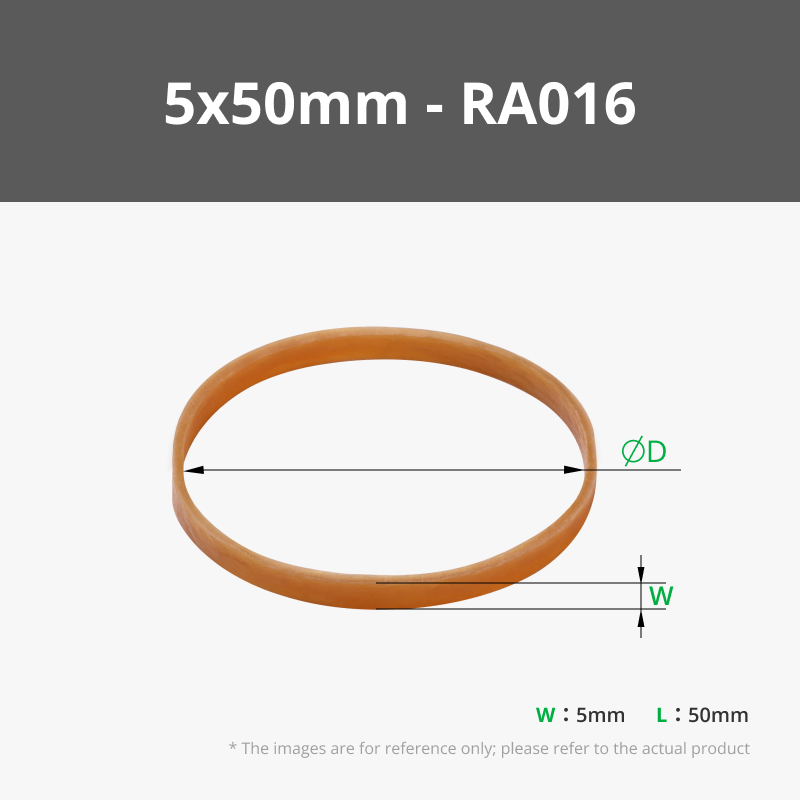
Slide the Rubber Band Hook (green) into place and secure with 2 - M3X5 screws. Run a rubber band from the Rubber Band Hook to the small clip on Spur Gear Handle 2. Using more rubber bands will increase the tension and throw treats more consistently but too many may break the handle slot so try to find the balance that works best for you. I also added a small amount of the Adhesive Foam Sponge to between the Spur Gear Handle 1 and the Case (20x0.5mm Adhesive Foam Sponge Strip Roll 5m (1pcs) - NC005)


Step 9
Place the lid on top then slide the Treat Wheel onto Gear Rod 3.

Finally place the Treat Dome over the Treat Wheel with using the alignment slots then rotate the dome to lock it in place. It can be rotated to either face away from or towards the handle depending on what your or your treat subject's preference is. You may also want to add some Adhesive foam to the bottom or there are 2 chamfered holes that will allow you to use a #8 wood screw or M4 wood screw depending on what availability is for you.

Congratulations! Your Treat Tosser is complete!
Commercial rights for my models can be purchased with a membership to my Patreon: https://www.patreon.com/c/SODA3D
Check out my Linktree to help support my future projects: https://linktr.ee/soda3d
License
You shall not share, sub-license, sell, rent, host, transfer, or distribute in any way the digital or 3D printed versions of this object, nor any other derivative work of this object in its digital or physical format (including - but not limited to - remixes of this object, and hosting on other digital platforms). The objects may not be used without permission in any way whatsoever in which you charge money, or collect fees.
Comment & Rating (3)