Automatic Super Thin Chamber AMS LED Light


Print Profile(1)

Description
Hey!……Turn off that light!!! (fond memory from a Bugs Bunny cartoon)
If you are like me you probably send print jobs to run at odd hours. I love my previous LED Chamber Light project but I did not like that it would stay lit well after the print job completes, maybe even for days. This had to stop.
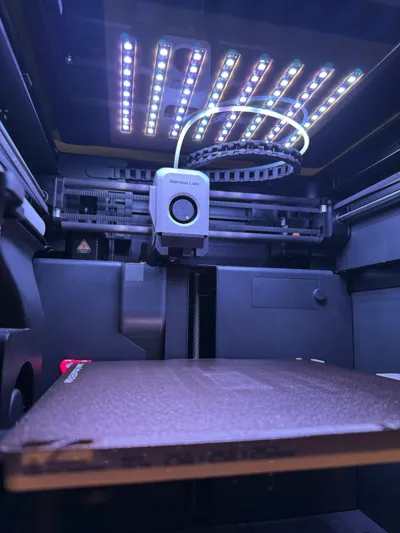
There are a million ways to approach this problem however my method guarantees that you do not have to poke around inside your nice shiny machine and risk damaging something, or even worse, voiding your warranty. I wanted a solution that was 100% independent of the machine and monitored it from outside the machine envelope. I also wanted it to be undetectable. It should be slick, resemble OEM and you should not notice it is there. Since the top of the machine is glass and you can see when the print head is at its resting position, I thought it would be clever to monitor that. And like magic, I got a “freakin' laser beam” to do it for me.
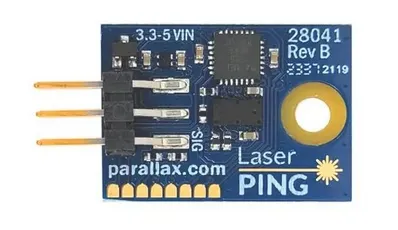
The Parallax Ping laser device (see photo) is an ultra-thin, low-cost laser that can measure distances with millimeter accuracy. Combine that with an ultra-tiny Arduino compatible processor, to serve as the brain, and you have a fully automated solution. I have included the Arduino code in this listing. (PDF attached)
The Arduino I chose to use is made by Seeed Studio (yes 3 E's). The model is the XIAO SAMD21. At under $10 it is inexpensive for its minuscule size and hefty processing power. This little device is smaller than a postage stamp but rivals the larger Arduino boards. (photo attached)
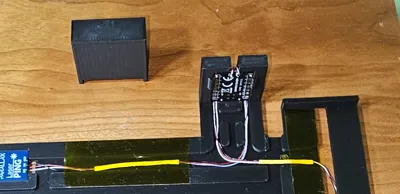
How does it work? The laser sensor sits outside the machine, underneath the AMS, directly above the print head home position. The laser is measuring distance. When the print head is “home” the LED strips will remain off. If the print head moves, the LED strips will turn on. The program logic has hysteresis that will ignore when the print head briefly arrives home for filament color changes. When the print job is complete the print head will park and the program logic will wait 5 minutes to turn off the LED strips.
I have made provisions in the code for an optional button to manually override the state of the light. (not shown in photos)
Wiring diagrams are also attached. This can go beyond LED strips. With a little creativity and a relay module, the Arduino could trigger big exhaust fans if you are doing a lot of ABS printing.
Warning: This is a new, exclusive offering of my other AMS light project. They are similar but still worlds apart. This version is a completely different beast that has integrated automation. This is an advanced ‘maker’ project that requires soldering skills, programming knowledge and low voltage circuit knowledge. I have limited time to help with wiring issues or programming questions. My other listing has useful information about assembling the LED strips.
https://makerworld.com/en/models/955579-super-thin-ams-led-light-maintains-oem-look#profileId-924443
Items required:
Soldering iron or soldering station.
Solder.
Flux pen or flux paste.
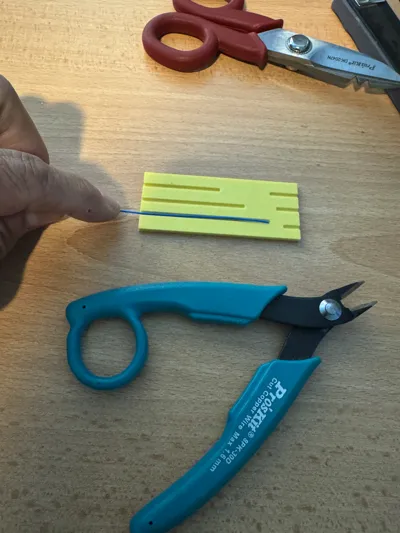
Very thin 30 AWG wire for connections between laser and micro-controller. (Kynar Wire-Wrap type)
22 gauge wire for power delivery to LED strip. (Usually included with LED strip)
Double sided tape.
Regular scotch tape.
Small shrink tube.
Parallax Laser Ping Module.
Seeed Studio XIAO SAMD21 micro-controller.
Computer with Arduino IDE software configured to interface with SAMD21 devices. Libraries listed in code should also be downloaded.
5 volt DC power supply with at least 2000 ma (2A) current capacity.
A lot of patience.
Optional but highly recommended: Fuse and fuse holder for 5V+ power supply output.
3 surface mount pins that are pre-installed on the Laser Ping module will have to be carefully un-soldered and removed. This is done to make it as thin as possible.
DO NOT ATTEMPT TO USE THE PRINTER OR AMS AS YOUR 5VDC POWER SOURCE! YOU HAVE BEEN WARNED! BUY A PROPER POWER ADAPTER.
As a best practice, build you circuits and test their functions on a test bench before mounting to printer.
Documentation (2)
License
You shall not share, sub-license, sell, rent, host, transfer, or distribute in any way the digital or 3D printed versions of this object, nor any other derivative work of this object in its digital or physical format (including - but not limited to - remixes of this object, and hosting on other digital platforms). The objects may not be used without permission in any way whatsoever in which you charge money, or collect fees.
Comment & Rating (0)