Tesla Cybertruck Electric Cyber Pickup Truck Futuristic Assembly/Movable Wheels


Print Profile(3)


Description
Boost Me (for free)
If you like this model, please boost it! Your support is my motivation for continuous updates!
【Special Notes for F1 Models】
1. The author has conducted structural printing tests on all models before release. However, the F1 model has a complex structure and requires high printing precision. Newcomers are advised to use the parameters in the slicer directly for printing and not to adjust them arbitrarily to avoid printing failures; experienced players may ignore this reminder.
2. The printing effect of the model is affected by various objective factors such as equipment, filament, and environment. If you encounter problems during printing, you are welcome to contact me through comments or private messages, and I will assist in troubleshooting. Creating is not easy. Please communicate before evaluating and do not give low scores at will; malicious negative reviews will result in being blocked. Thank you for your understanding!
3. All models from the author are tested based on Bambu Lab printers, and the configuration files use Bambu Lab's official slicing software. If you are using other brands of printers, it is recommended to adjust the parameters according to your own equipment's slicing software and preview before printing. Thank you for your cooperation!
4. As multi-color printing becomes the trend, the model is sliced with the H2C multi-nozzle printer by default. For other models, please refer to your own model for slicing preview to check the time and filament consumption.
5. Thank you again for the recognition and support from fellow enthusiasts. I hope to receive your likes and boosts. In 2026, let's unlock more F1 models together!
【Read Before Printing!!! Warm Tips】
It is strongly recommended to print the single-color configuration first before printing the multi-color configuration to test the model structure and slicing effect (Cost of single-color model printing: 64 scale 15g filament, 2 hours. 43 scale 50g filament, 3 hours). After being satisfied with the model's appearance, articulated structure, and slicing effect, then print the multi-color version. Thank you.
Note: Before printing the multi-color configuration file, you can enlarge it according to the complexity of the paint scheme. Preview in the slicing software to check the details and ensure printability.

---------⇪3D Printing Instructions-----------⇩ Product Introduction--------------
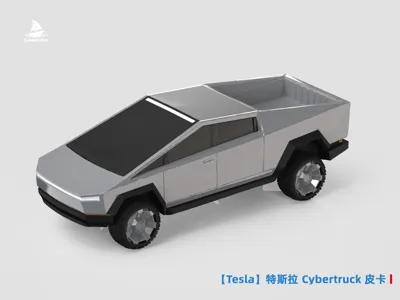
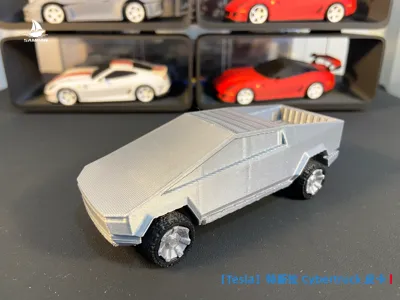
The Tesla Cybertruck, a futuristic electric pickup truck, boasts a sharply angular, geometric design and an Ultra-Hard 30X stainless steel body, drawing inspiration from the science fiction film Blade Runner.
Available in single-motor, dual-motor, and tri-motor variants, the tri-motor version accelerates from 0 to 100 km/h in a mere 2.9 seconds and offers a maximum range of 800 kilometers.
Equipped with bulletproof glass and a towing capacity of up to 6300 kg, it features a minimalist interior and a 17-inch touchscreen.
Model Description
- Includes monochrome and multicolor printing configurations: Monochrome allows for painting and decal application. Multicolor printing configurations can be printed directly (consumes more filament and takes longer), or used as a reference for monochrome painting.
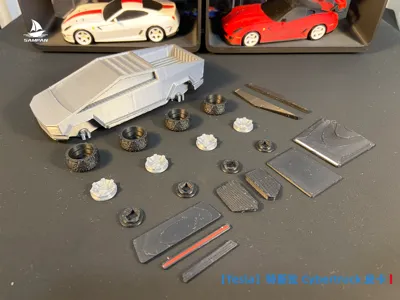
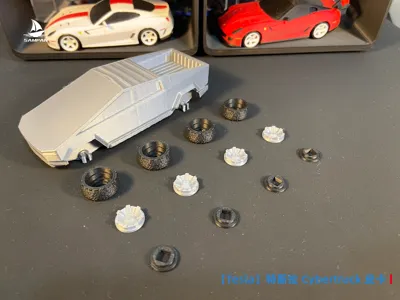
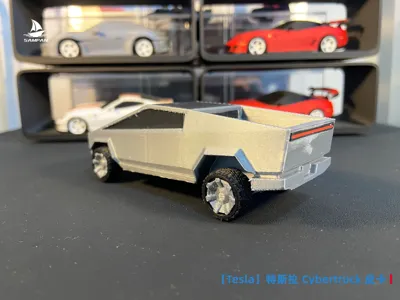
- Rotating wheels, glue-free assembly.
- Body parts assembled using 409 adhesive.
- Compatible with a wide array of wheel rims from this account; browse and download your preferred wheel rim style on the homepage.
Dimensions
- 1/43 scale: Approximately 110mm in length.
- 1/64 scale: Approximately 75mm in length. The model is scaled down to 67%, and can be printed using a 0.12mm layer height (a monochrome version is included in the configuration; other versions can be scaled accordingly).
- Sliced files are set for minimum printer dimensions. Adjust the number of models printed at once to optimize time and filament consumption based on your printer's dimensions.
FDM Print Settings
- The physical model was printed using an A1 mini with a 0.4mm nozzle, 0.16mm layer height, and official PLA filament. Higher-end equipment, settings, and filaments will yield superior results (though assembly may be too tight or loose; compensate by adjusting the XY outer contour dimensions of the assembly components, or use sanding tools and 409 adhesive for finishing and joining).
- Enable variable layer height for finer layer lines.
- Infill density: 15%. For a more substantial weight, increase infill density to 100%.
- Support: A combination of standard and tree supports was used.
- Various painted versions will be released in the future; follow this account for the latest updates.
- Adjust parameters as needed based on your printing experience.
Support Removal Instructions
- Due to the small size of the model, supports have been added to critical areas. Support removal requires flush cutters and tweezers. Forcibly removing supports by hand will likely cause breakage, especially the rearview mirrors.
- Tip: To ensure successful multicolor model support removal, print a monochrome version first to understand the model and support structure before removing supports from the multicolor model (use 409 adhesive to repair any breakage).
Monochrome Painting Guide
- Sanding: (Optional) Sand sequentially using 400-600-800 grit sandpaper.
- Painting: Apply acrylic paints using a brush (to address layer line bleed-through, apply the base coat first, then paint the edges).
- Polishing: Polish with a velvet cloth to achieve a glossy finish for the acrylic paint.
Assembly Instructions
- For long-term stability, wheel installation requires firm pressure; initial rotation will feel tight. It will become progressively more flexible with use. See GIF for wheel installation.
- A dedicated wheel caliper installation tool was designed and produced for convenient wheel caliper installation. Link: 64-scale Wheel Caliper Installation Tool from SAMPAN棱界复刻 - MakerWorld
Visit the author's homepage to see all vehicle models, welcome to like and follow!
Hope to see more friends share your printing photos, I'm curious what kind of works you will print!
We will continue to release various high-precision 3D printed vehicles, thank you for your attention and support!
Membership
China site:https://makerworld.com.cn/zh/@sampan1120
International site:https://makerworld.com/zh/@sampan1120
License
You shall not share, sub-license, sell, rent, host, transfer, or distribute in any way the digital or 3D printed versions of this object, nor any other derivative work of this object in its digital or physical format (including - but not limited to - remixes of this object, and hosting on other digital platforms). The objects may not be used without permission in any way whatsoever in which you charge money, or collect fees.
Comment & Rating (12)