


Print Profile(1)

Description
Introduction
This is a spacer designed to fix the notoriously imprecise d-pad of an XBOX 360 controller. Earlier revisions are especially susceptible to missing inputs, and I found that a handful of the controllers in my own collection suffered from missed key presses on at least one axis of the d-pad. This may not affect more recent controllers, and I did not experience this issue with controller revisions of at least “009”.
This is due to primarily to deviations in the quality control of the d-pad rocker, which uses two small plastic extrusions on each axis of the d-pad, to compress a membrane that completes the circuit for the button press. Unfortunately, the plastic does not always compress the membrane enough such that it is able to complete the circuit. This results in a tactile “bump” on press, but a missed input that only completes if the user presses the button harder or more aggressively.
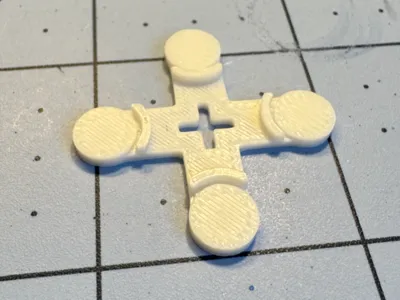
To remediate this, a designer named OOOToys designed a spacer that adds additional height to the rocker, with small divots to better align with the membrane. This has, for me at least, completely revitalized the controllers in my collection that suffer from this problem.
Installation
- Disassemble the Xbox 360 controller by removing the 7 screws on the rear of the controller.
- Carefully separate the back panel of the controller.
- Remove the vibration motors and carefully slide out the PCB with the controller face down; try to keep the trigger buttons in place. This should keep the rubber membranes in place.
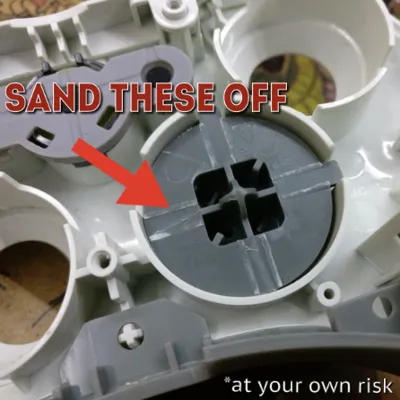
- Unscrew the rear d-pad rocker from the front of the d-pad; you will need to use a pair of tweezers to separate these two pieces
- Take the rocker and carefully remove the plastic extrusions from the piece. I accomplished this with a craft scalpel and then filed the entire back face with a hobby file. Try to make the piece as flat as possible.
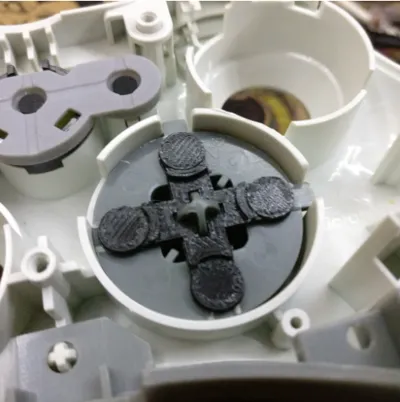
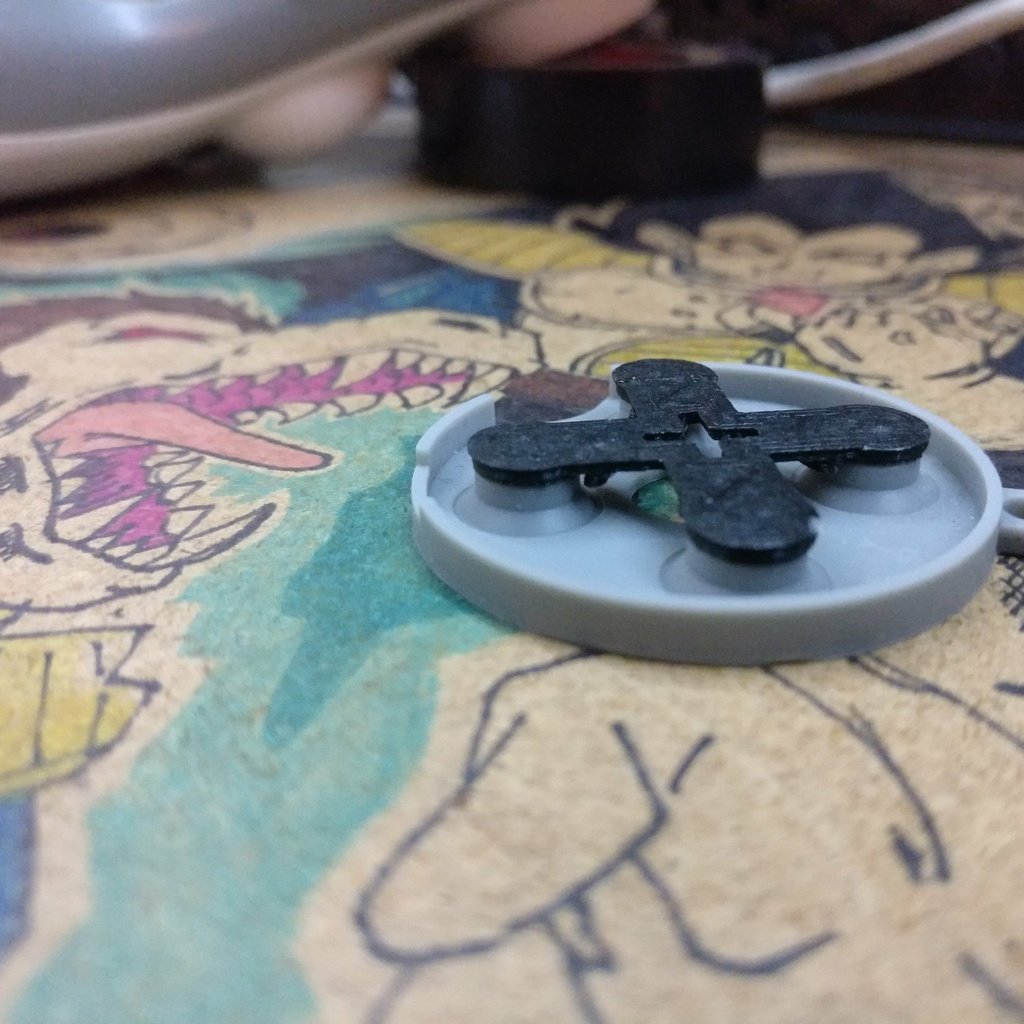
- Slide the spacer flush on the rocker, with the flat side against the rocker; the divots should align with the membrane.
- Reassemble.
Notes
OOOToys original version of this spacer was not quite able to sit snug on my rocker's pin. In order to prevent it from wobbling during use, I made some modifications to the original model for adjust scaling. I also fixed non-manifold geometry issues seemingly present around the pin area.
There should be some pressure when adding the spacer, so try to avoid unnecessary force. To remove, use a spudger and press up from the center of the spacer, and not the arms. Fortunately, due to the small size of this model, it should be a very quick print even with extra fine detail, so this was done to ensure as accurate measurements as possible.
This mod does require permanent modification of a 360 controller. Do not attempt this modification if you are unsure about your ability with craft knives or sanding tools. Please take care to avoid harm, and to ensure your controller remains in usable condition. If your rocker is damaged during this modding, replacements can still be found online for low prices, either from third party manufacturers, or from broken donor controllers.
Comment & Rating (0)