[Lao Teng] New Machine Must-Have Series Bambu Lab X1 Carbon Shield Lightweight Design, Secure Installation, Only Takes 20 Minutes, 4.5g Material


Print Profile(2)


Description
- There are many designs for the Bambu Lab X1 Carbon Shield, and I've used several designs from other creators, but they all have minor issues. Although these problems don't affect usage, as a perfectionist designer, I won't allow any flaws in any of the machine's components!!
- So, I disassembled the Bambu Lab X1 Carbon components, re-measured the dimensions carefully, and after more than a dozen revisions, I completed the design of this small part.
- Design concept and highlights are as follows:
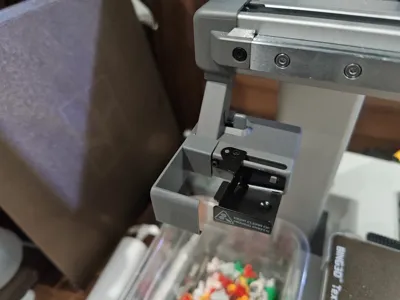
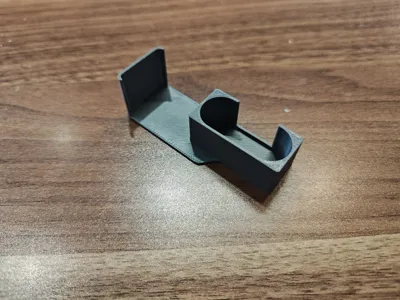
Although the end face of the original Bambu Lab X1 Carbon component is a round arc design, the main body is square. Almost all shield designs use a round arc design, and when installed, it clashes with the square main body. So, I designed the fixing buckle to be square, while using the round corners of the original component. Once installed, it is seamless.

I added the Tuozhu LOGO to the side. Although this area is usually not noticeable, if you prefer to add the LOGO to make it look more like an official component, then use multicolor printing. If you don't need the LOGO, then ignore my color settings and use single-color printing.

Dimensional inaccuracies are the shortcoming of most designs. Although the component is small, it is a high-frequency accessory used over long periods, so precision is paramount. I not only adapted the outer contour dimensions of the Bambu Lab X1 Carbon component but also refined the angle of the upper connecting rod and the small gap outside the connecting rod. The fracture was designed with a bevel according to the angle of the connecting rod, achieving true precision. This shield can be installed perfectly.

- The outer cross-section of the original Bambu Lab X1 Carbon component is not flat, it's slightly concave, so I designed a fully enclosed structure to conceal the uneven cross-section of the original shield, and the shield will look more integrated.
Finally, one point: The A1 machine's cooling fan time before ejecting the part is shorter than the A1 Mini, which may cause the uncooled part to stick to the shield; this is not related to the shield, it is a machine characteristic. If you occasionally encounter this problem, you can tear off a small piece of tape and stick it to the inside. The type of tape doesn't matter; I used a fuzzy cloth tape, but you can also use ordinary tape or masking tape.

License
You shall not share, sub-license, sell, rent, host, transfer, or distribute in any way the digital or 3D printed versions of this object, nor any other derivative work of this object in its digital or physical format (including - but not limited to - remixes of this object, and hosting on other digital platforms). The objects may not be used without permission in any way whatsoever in which you charge money, or collect fees.
Comment & Rating (2)