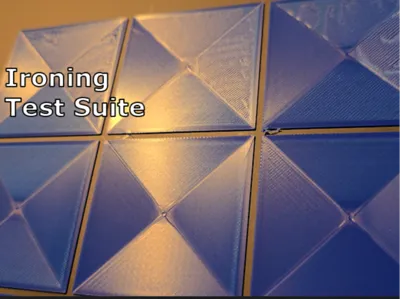
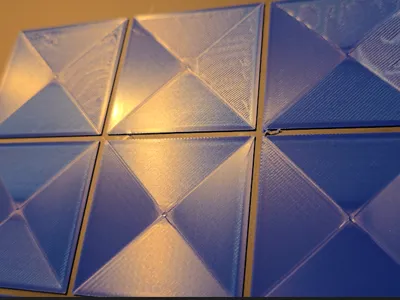
Ironing Test Suite


Print Profile(1)

Description
This test suite allows you to get close to perfection from your ironing settings at high speed. I've managed to cut some larger print times down by almost a third in some cases where the surface area to be ironed was large.
Boost Me (for free)
Please consider giving me a boost, I'd really appreciate it =)
I've had some ironing issues with the same filament material and different colors that have had slightly different problems with exactly the same settings, the problems I've used solved with this:
- Scratchy look
- Missed layer lines
- Slightly whiter edges / discoloration
- Pillowy look
These tests let you find the exact speed and flow rate to achieve the perfect ironing layer.
Pre-made plates for concentric and rectilinear ironing settings at 60mm/s and 90mm/s ironing speed.
A plate for exploring 120mm/s ironing speed (and higher if you tweak the settings)
Plates for both Ironing Line Space and Ironing Inset Testing to really help you dial in the process.
Directions for use:
The 90 and 60 plates are good to go, just do the following:
- Print a plate for a speed / pattern you want to use.
- Inspect the printed plate for the setting that came out the best. (Don't remove them, so you know which printed square matches in the slicer)
- Select the printed square in the slicer and write down those settings. (You have to click “Objects” → Select Cube → “Quality” → Scroll to Ironing settings)
- Copy those settings (speed and flow rate only) to the Ironing Line Space Test to really dial in the quality further.
- (Bonus) Try the inset test! (Note: I've not found much of any difference with the inset being changed)
- Apply those ironing settings to the project you wish to get the best ironing results!
The 120 Exploration plate lets you figure out what flow rate looks best at 120mm/s, or higher! Print as is and follow the instructions above, or change the speed to whatever you like to get the results you want! (Note: for slower speeds you may need to decrease the flow rate, higher you may need to increase the speed)
License
You shall not share, sub-license, sell, rent, host, transfer, or distribute in any way the digital or 3D printed versions of this object, nor any other derivative work of this object in its digital or physical format (including - but not limited to - remixes of this object, and hosting on other digital platforms). The objects may not be used without permission in any way whatsoever in which you charge money, or collect fees.
Comment & Rating (2)