XL LUXE Rubbish Bin - Modular HUGE Fancy Trash Can


Print Profile(6)


Bill of Materials


Description
BIGGER is BETTER…? Well, this thing is MASSIVE!
272.9mm (10.74") TALL (assembled height). No bananas but here's a Benchy for scale:

I have uploaded STL's for a sectioned version to fit ENDER 3 and similar sized printers.👍
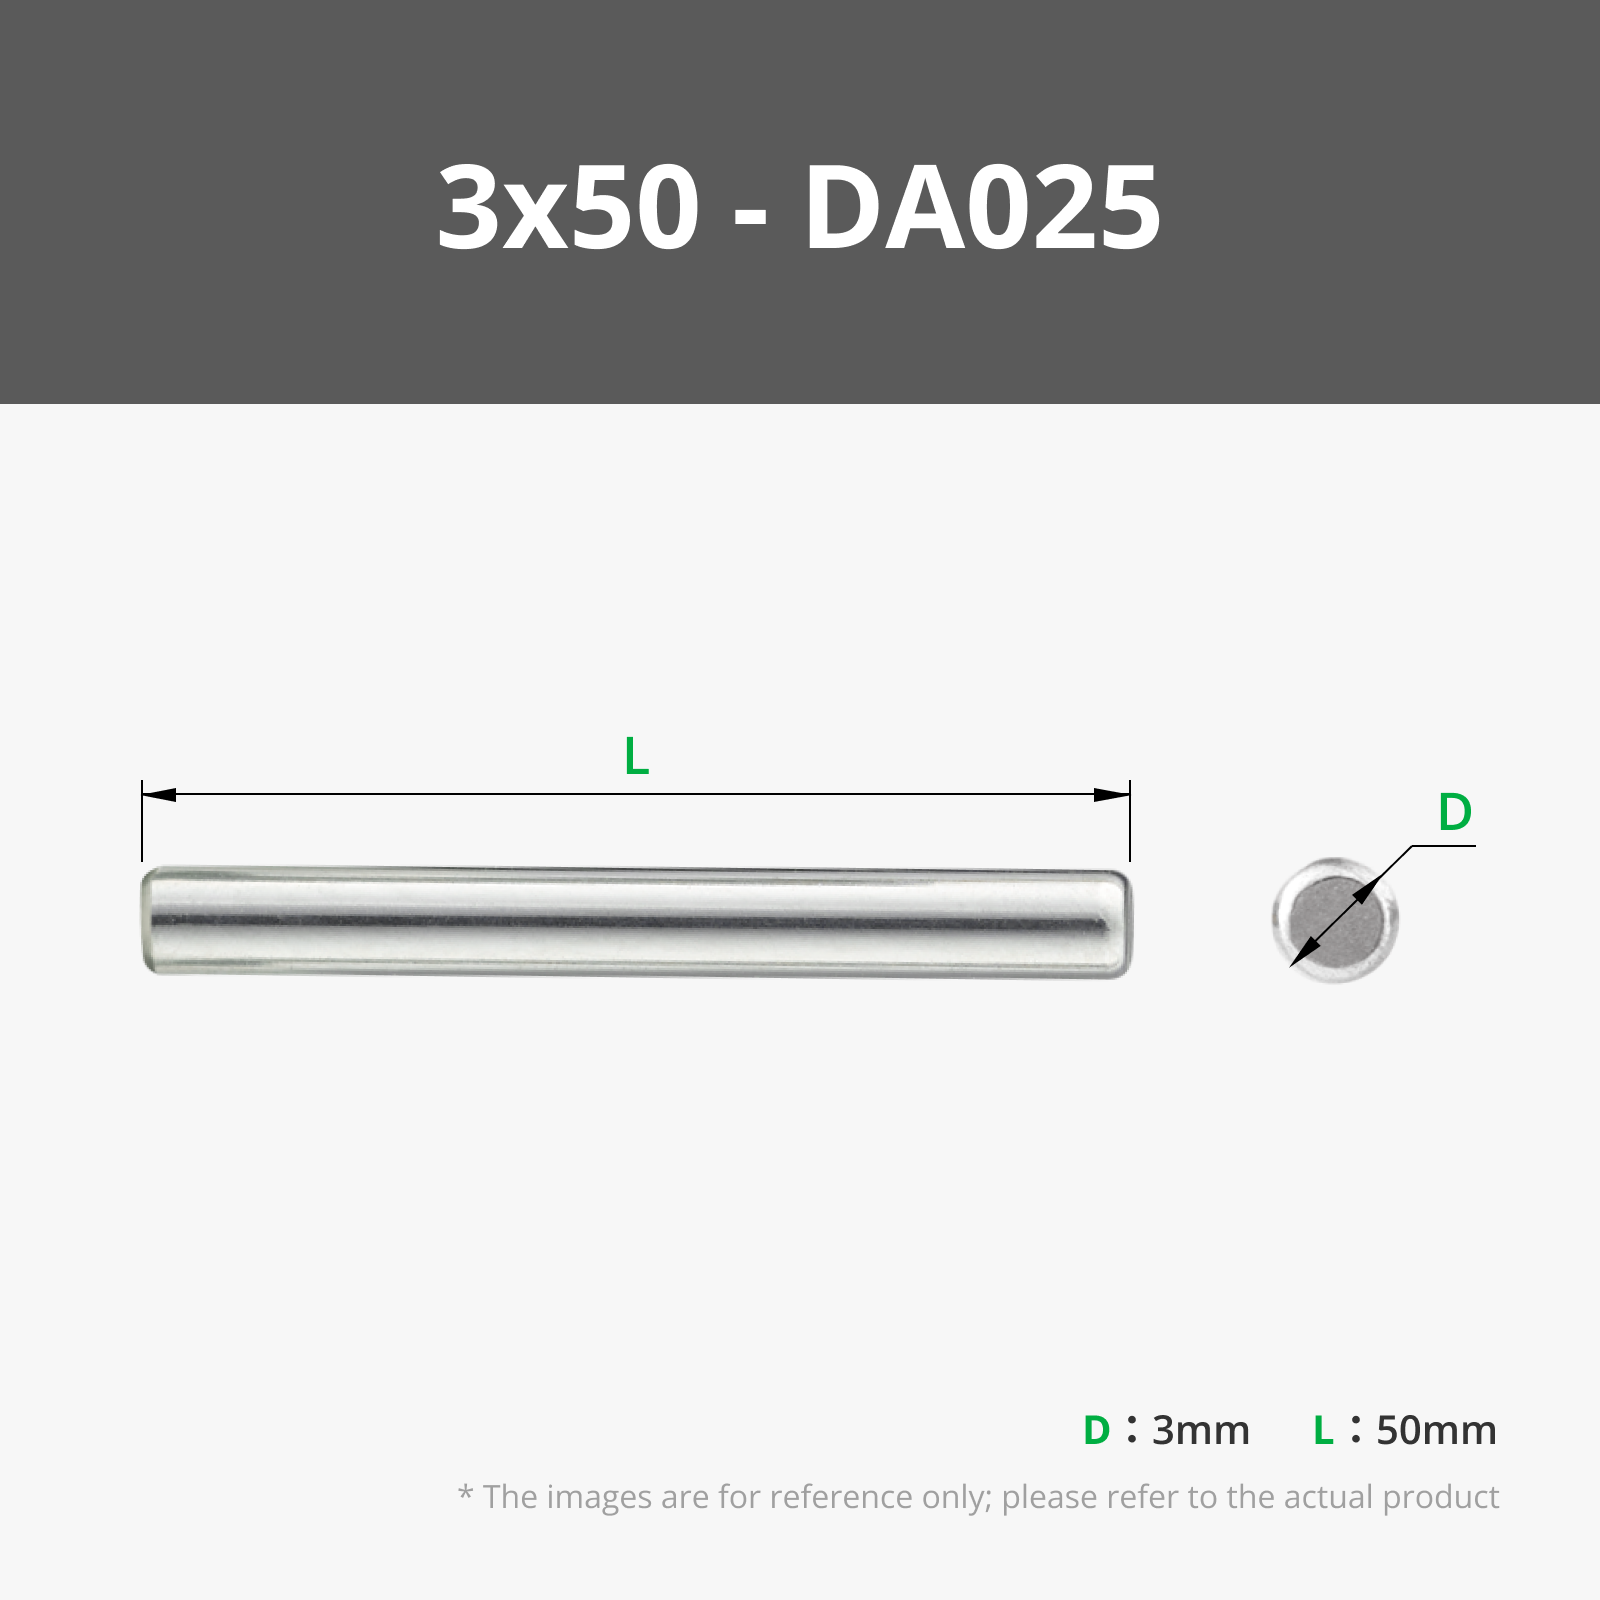
Note that you will use Qty (4) 3x50mm Stainless Steel Dowel Pin - DA025 to pin it together (with glue).
The STL's are in the folder named, “SECTIONED to fit ENDER 3 and similar printers”.
I'm still trying to make it fit an A1 Mini… stay tuned.
NO SUPPORTS
- CUSTOMIZABLE INSERT & PLACARDS (download included STEP file and EDIT before printing)
- Here's the collection of modular organizer inserts (for XL LUXE and LUXE Rubbish Bins)!


Maker's Supply Hardware
I genuinely tried to use all the same hardware as the LUXE Rubbish Bin; there are a couple parts that are different but it is MOSTLY the same. I've crossed out the unused parts in the following image:

These are additional parts necessary for this build:

Magnets are OPTIONAL, I've included a print profile for a version WITHOUT magnets and customizable placards. It's not as fancy but it's still an impressive print!

Captive Bearings for Wheels (pause for insertion)
- The wheels are a built-in fidget spinner! Don't believe me?? I challenge you NOT to spin the wheels when it's sitting in front of you (I guarantee everyone who picks it up will spin the wheels! Usually before they open the lid). You can't not spin them. You will spin them. You must spin them. The wheels must be spun.
- I used the premium 608 Open Hybrid Ceramic bearings from Maker's Supply and I highly recommend these bearings, they spin forever!

Install Snap-Fit Grab Bar 3x50mm Stainless Steel Dowel Pin - DA025 and 5x50mm Stainless Steel Dowel Pin - DA036 (Totally my favorite parts!) like so:


Install two (2) M3x5x4 Round Threaded Brass Heat-Insert Nuts - AB012 (one per side) for the handles with a soldering iron:

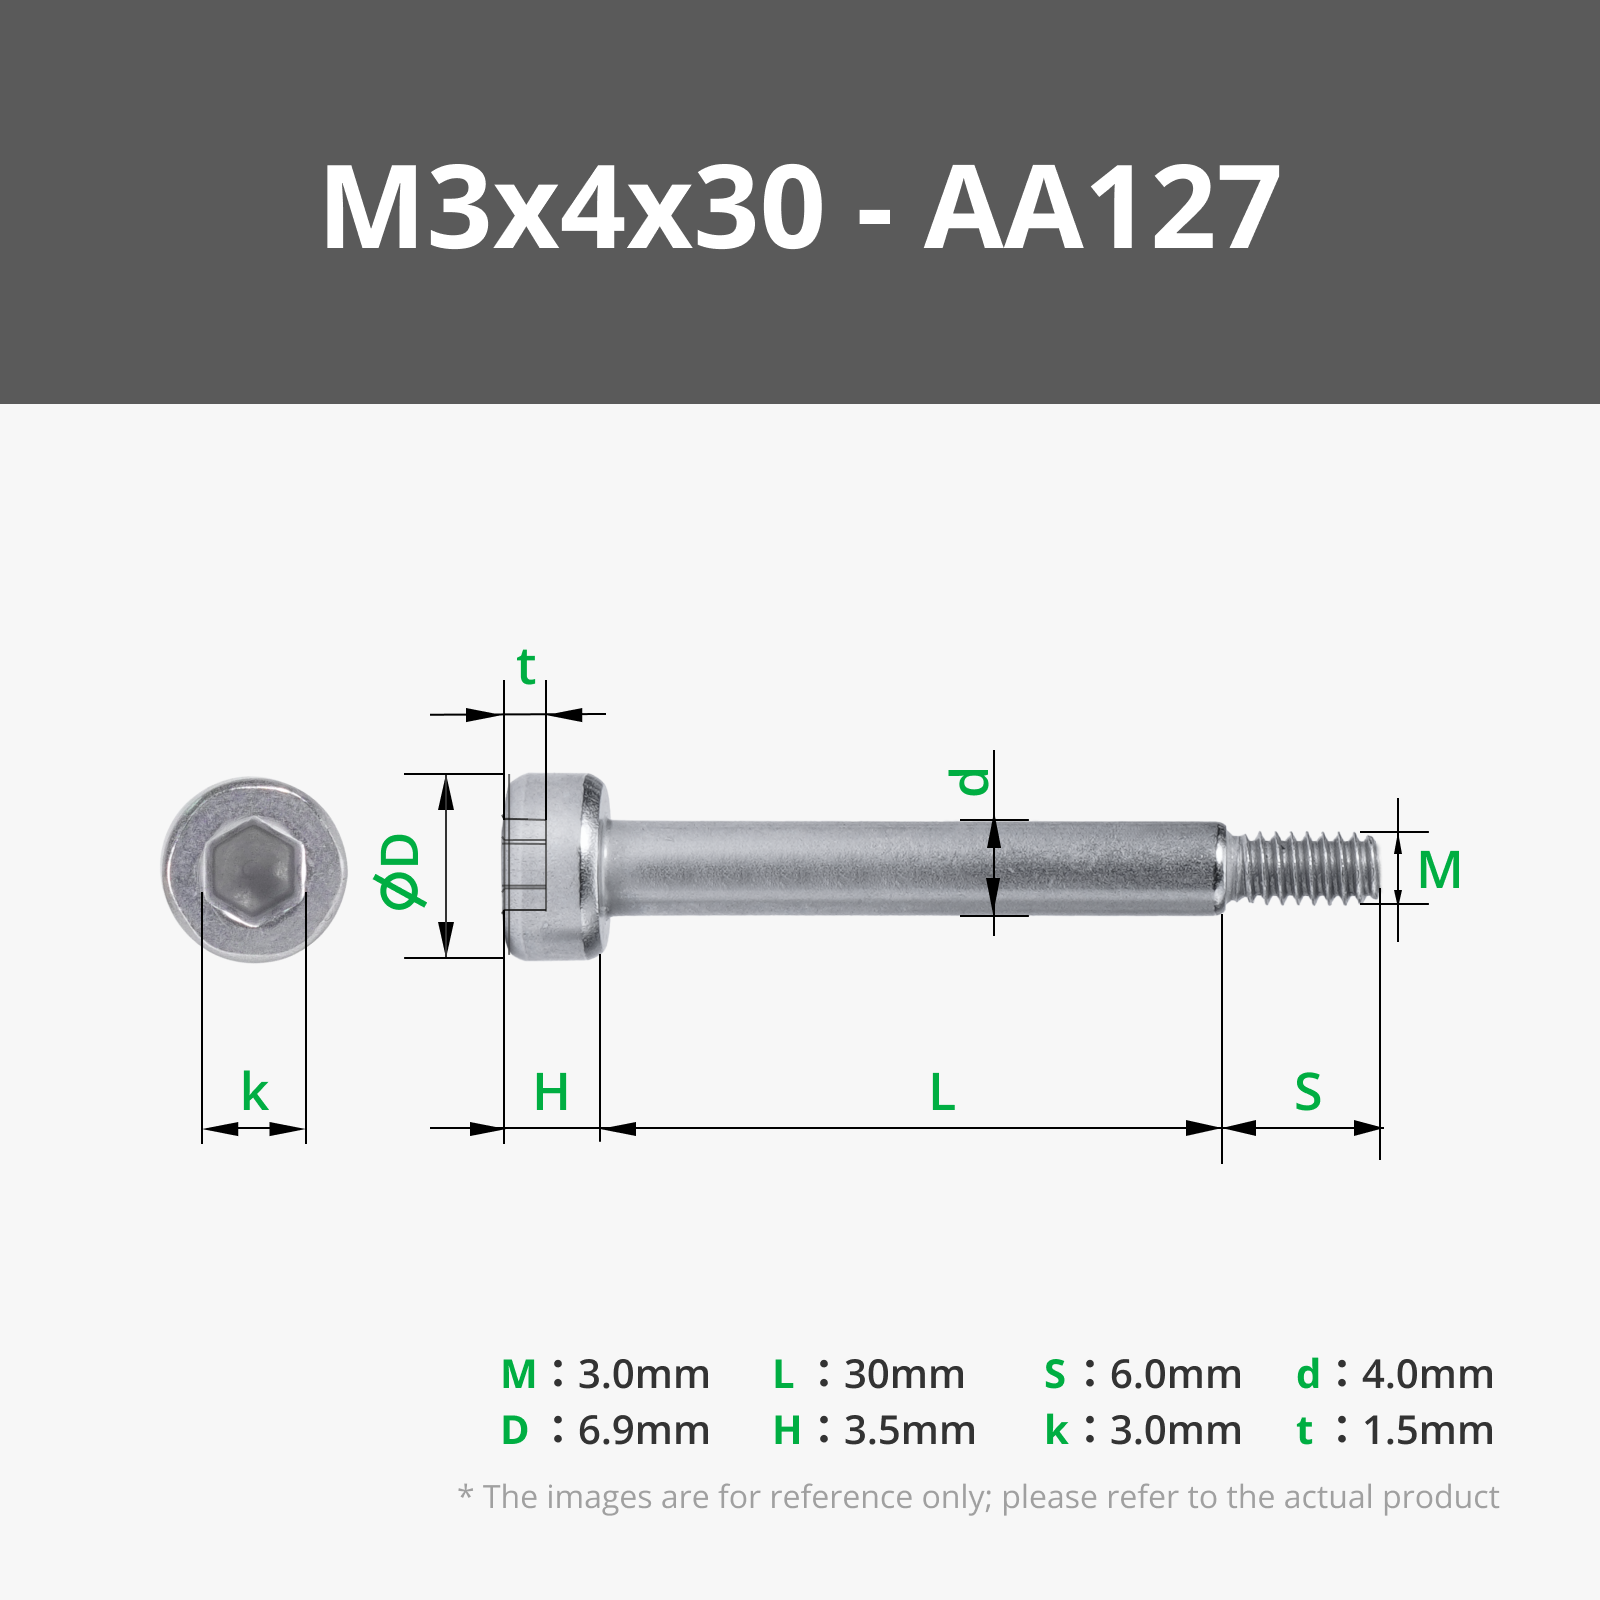
Test at this step to ensure proper alignment with the M3x4x30 SHSS Machine Screw - AA127 shoulder screws
Install two (2) M3x5x4 Round Threaded Brass Heat-Insert Nuts - AB012 (one per side) for the wheels with a soldering iron:

Install the 608 Open Hybrid Ceramic (2PCS) - EA029 when the printer pauses like so:

WHEEL NOTES:
- The included print profile pauses at Layer 61 (12.2mm) for bearing insertion.
Make sure you have bearings on-hand prior to printing the wheels! You won't be able to (easily) add them after printing; as they will be encapsulated by a hexagon as shown in the following image:

This was a lot of fun to design, assemble, and use! Guaranteed to be the perfect statement piece for your laboratory, workshop, desk, lair, kitchen, bathroom, Grandma's house, wherever!!
I UPLOADED A CUSTOMIZABLE INSERT & PLACARDS (.STEP Files) SO FEEL FREE TO CUSTOMIZE THE INSERT & PLACARDS TO FIT YOUR UNIQUE CHAOS!!
Boost Me (for free)
I appreciate your support for my designs!!
Out of boosts? You're welcome to “buy me a coffee” if you really like this model & want to encourage me to make more.😉

Membership
Want to sell physical prints of my designs?? Please do it legally by subscribing for a commercial license.👍
Feedback is welcome!
ENJOY!
License
You shall not share, sub-license, sell, rent, host, transfer, or distribute in any way the digital or 3D printed versions of this object, nor any other derivative work of this object in its digital or physical format (including - but not limited to - remixes of this object, and hosting on other digital platforms). The objects may not be used without permission in any way whatsoever in which you charge money, or collect fees.
Comment & Rating (79)