Bottle opener


Print Profile(1)

Description
WARNING: This is not my creation! The original inventor is Mark Manger. I highly recommend visiting GrOpener's website: GrOpener. You can purchase the original aluminum bottle opener there.
GrOpener is the brainchild of Mark Manger, a Denver, Colorado applied artist. Inspired by the stick and screw bottle openers he encountered in Africa in the 1990s, Mark designed the GrOpener using the same lever principle, but in a form that allows you to open a bottle by simply gripping it.
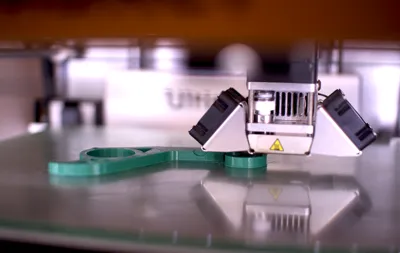
This model is super easy to print!
Project video in Finnish (UPDATED: ENGLISH SUBTITLES): Project video
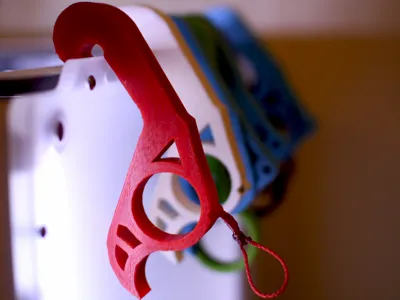
PRINT WITH SUPPORT MATERIAL (there is a small overhang!)
This is my very first 3D creation!
Version 4 (updated 23.6.14): There are now 4 different editions:
- Edition one: Basic OHBO
- Edition two: OHBO with a magnet.
- Edition three: OHBO with a coin.
- Edition four: OHBO with a magnet and a coin.
By the way: The back of the OHBO is for cans! Just slide the tail under the can's tab to open it!
Magnets from dx.com (here's a link: dx.com magnets) The coin is a 1-cent euro coin. You will also need super glue if you print edition 2, 3 or 4. All editions are to the correct scale and tested. Only object rotation is required in the slicer software. I recommend printing with 100% infill (0.2 mm layer height), but my bottle opener with 20% infill is also strong enough to open a bottle! My prints are made of PLA, PLA/PHA and XT plastics! I would love to see your prints of this model! Visit: YouMagine
Printing tips:
- Always print with support touching the build plate! (There is a small overhang). I prefer to print this model with 100% infill. Adding more outer perimeters also helps. 4 should suffice.
Material:
- For me, this model works well with many plastics. I've tried PLA, Colorfabb PLA/PHA and Colorfabb XT (copolyester). ABS should also work well, but it might be a bit too flexible (some of the opening force goes into bending, so the opening process requires more force). I think PLA is a great material to choose for this print!
Steps:
- Glue the coin and magnet or one or the other. (Edition 2, 3 and 4)
- Add a keychain or string to the hole.
!!! IMPORTANT !!! Use super glue or epoxy and glue the coin as well as possible. The product must be very strong. It will not break if it is not strong enough. (I have printed so many and only one broke because of poor gluing).
License
You shall not share, sub-license, sell, rent, host, transfer, or distribute in any way the digital or 3D printed versions of this object, nor any other derivative work of this object in its digital or physical format (including - but not limited to - remixes of this object, and hosting on other digital platforms). The objects may not be used without permission in any way whatsoever in which you charge money, or collect fees.
Comment & Rating (0)