Search models, users, collections, and posts

Gabbys Dollhouse Meow Meow Mailbox and Suprise Box

Print Profile(2)

All
X1 Carbon
P1S
P1P
X1
X1E
A1
H2D
H2D Pro
H2S
P2S
H2C
X2D
A2L
A1 mini

0.2mm layer, 3 walls, 10% infill
Designer
41.1 h
5 plates
4.9(83)

0.2mm layer, 3 walls, 10% infill
37.3 h
5 plates
4.8(17)

Open in Bambu Studio
Boost
555
1794
156
134
1.6 k
927
Released 

Bill of Materials

Bambu Filaments
Select all
Jade White (10100) / Refill / 1kg
Matte Lilac purple (11700) / Refill / 1kg
Matte Ice Blue (11601) / Refill / 1kg
Pink (10203) / Refill / 1kg
Beige (10201) / Refill / 1kg
Matte Dark Blue (11602) / Refill / 1kg

Description

Most of my models are shared under a Makerworld exclusive license with REMIXES ALLOWED. They are posted exclusive so I can earn points for filament, but in the spirit of the open source community that made 3D printing what it is, I highly encourage adaptations and expansions on my work. 

If you like my designs, be sure to follow me so you know when I publish new models.


This is my attempt at the Meow-Meow Mailbox and a Surprise Box from Netflix's Gabby's Dollhouse.


There are two versions of the mailbox:

  1. A fully enclosed mailbox with a door, which will fit 2 surprise boxes front to back.
  2. A backless mailbox with a stop in it so it can be used with the mailbox sled. This is intended to hold just one surprise box and the sled.

The backless version is intended to be used with tracks like in the show (which I have not modeled and printed yet). The surprise box fits snugly in the sled, which has no front. The sled and surprise box roll into the back of the mailbox and hit a stop inside once they are fully inside. Upon hitting the stop, the surprise box slides off the sled into the front half of the mailbox. When the child opens the mailbox, they see the surprise box ready for them to grab, and the sled stays in the back of the box.


In the print profile, there are several plates:

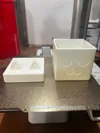
  1. The first plate is the surprise box and lid, which are meant to be printed in white and painted. The show has many variations of the surprise box depending on the episode, and a white box can be painted, glittered and otherwise decorated easily.
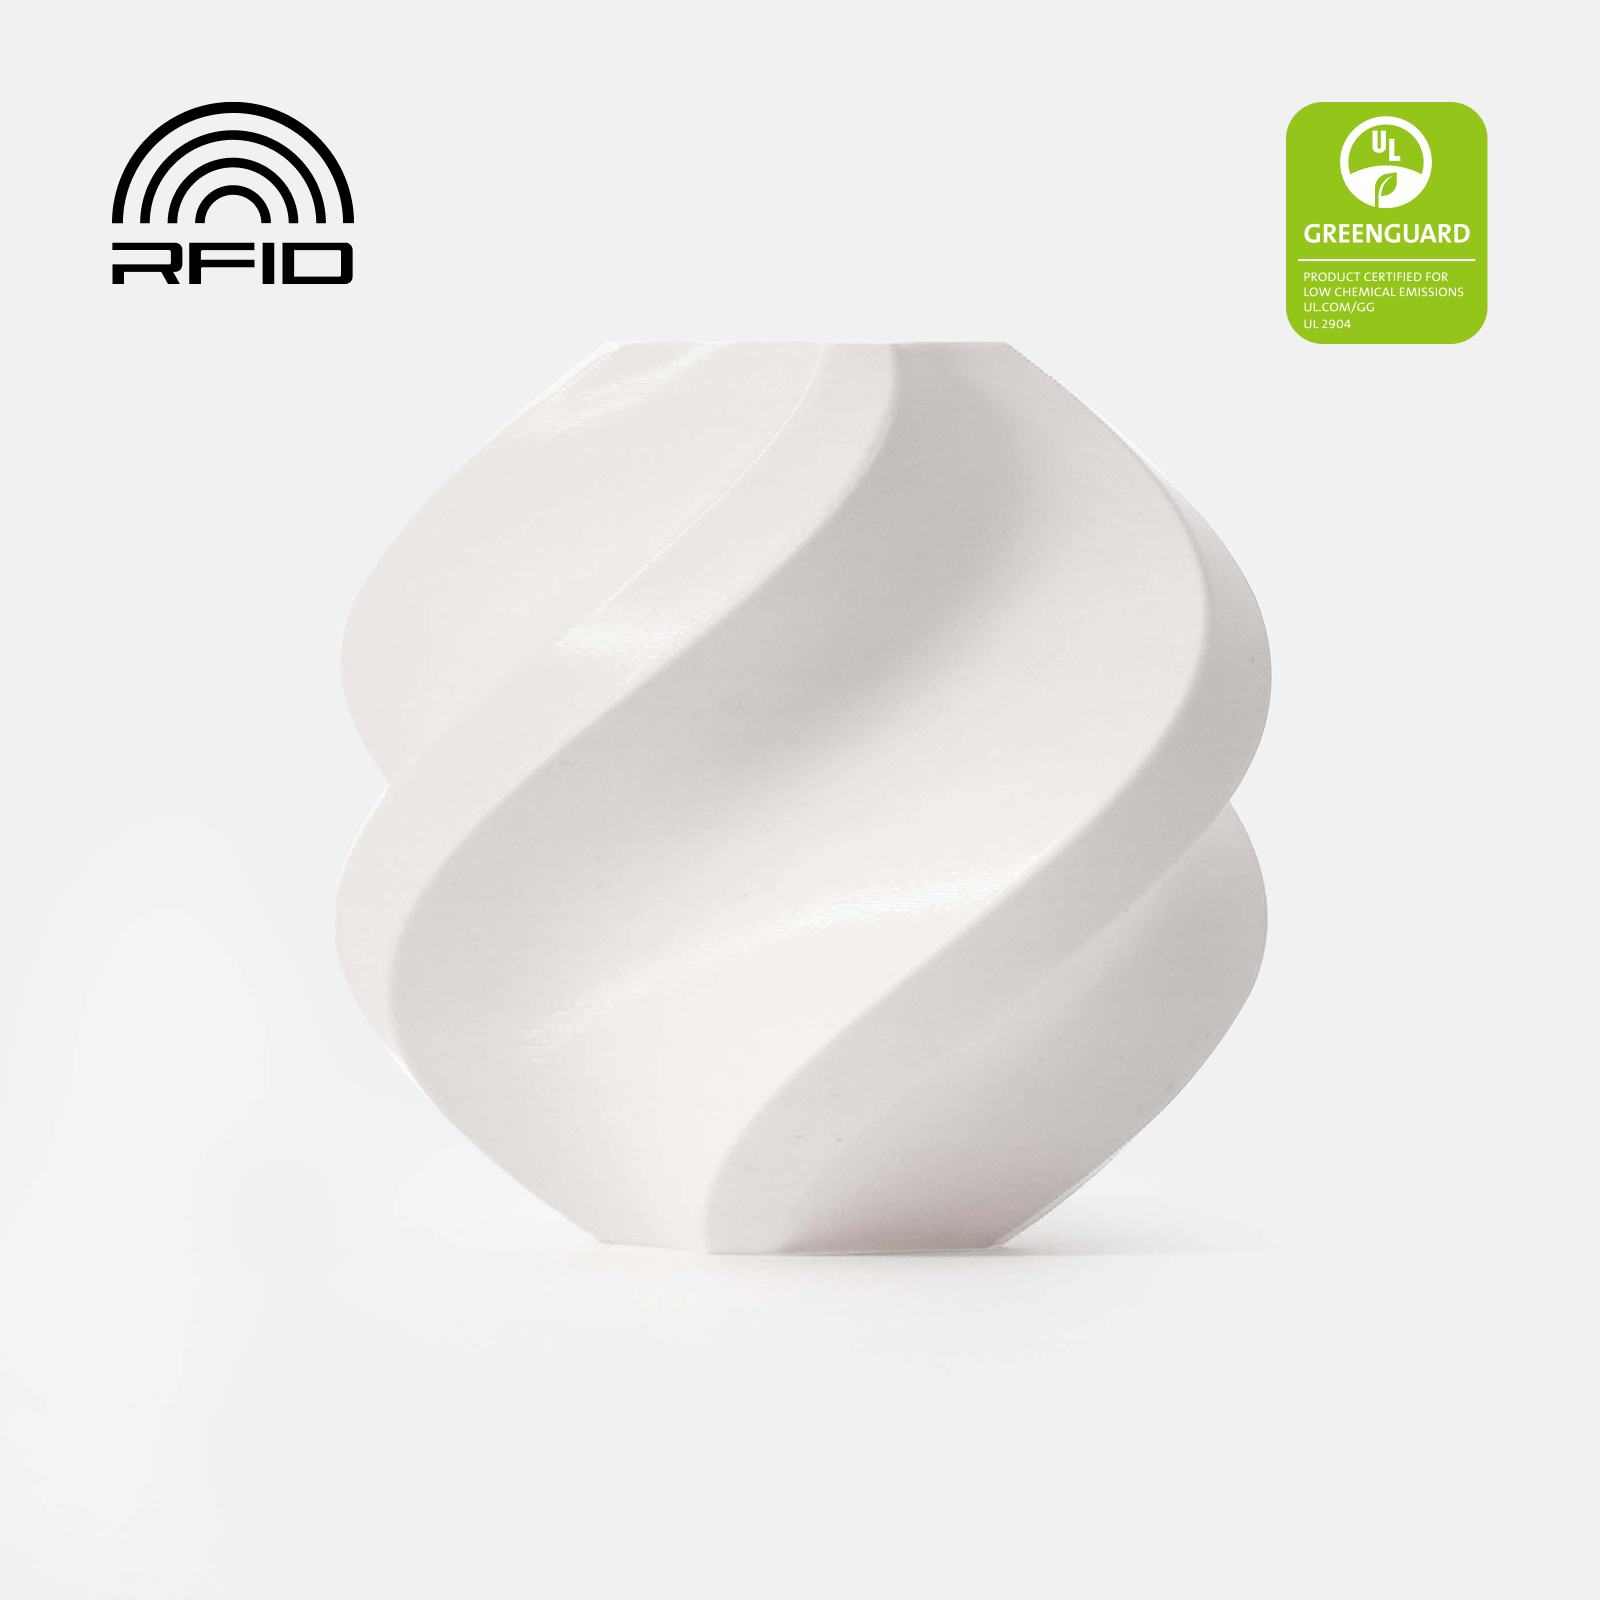
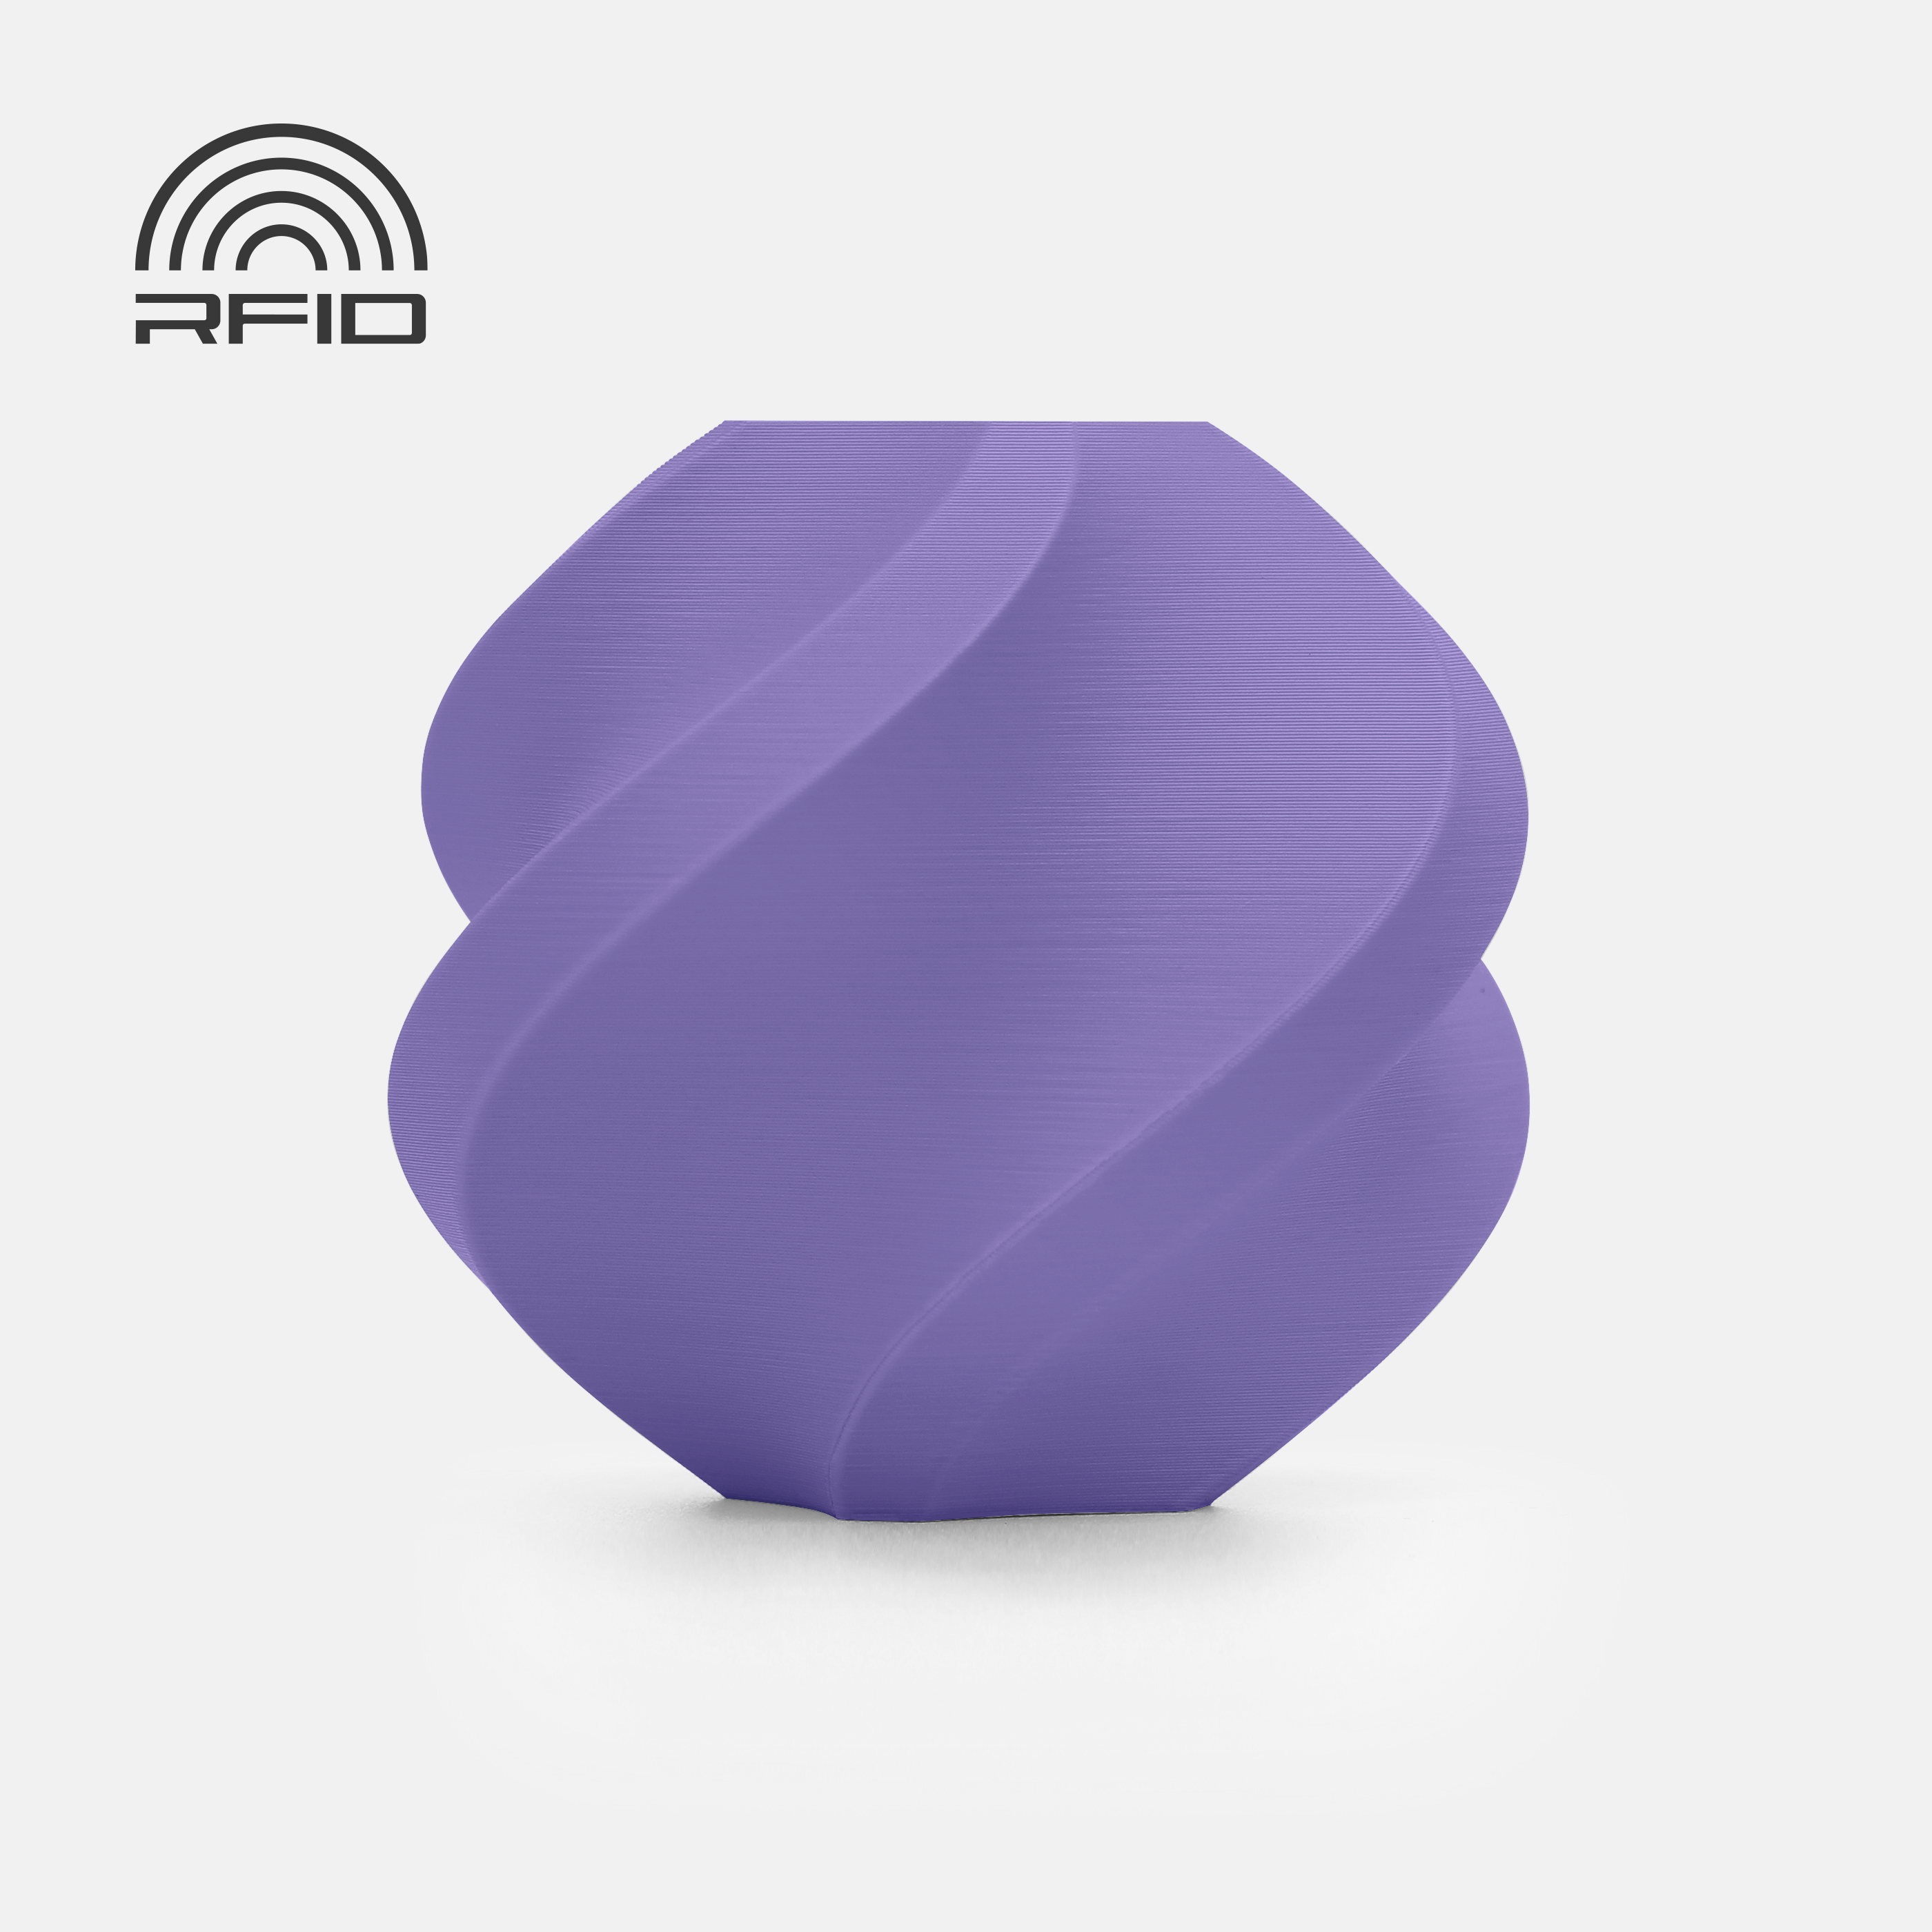
  2. The second plate is the full mailbox with a back. I printed this with Bambu Matte PLA Lilac Purple, Ice Blue, and regular white PLA. It is sliced so that the colors switch by layer where possible, to keep material changes to a minimum.
  3. The third plate is the backless mailbox with endstop. This uses the same slicing and colors as the other mailbox.
  4. The fourth plate is the door. I used pink for the heart, beige for the handle, and dark matte blue for the door. The door needs to be painted with glitter glue to match the show so the color isn't very important, but I found the blue looked nice once the glitter was applied. The door and mailbox are printed with a 1/16" hole meant for a dowel pin. I drilled one of the holes to 1.75mm manually to use filament as a hinge and that did work fine, but you will need the drill bit.
  5. The fifth plate is the sled and wheels. They can be any color, but I think whites and greys would probably look best. The wheels are held on with M3 screws that were tightened down snug, then pulled back 1/8-1/4 turn.


Boost Me (for free)

Boosting helps me buy filament to keep printing new prototypes!

Comment & Rating (156)

(0/1000)

Print Profile
0.2mm layer, 3 walls, 10% infill
To be honest i didn't printed all the plates, only the boxes. But i did print over 20 boxes to use as gifts on my daugther birthday party, and they came amazing, whith no trouble removing supports and so.
3
Reply
Did you manually paint these in bambu studio or paint the colors by hand?
0
Reply
Replying to @sjuhnke :
Painted in bambu studio.
0
Reply
what are the dimensions on the box? im looking for 4x4x4 boxes that can fit the mailbox
0
Reply
I am curious if anyone changed slicer options when printing this model. I got issues around the corners of the mailbox...and it seems to have been in the way it was sliced. Using a P1S with a 0.4mm nozzle
The designer has replied
1
Reply
Are you talking about the supports? The ears are only at the front of the mailbox. the rest of the ears in your photo (the part with the slots in it) is support material that should be removed.
0
Reply
Replying to @IJMW :
I would like to go on record that....I am an idiot. So sorry did not realize it was supports. I removed it looks great! Small stringing on the back of the "ears" but I am assuming that's cuz I left the supports on for too long.
1
Reply
Replying to @user_1548808017 :
No worries, its not obvious when the colors all match up like that. The backs of the ears look like you may need to calibrate your support offsets or extrusion. I have had great success with the bambu defaults but I know a few people who have had to perform extrusion calibration or print a few cal prints for support offset. Mine printed nice and smooth so if you are willing to do some cal and reprint it, you could get a better finish. Based on the mismatched band diameters, it may be an extrusion cal issue.
(Edited)
0
Reply
Boosted
Print Profile
0.2mm layer, 3 walls, 10% infill
Great Modell & Print
2
Reply
Print Profile
0.2mm layer, 3 walls, 10% infill
some printing issue with top of the box.... 😭
(Edited)
The profile uploader has replied
0
Reply
Is that PLA? I havent seen that issue but I only print in bambu pla basic so its possible the material you used is more prone to warping.
0
Reply
I am getting similar results. The top of the box has odd warping and layer line breaks like yours.
0
Reply
Very nice design, thank you very much.
1
Reply
Print Profile
0.2mm layer, 3 walls, 10% infill
Remember to remove the casing around the mailbox. You will need a metal wire to hinge the door! Prints and looks great!!
1
Reply
Boosted
Print Profile
0.2mm layer, 3 walls, 10% infill
Printed perfectly and my daughter loves it. Thank you. Definitely worth a boost or 2!
1
Reply
Printed for my daughter's, she couldn't wait for it to be finished. Printed the kitty box in pink glitter filament. Also I used some small straw I had on hand to attach mailbox door. She's been carrying it everywhere with her.
0
Reply
this was such a good print. my 4 year old flipped out when she opening this on Christmas. thank you for making this. it’s fantastic
0
Reply
great print! I used a paper clip for the door hinge. it worked great. thanks so much!!
0
Reply

License

This user content is licensed under a Standard Digital File License.

You shall not share, sub-license, sell, rent, host, transfer, or distribute in any way the digital or 3D printed versions of this object, nor any other derivative work of this object in its digital or physical format (including - but not limited to - remixes of this object, and hosting on other digital platforms). The objects may not be used without permission in any way whatsoever in which you charge money, or collect fees.