Desktop Air Purifier with HCHO&TVOC Purification


Print Profile(2)


Bill of Materials

- 120mm PC Cooling fan 12V/1A x 1:
- Support PWM Speed Controller (12V/24V, Xiaomi Mesh-compatible for Mijia control) x 1:
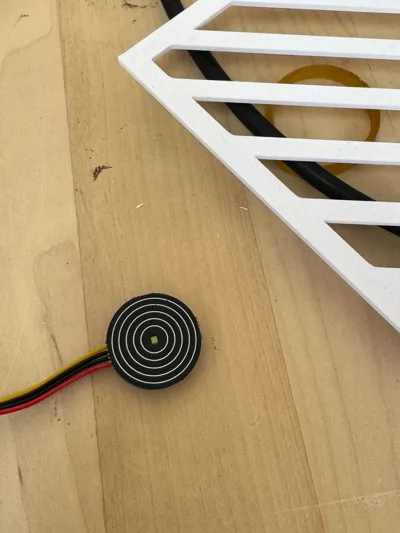
- Touch Switch (20mm diameter, capacitive type, DC 3–30V) x 1:
- Epoxy glue or Hot glue x 1:
Description
📅 – Update in 06/06/2025
- Add a Brim to prevent warping on the upper/lower cubes.
- If warping is severe, adjust first-layer speed/temperature (specific settings depend on your printer/filament; no universal recommendation for this model).


Boost Me (for free)
📅 – Create in 28/05/2025
📦 Product Introduction
Pain Points: Most air purifiers on the market primarily focus on PM2.5 filtration, are bulky, and lack formaldehyde/TVOC removal capabilities. Existing formaldehyde-removing products often rely on passive operation.
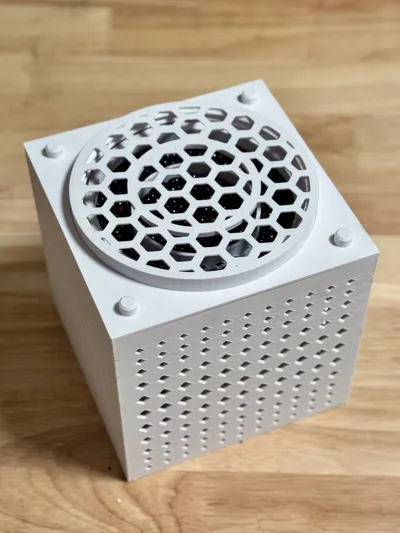
Product Features: A compact, desktop-sized smart appliance with active formaldehyde/TVOC removal, sufficient power, smartphone control, and optimized for efficient air purification in small areas.
Tips: All 3D-printed parts can be assembled without any metal hardware
🎛 Design Approach
This product draws inspiration from mainstream air purifier designs. It works by the fan drawing in air, treating it with adsorbent materials, and expelling purified air, with key modifications to size and filter materials. (Note: PM2.5 filtration is not included by default, but users can add PM2.5 filter materials during assembly.)
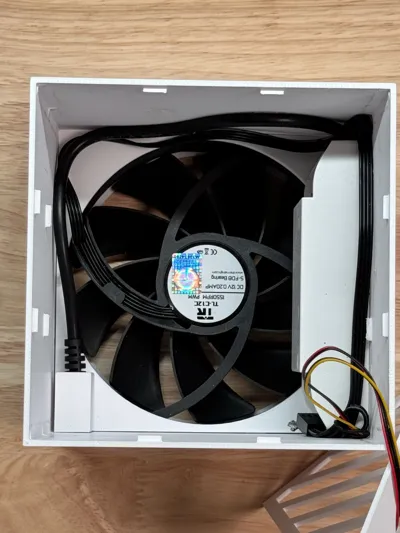
- Repurposed 120mm PC cooling fan for airflow (salvaged from old PCs).
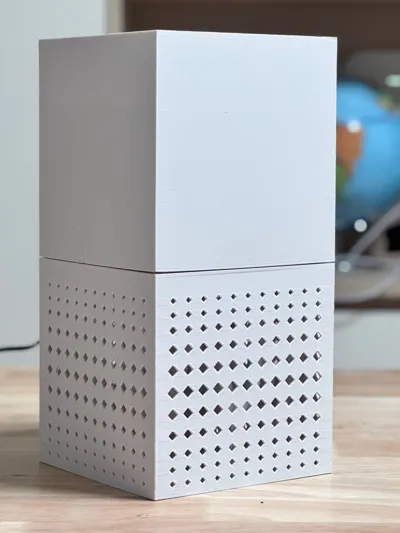
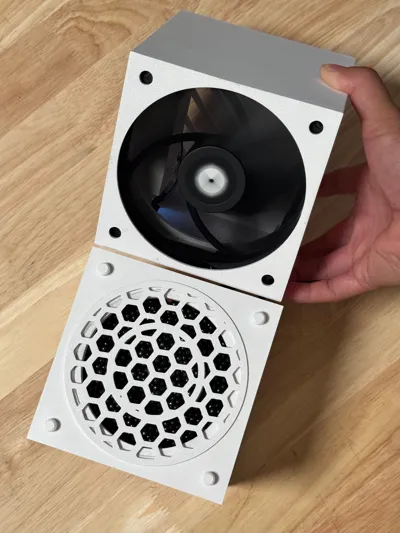
- 3D-printed two-part housing: Lower compartment holds adsorbent materials (activated carbon or potassium permanganate pellets). Upper compartment houses the fan and low-voltage electrical components.
- Powered by recycled 12V DC adapters (e.g., from routers or set-top boxes). For 5V setups, use 5V-compatible fans or add a voltage converter.
- Airflow path: Air is sucked in from the bottom → treated by adsorbent materials → expelled from the top.


🧱 Electrical Components
Prices are based on the Chinese market. Actual costs may vary depending on your region.
- 4-Pin PC Cooling Fan (120mm, 12V/1A input, PWM speed control) – New units cost ~$1.43–$2.86 (¥10–20). Most PC case fans support PWM speed adjustment.
- PWM Speed Controller (12V/24V, Xiaomi Mesh-compatible for Mijia control) – ~$4.29–$5.71 (¥30–40) for the bare circuit board. A non-smart version can be customized if needed.
- DC Power Jack (5.5x2.1mm female connector, 0.75mm² wire, 0.25m length) – ~$0.14–$0.43 (¥1–3). Note: Strip the insulation to save space—thicker wires aren’t always better.
- Touch Switch (20mm diameter, capacitive type, DC 3–30V) – ~$0.14–$0.71 (¥1–5). The creator used a capacitive touch switch.


🗃 Other Materials
Wear gloves when handling these materials!
- Adhesives: Epoxy glue, hot glue, etc. (Costs vary by region—check locally).
- Activated carbon packs or potassium permanganate pellets – ~$0.86/kg (¥6/kg). *Cut open the carbon pack’s outer fabric-like material and pour the contents into the 3D-printed base compartment during assembly.*


🖨 3D Printed Parts
I’ve tried to avoid support structures as much as possible. That means there are a lot of small details, like inverted triangle supports and snap-fit parts. 📎 I’ve also included the 3D printing files and design parameters for anyone who wants to give it a try
To keep things organized, I’m using short codes for each part.
✅ Green check = must-print
⬆️ Gray arrow = optional — print if needed for your setup
Here’s the parts breakdown:
- LS01 – Lower part of cube with diamond-patterned holes ✅
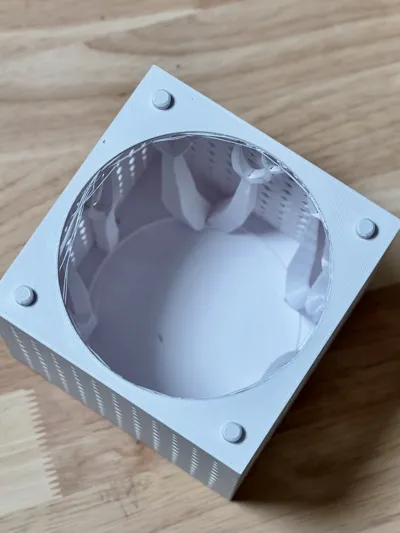
- LS02 – Lower part of cylinder with diamond-patterned holes, holds the filter material ✅
- LS03 – Cylinder top cap to keep the material in place ⬆️
- US01 – Main upper cube body , lots of clever inverted triangular protrusions are built into the design — they let you skip support structures during slicing, saving material. Their main job is to hold certain panels securely inside the enclosure.✅
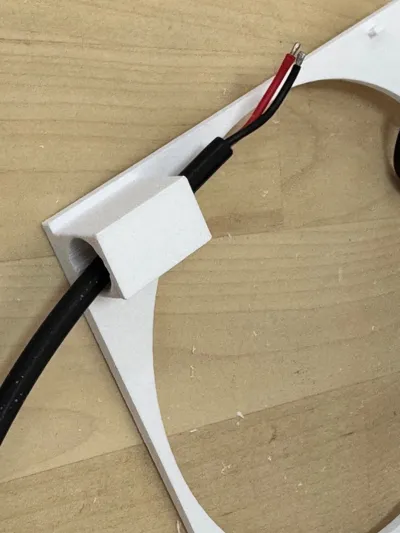
- US02 – DC power cable mount panel ✅
- US03 – Fan screw-mount panel (optional, because the upper cube fits tightly on its own) ⬆️
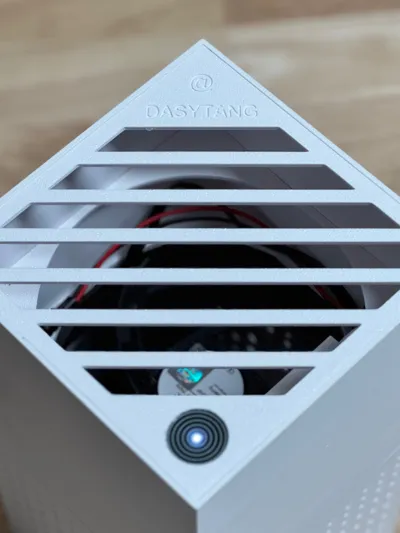
- US04 – Touch switch mount + vent cover ✅


Drawing


😂 Modeling Struggles – AKA Things That Drove Me Nuts:
- The diamond holes on the cylinder are exactly 2.75 mm wide — just tight enough to hold activated carbon granules in place.
- I originally designed round holes for the base, but my printer kept turning them into ovals 😅 — diamond shapes worked out better.
- The side panels of the upper and lower base were first modeled at 1 mm thick, but they came out way too flimsy. I eventually bumped them to 2 mm — much sturdier and fully opaque after printing.
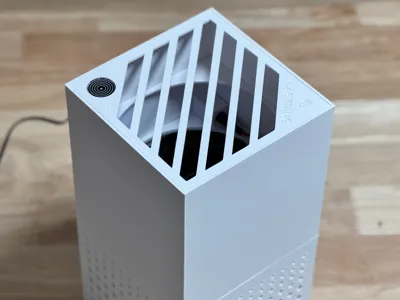
- The top cover was supposed to have fan-shaped cutouts, but they turned out too weak during tests, so I switched to diagonal slats for better strength.
⚠️ Printing Notes & Tips (Important!!!):
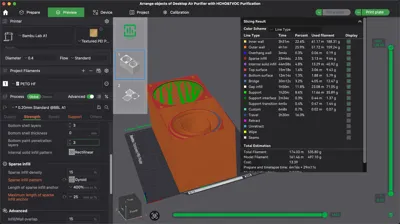
- Warping on large flat parts (LS01, US01) – To avoid edge lifting, I recommend setting your slicer to use 5 Wall loops, a gyroid Sparse infill pattern, and a max infill density of 25%. For more details, check out Bambu Lab’s official guide: https://wiki.bambulab.com/en/knowledge-sharing/printed-model-warping
- Support under LS01 – The cube base (LS01) absolutely needs support underneath. I used hybrid tree support to keep it stable (Tree Hybrid, Threshold angle: 20, Support critical regions only: Yes, Remove small overhangs: Yes).
- LS02 + LS03 screw fitting – After printing the cylinder (LS02) and its cap (LS03), screw them together and then unscrew by hand before final assembly. The M105x4 thread is snug and might be tight on the first fit.


⚙️ Assembly Guide:
STEP1: Filling and loading the filter – Fill LS02 (the cylinder) with your chosen adsorption material ➡️ screw on LS03 (the top cap) tightly ➡️ drop the whole thing into LS01 (the base cube), where it should snap neatly into the bottom cutout.

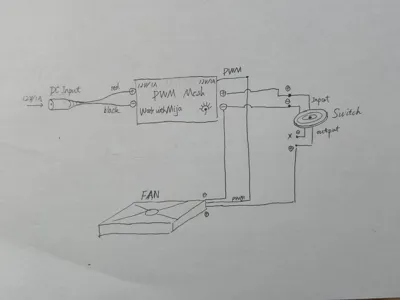
STEP2: Wiring – Connect the DC power input to the input side of the speed controller ➡️ connect the controller’s output positive to the switch input positive ➡️ connect the controller’s output negative to both the switch input negative and the fan’s negative ➡️ connect the PWM line from the controller to the fan’s PWM line ➡️ connect the switch output positive to the fan’s positive terminal. (See the wiring diagram in the original notes for clarity!)

STEP3: Mounting the fan – Insert the fan into the top of the US01 cube and slide it down carefully. You’ll need to gently flex the inverted triangle clips as you guide the fan into place.
⚠️ Note: Because the internal width is 120 mm, panel thickness is 2 mm, and the inverted triangle supports protrude inside, installing the fan can be tricky. Don’t force it in from the top — instead, guide it in by dragging it gently from the bottom part of the upper housing.

STEP4: Installing US02 – Slide in the DC power cable panel (US02) just above the fan, aligning it with the DC jack hole in the case.


STEP5: Placing the speed controller – Place the controller parallel to the DC line, fix it in place using zip ties or hot glue.
STEP6: Mounting the touch switch – Mount the switch into the ventilation cover panel (US04), then snap it into the front of the US01 cube. Watch out for the clips — press gently but firmly.
📘 Usage Instructions:
- Plug a DC 12V power source into the purifier's DC input jack.
- Tap the touch switch to power it on (note: don’t press too quickly — give it a solid touch to activate).
- Open the Mi Home app on your phone and add a new device — it should detect a "lighting device" (the PWM controller simulates speed control via brightness and color temperature settings). If you have a better smart fan control setup, please drop your recommendations in the comments!
- Use the Mi Home app to adjust fan speed and set up smart automation scenes as needed. You can also run the fan in a fully customized scene mode — it’s surprisingly fun to play with once you try it!


📅 Future Plans:
- Create models adapted for 75mm fans and even smaller devices;
- Improve the base hole design to horizontal slatted blinds (may require supports) to speed up printing;
- Adapt for cheaper speed controller switches and add remote control support;
- Add support for 5V fans, DC power supplies, controllers, and USB-A/USB-C power options;
- Add sensor detection devices and enable creating smart scenes in the Mi Home app to adjust speed or power on/off automatically.
License
You shall not share, sub-license, sell, rent, host, transfer, or distribute in any way the digital or 3D printed versions of this object, nor any other derivative work of this object in its digital or physical format (including - but not limited to - remixes of this object, and hosting on other digital platforms). The objects may not be used without permission in any way whatsoever in which you charge money, or collect fees.
Comment & Rating (6)