TagTuner Compact Multi-Use Case - RFID NFC Scanner - HA


Print Profile(3)


Description
⚒️ No 3D printer? No time to source components?
I just opened my own e-shop where you can buy physical, ready-to-use versions of my models! Designed with passion, printed and assembled with care ⚙️.
📦 Shipping across the EU: 👉 Get it at NautilusForge.shop
Boost Me (for free)
Like this model? A free Boost is always appreciated! It supports the time that goes into designing and testing. Thank you so much! 😊🙌
Recently switched my home assistant from Adonno's rfid tag scanner to the newest [better?] Luka6000's TagTuner.
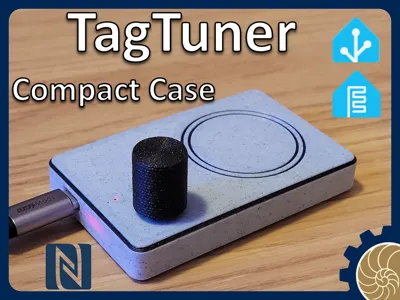
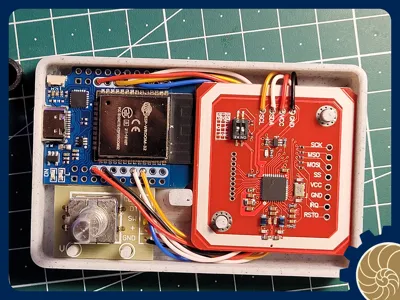
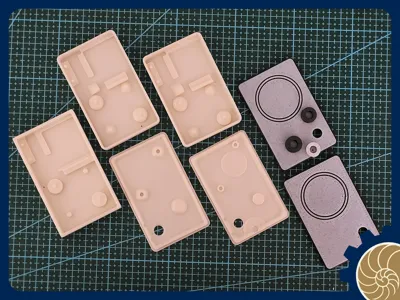
The case provided by Luka is to big for my application and I wanted a more card-sized case. So I designed a case for the wemos D1 esp32 version. Inspired by adonno's original case.
Design:
- as compact as possible
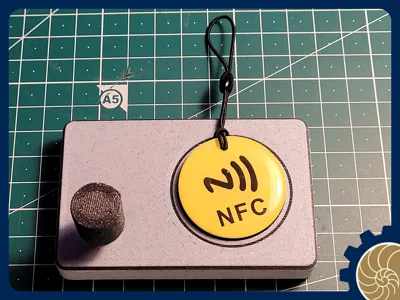
- Card-sized
- Perfect tight fit, no screw required to close the lid/cap
- separate wall mount cage provided for more intensive application (e.g. kid room), otherwise just double side tape on the main case should be more than enough.
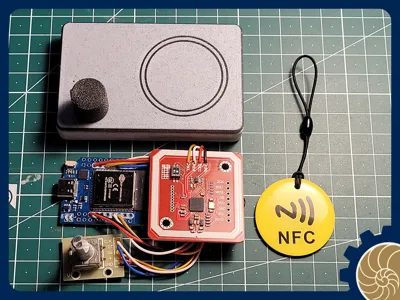
- Light from component is properly managed, Wemos light is visible from front only, light from rfid modul is blocked.
- Reset still accessible
- Many prototypes to [almost] perfect results !
Print:
- no support
- can be printed with 0.6 nozzle (or 0.4)
- Layer H can be 0.3
- Consider using a black color change for the cap for better light management
Instructions:
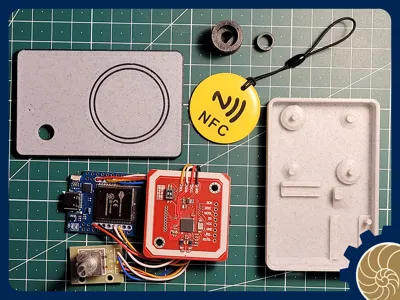
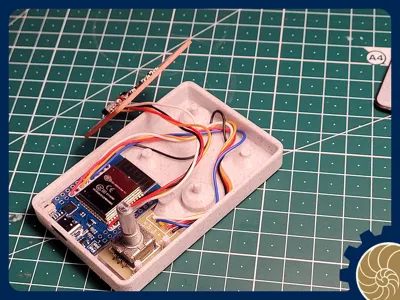
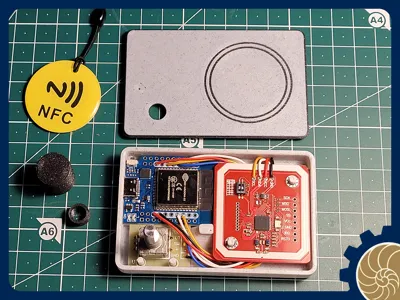
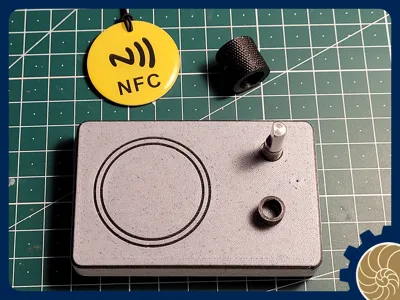
- See pictures in order for mounting instruction
- Cable management space below the rfid module
- 'Click' the case once you are sure it works, reopening the case is not easy once it is closed.
- use nut to tighten the KY040 the press fit the knob
For more info on how to setup the TagTuner itself please visit the creator page at https://luka6000.github.io/TagTuner/
/!\ Regarding the KNOB:
Please note that the knob IS NOT MY DESIGN. Please download from its author page: https://www.printables.com/model/927066-knurled-knob-for-ky-040-rotary-encoder. I only reuploaded it here in case OP deletes his design/account as my design relies partly on that knob.
Hope it helps !

Membership
☕ NEED MORE FROM THIS MODEL? Buy me a coffee and request specific tweaks! | 🌍 WANT TO SELL PRINTS? Join my Commercial Tiers for instant worldwide rights. | Your support keeps this hobby alive! 👉
License
You shall not share, sub-license, sell, rent, host, transfer, or distribute in any way the digital or 3D printed versions of this object, nor any other derivative work of this object in its digital or physical format (including - but not limited to - remixes of this object, and hosting on other digital platforms). The objects may not be used without permission in any way whatsoever in which you charge money, or collect fees.
Comment & Rating (0)